Docs / Settings
Sending domains
Send envelope emails from your own domain instead of Annature's default for a more professional, branded experience.

By default, all emails sent from Annature come from [email protected], or [email protected]. You can enhance your communication by sending envelopes from your own domain instead, helping your messages look more professional and improving deliverability.
Setting up a custom sending domain ensures emails come from your address (for example, [email protected]) rather than Annature's default.
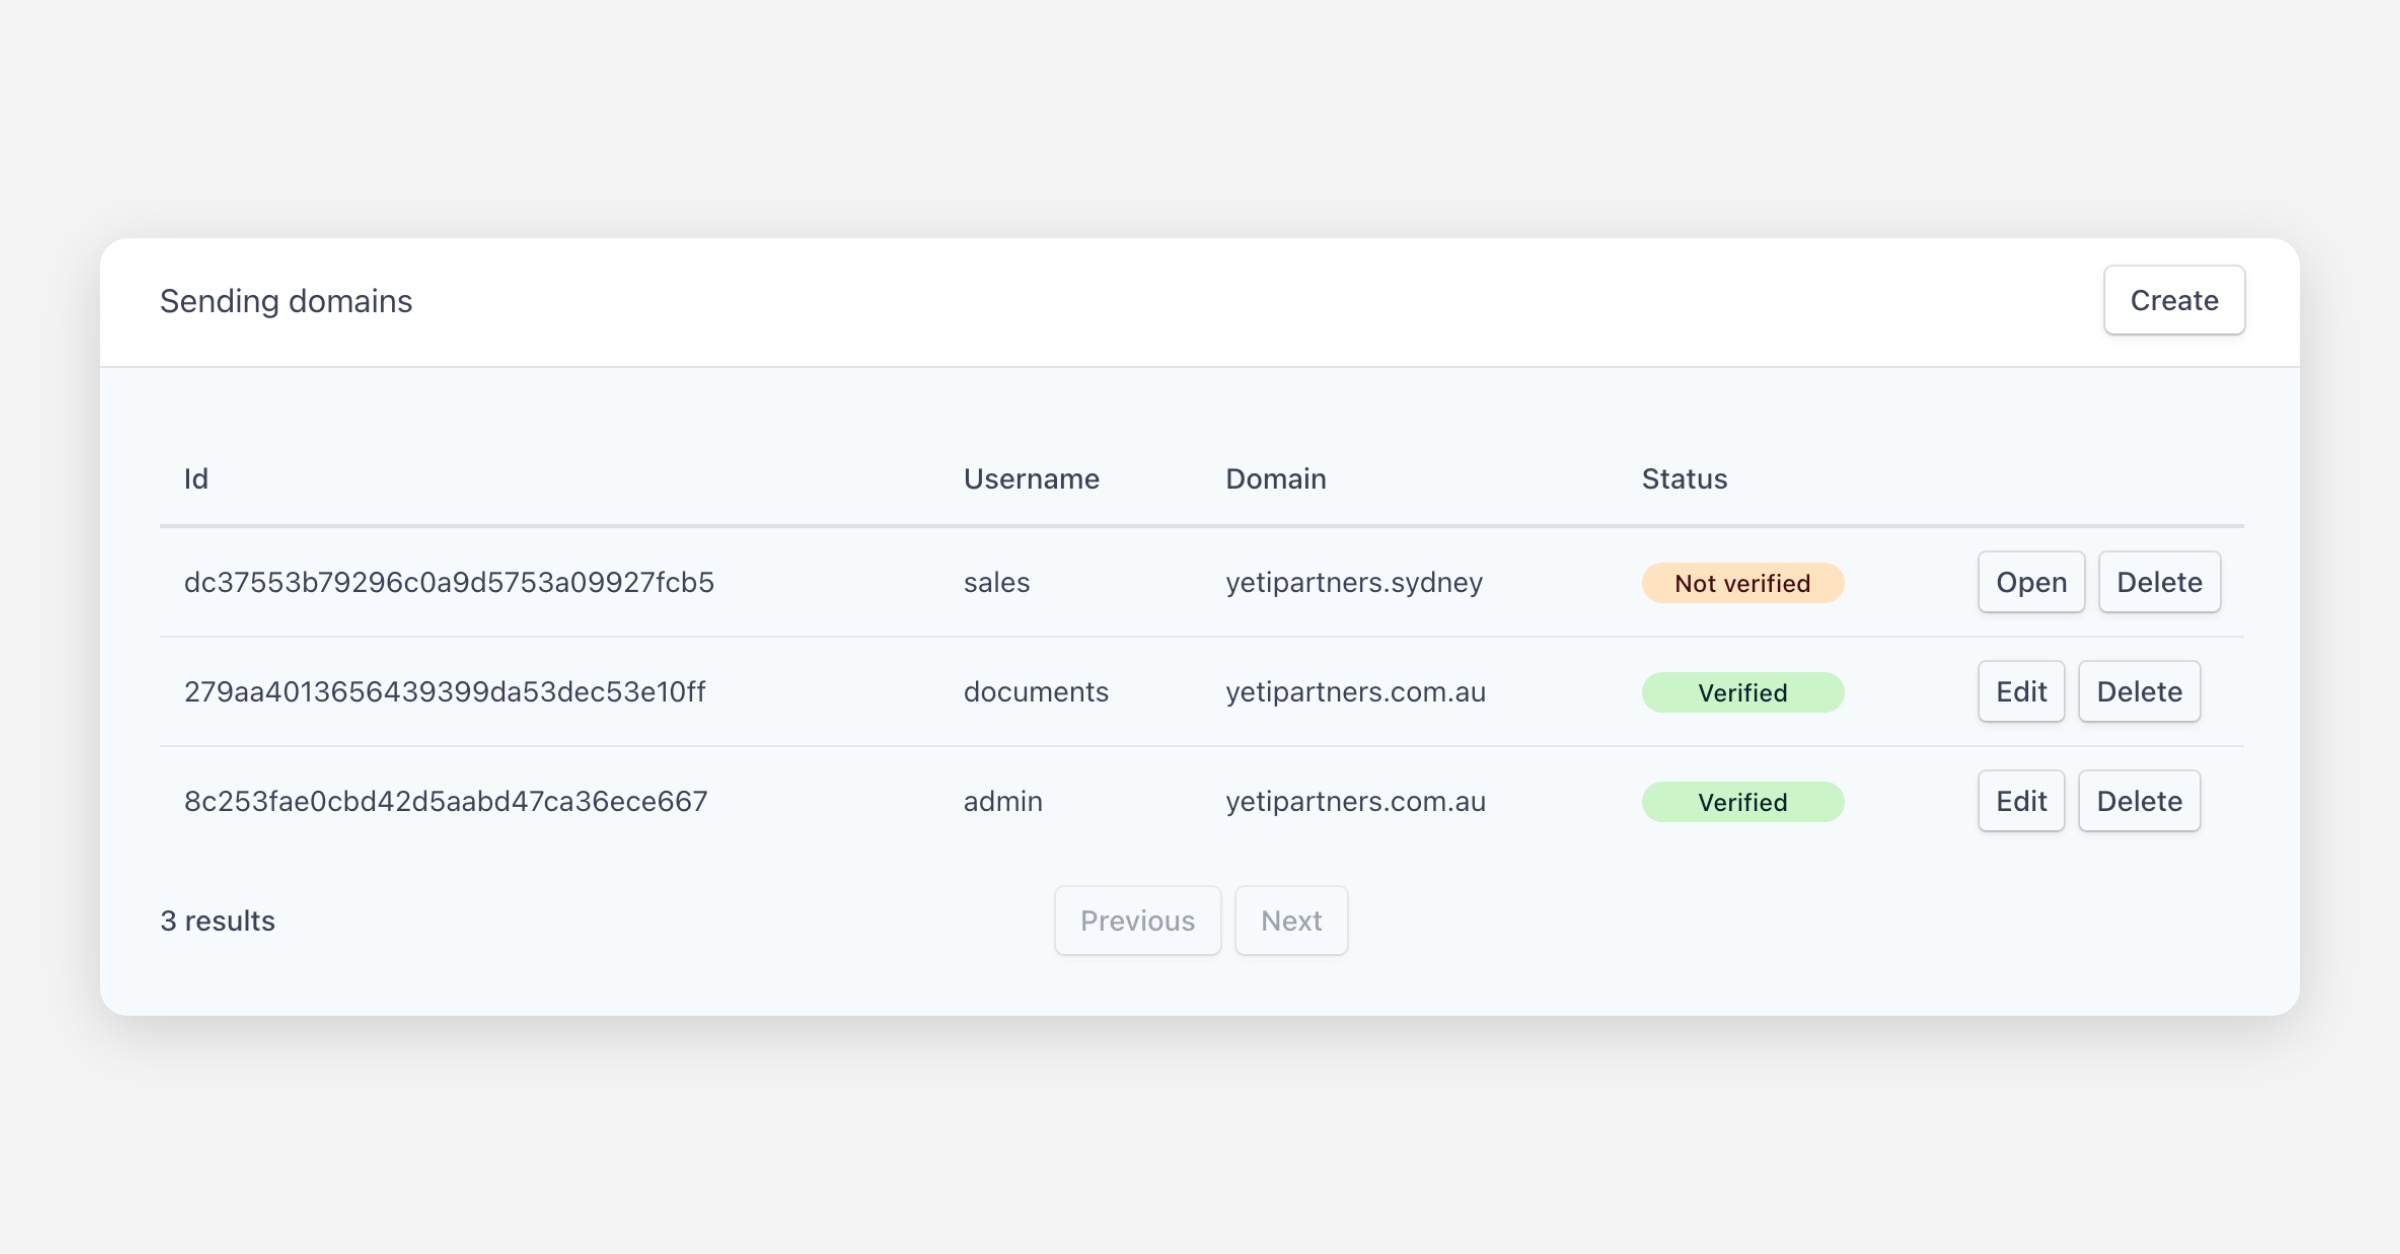
The Sending Domains page can be accessed by navigating to Settings > Sending Domains. The page displays a table of all sending domains in your organisation, showing:
Username — The email prefix (e.g.
noreply,hello,documents).Domain — The domain name.
Status — Whether the domain has been Verified or is still pending.
Verified domains have Edit and Delete buttons. Unverified domains have a open button to retry verification.
Adding a Sending Domain
To add a new sending domain:
Navigate to Settings > Sending Domains and click Create.
Enter the Username (prefix) you wish to send from and your domain name.
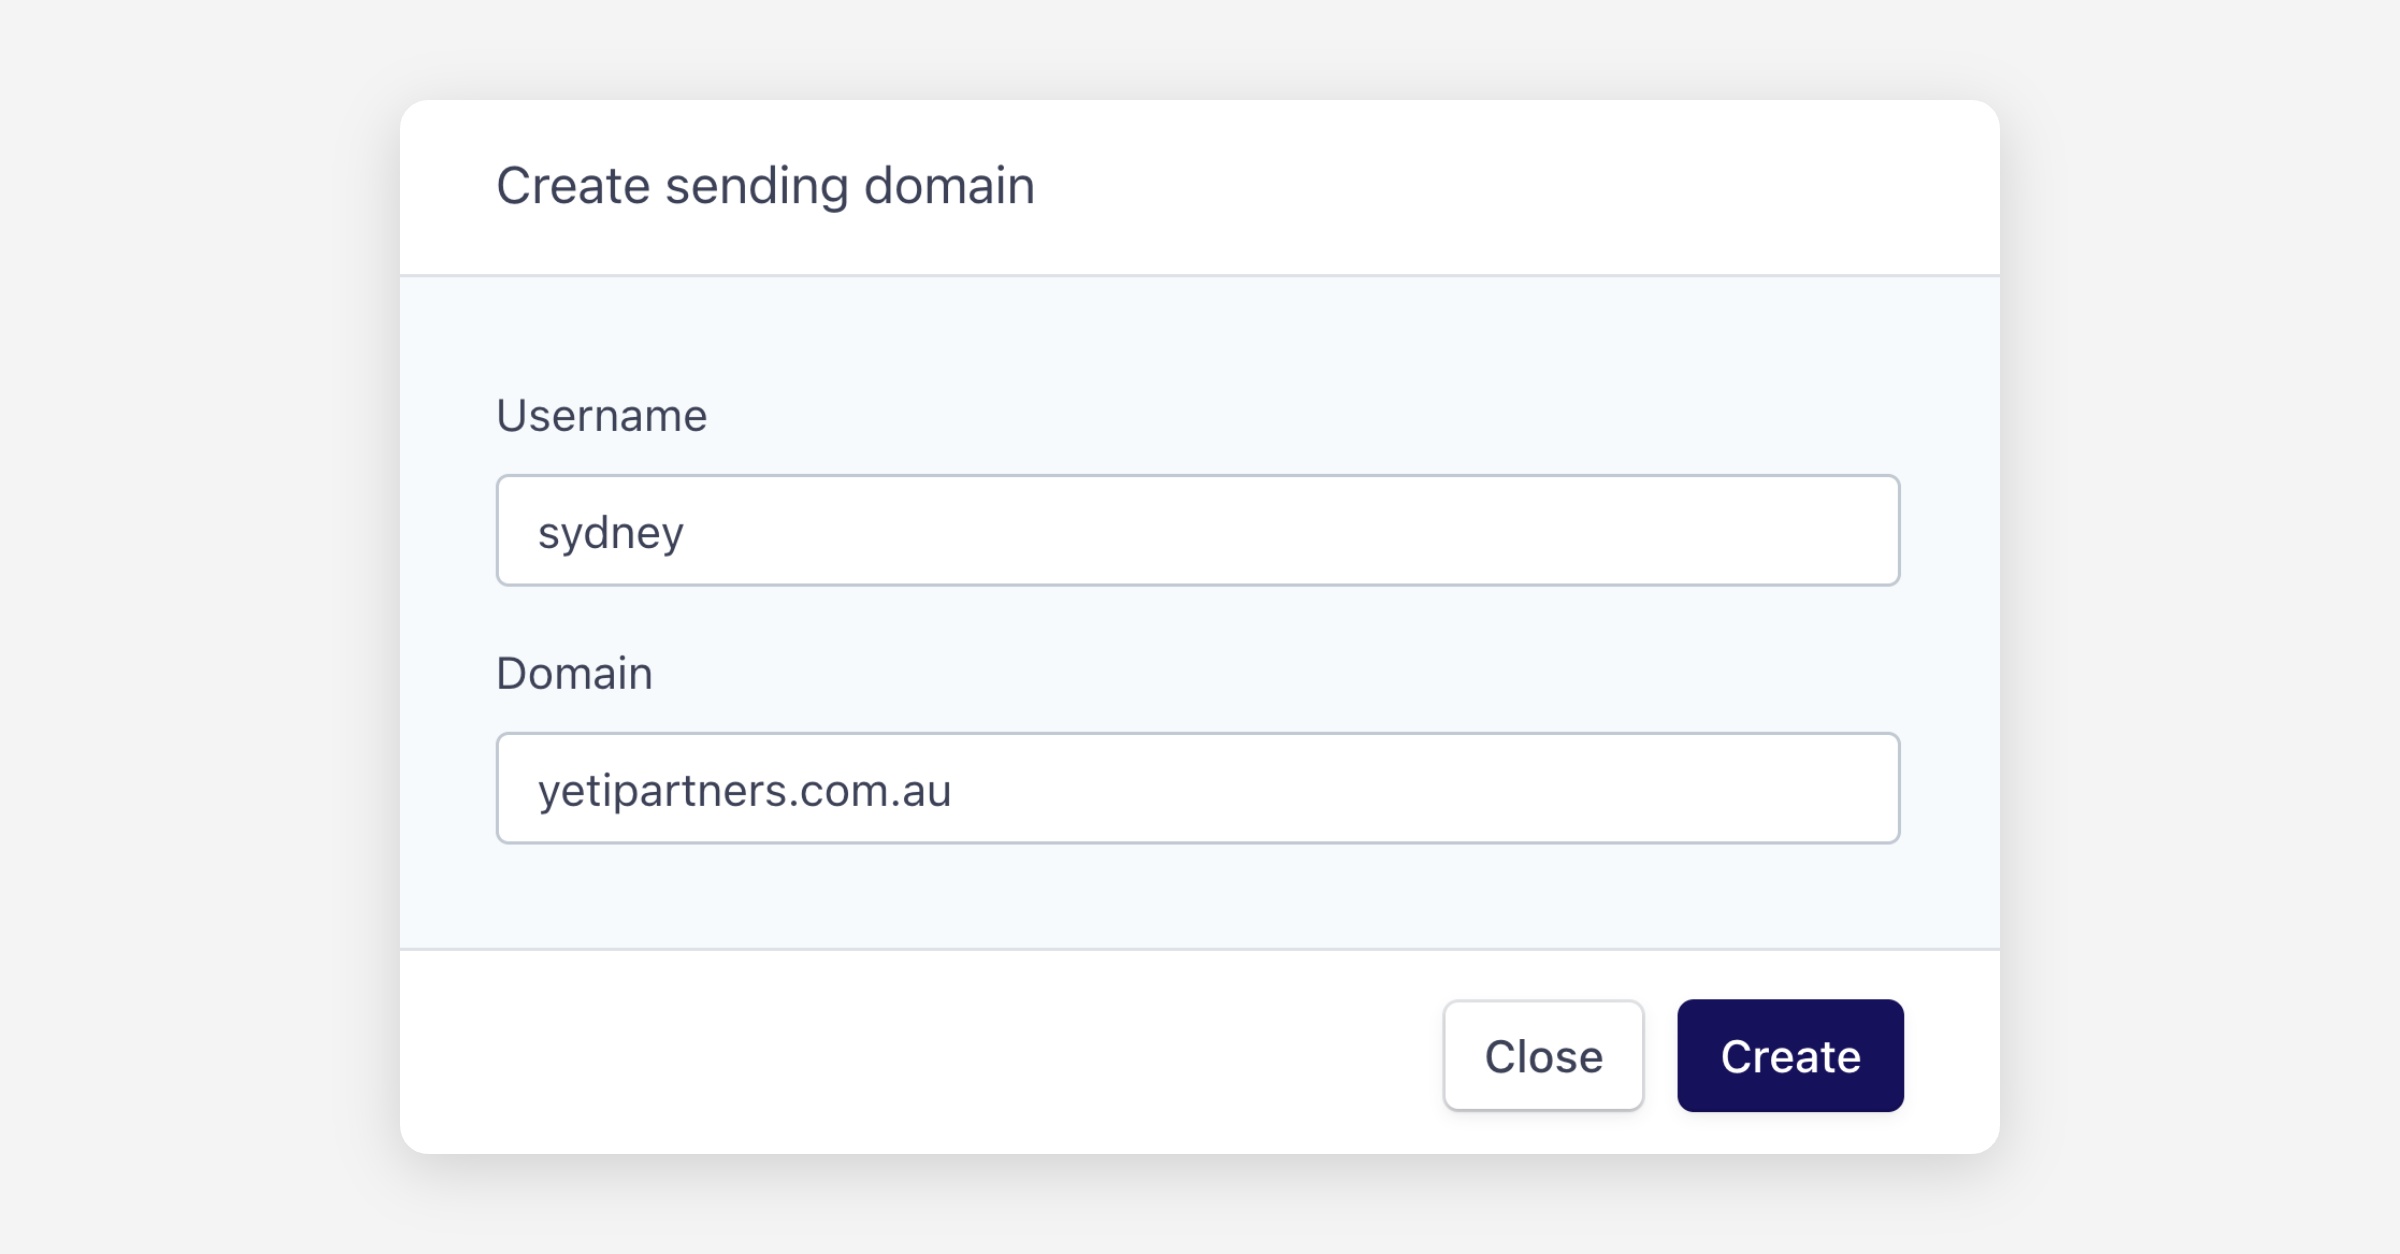
Click Create.
Your new domain will appear in the Sending Domains list. Continue to the next step to verify ownership.
Adding DNS Records
Once your domain has been created in Annature, you will need to add DNS records to your domain host. These records allow Annature to send emails securely on your behalf.
Open your domain from the Sending Domains page.
You will see a list of DNS records that must be added to your domain's DNS settings.
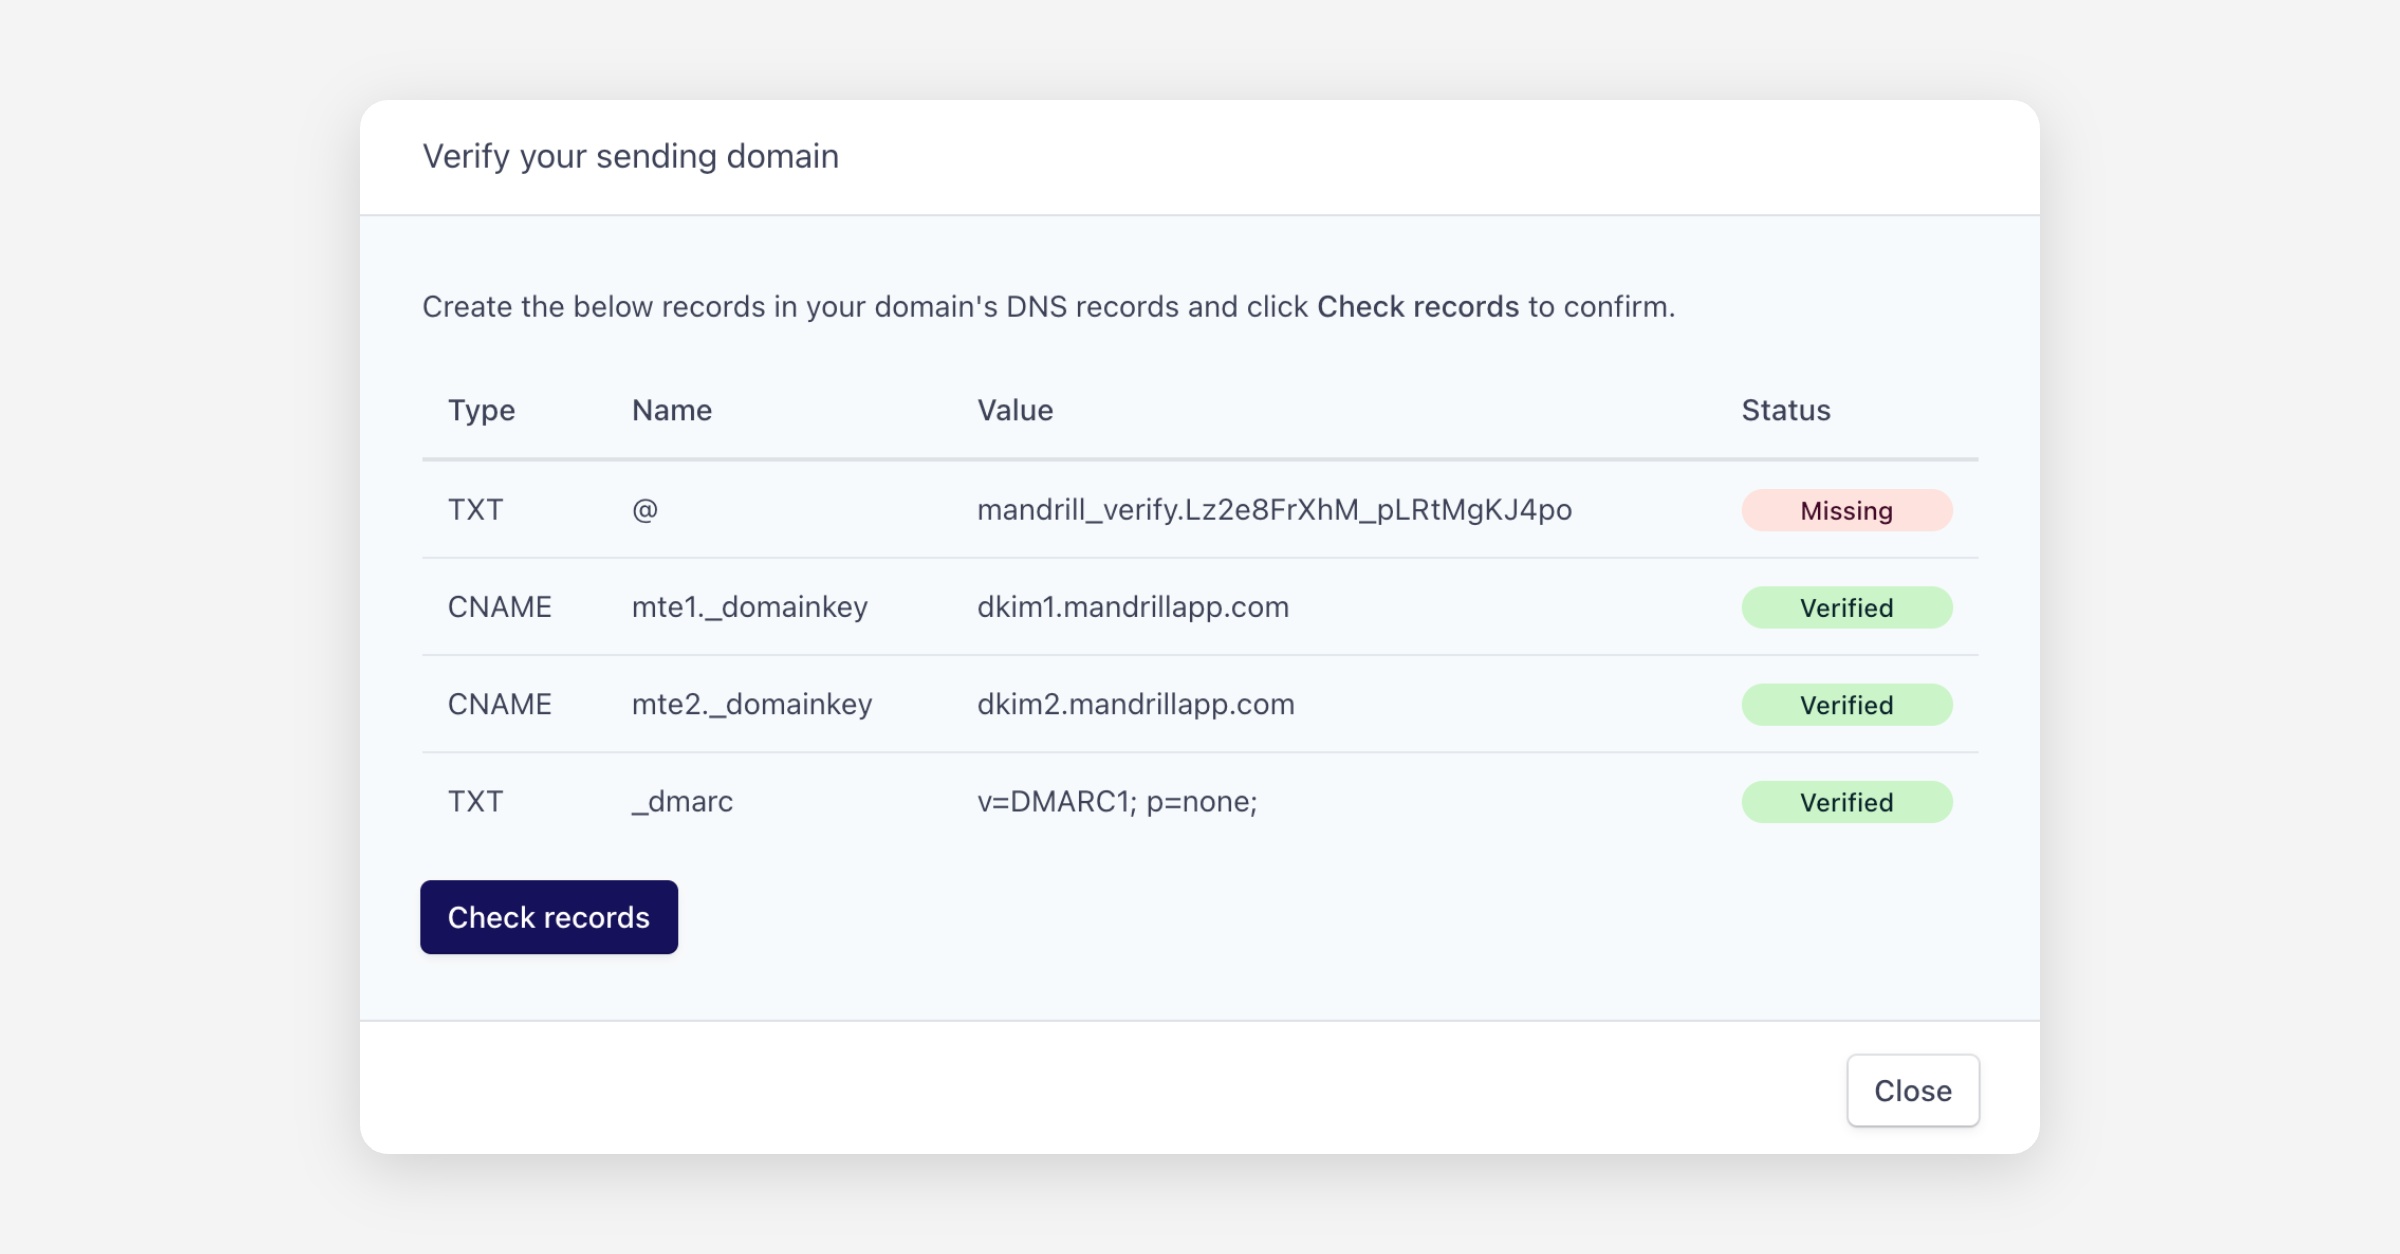
Copy and paste each record exactly as displayed — they are unique to your domain.
If you are using a third-party DNS provider, here are some helpful links to their setup guides:
Cloudflare DNS — Ensure records are not proxied.
Verifying Records
After adding the DNS records, Annature needs to verify your domain ownership.
On the Sending Domains page, click open next to your domain.
Annature will check each record's status.
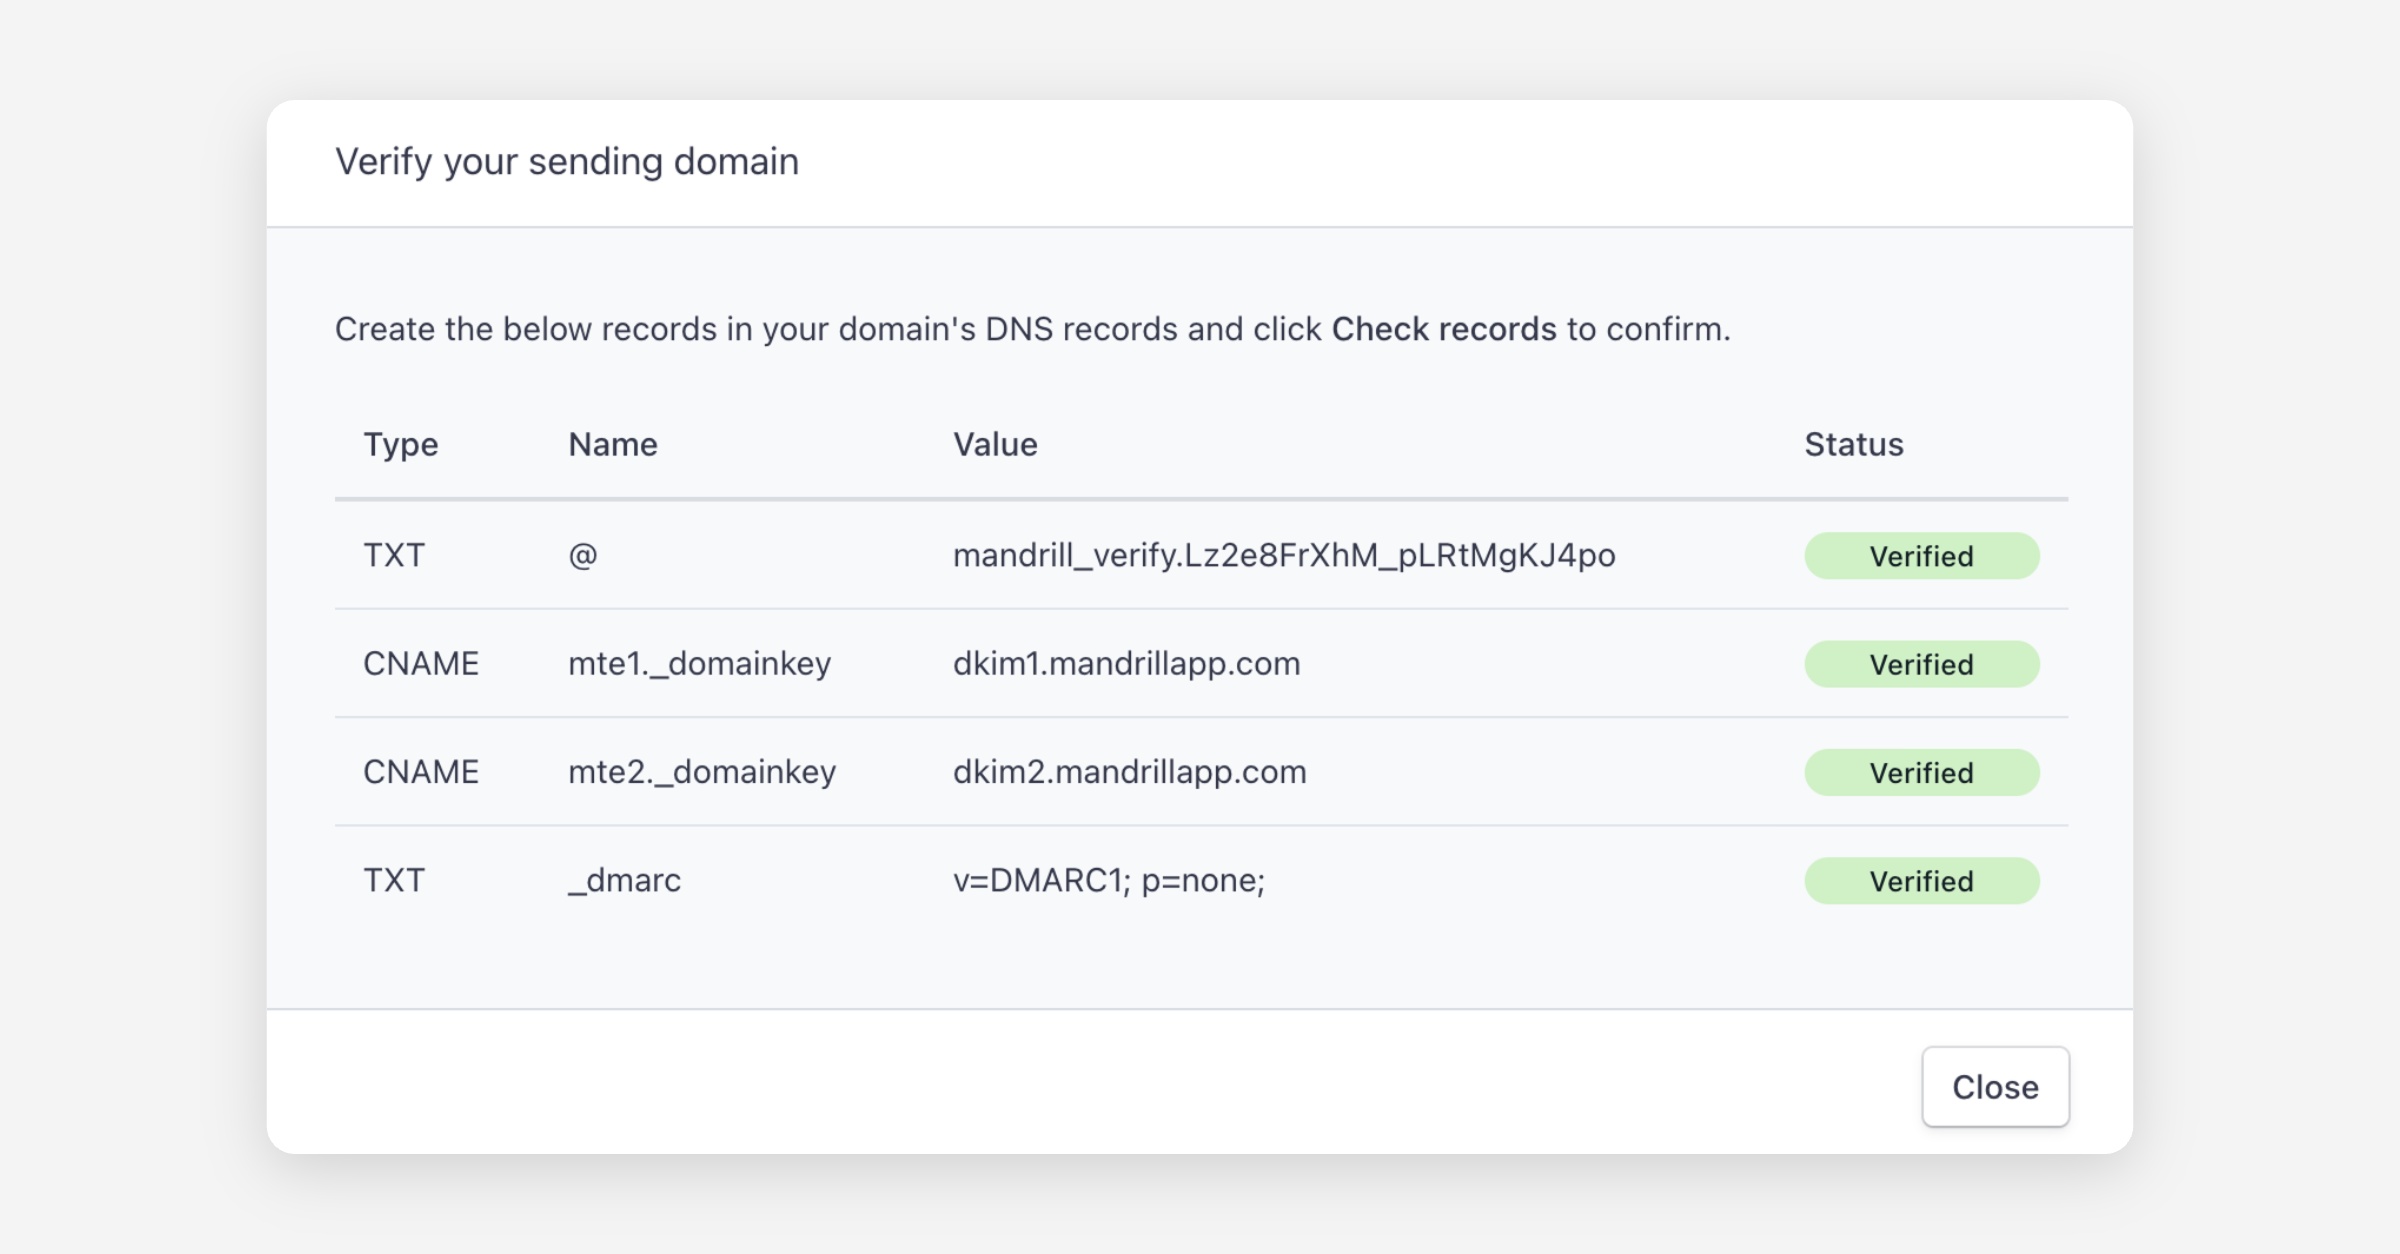
If everything is correct, your domain will display as Verified.
Some records can take up to 24 hours to propagate, so check back later if verification is still pending.
Once verified, your domain is ready to use.
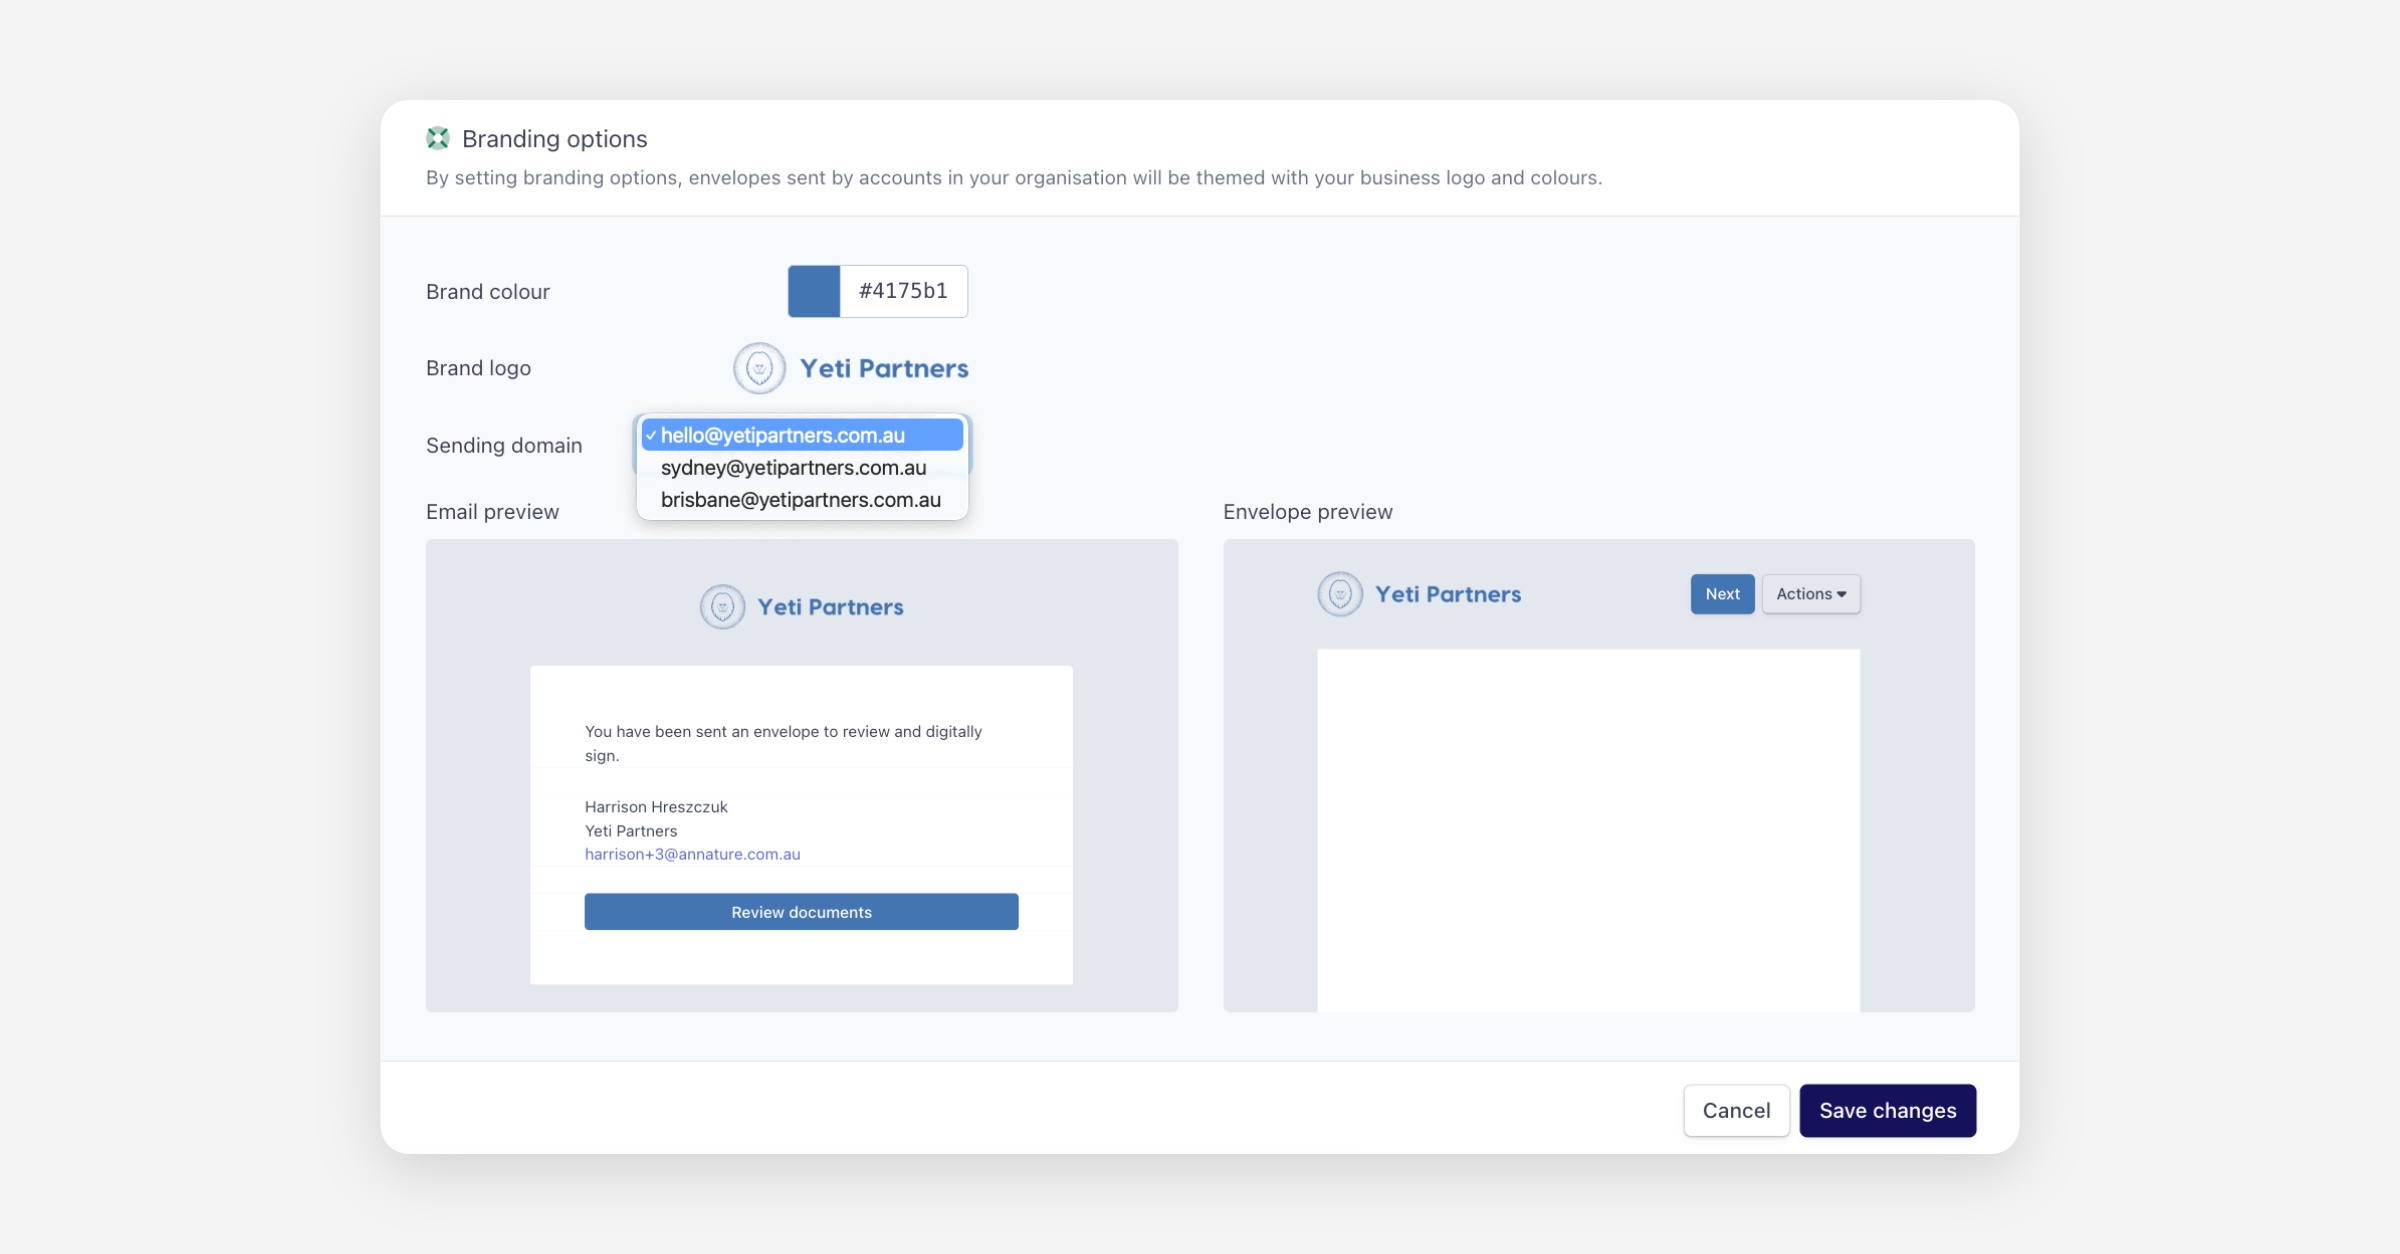
Assigning a Sending Domain
Once your domain is verified, you can assign it to your organisation or to specific groups.
Assign to your organisation:
Go to Settings > Organisation and Branding.
Select your domain from the Sending domain dropdown.
Assign to a group:
Go to Settings > Groups and click Open on the group you want to update.
Select your domain from the Sending domain dropdown.
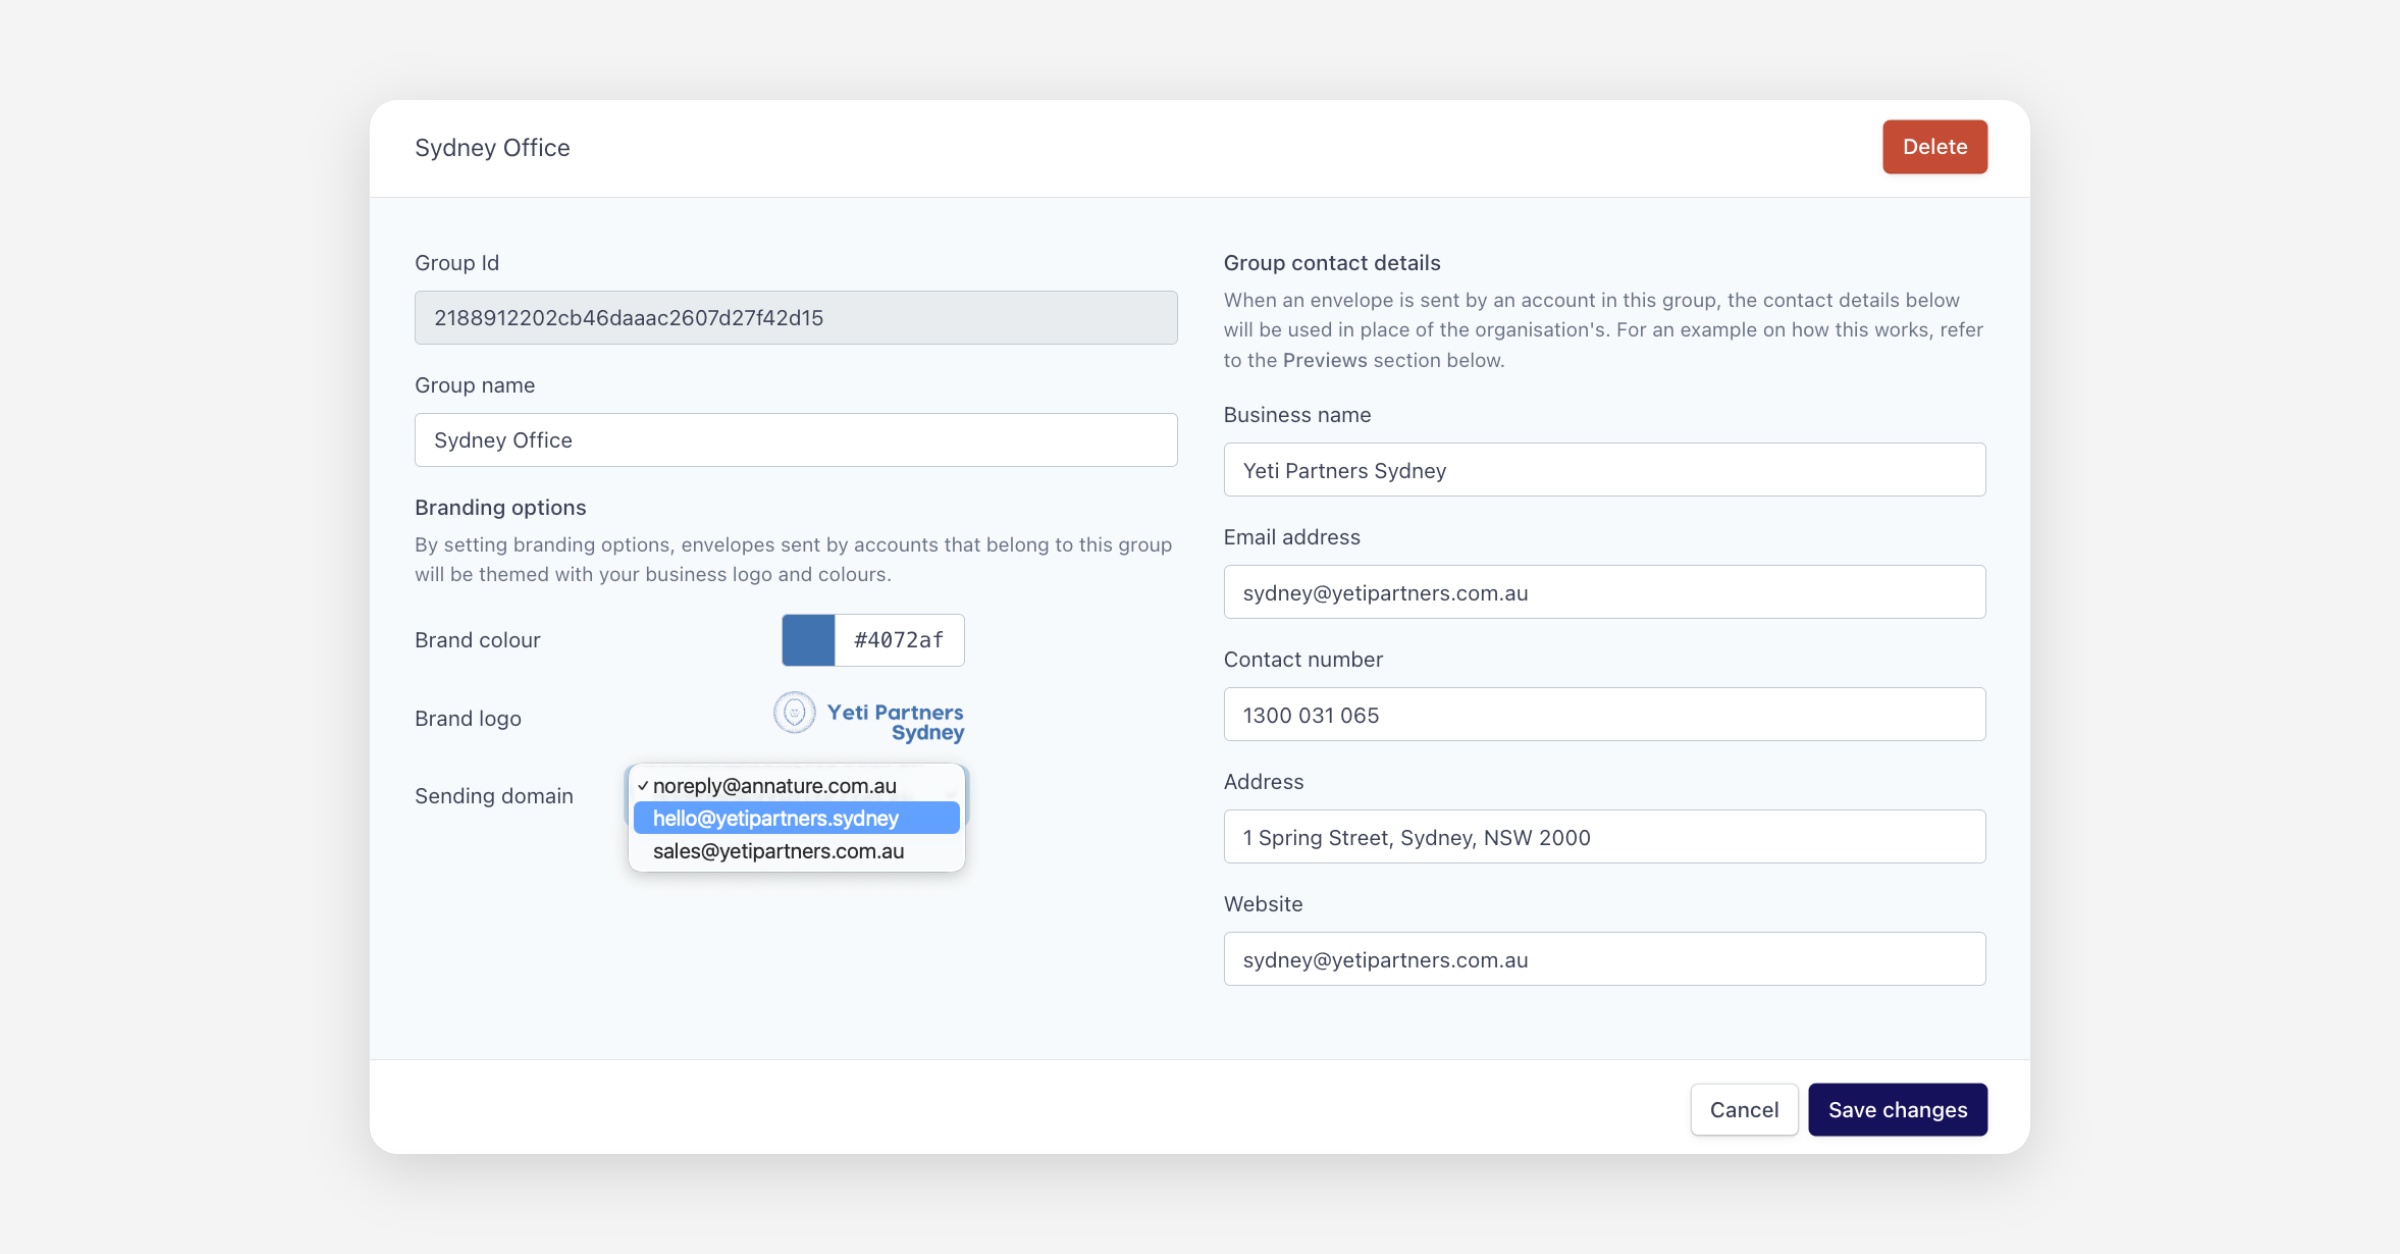
Once assigned, all envelopes sent from your organisation or the selected group will come from your custom email domain.
Was this helpful?