Docs / Settings
Groups
Organise your team into groups for envelope sharing and apply distinct branding, contact details, and sending domains per group.
Groups help you organise your team and manage how envelopes are shared and branded within your Annature account. They are useful for two main purposes:
Sharing envelopes between team members — When team members belong to the same group, they can share access to each other's envelopes, making collaboration easier across departments or teams.
Managing multiple brands or identities — Groups allow you to set up distinct branding, contact details, and sending domains for different parts of your business, all within a single Annature account.
If a group does not have its own branding or contact details configured, it will inherit the organisation's default settings.
The Groups page can be accessed by any Annature Admin by navigating to Settings > Groups.
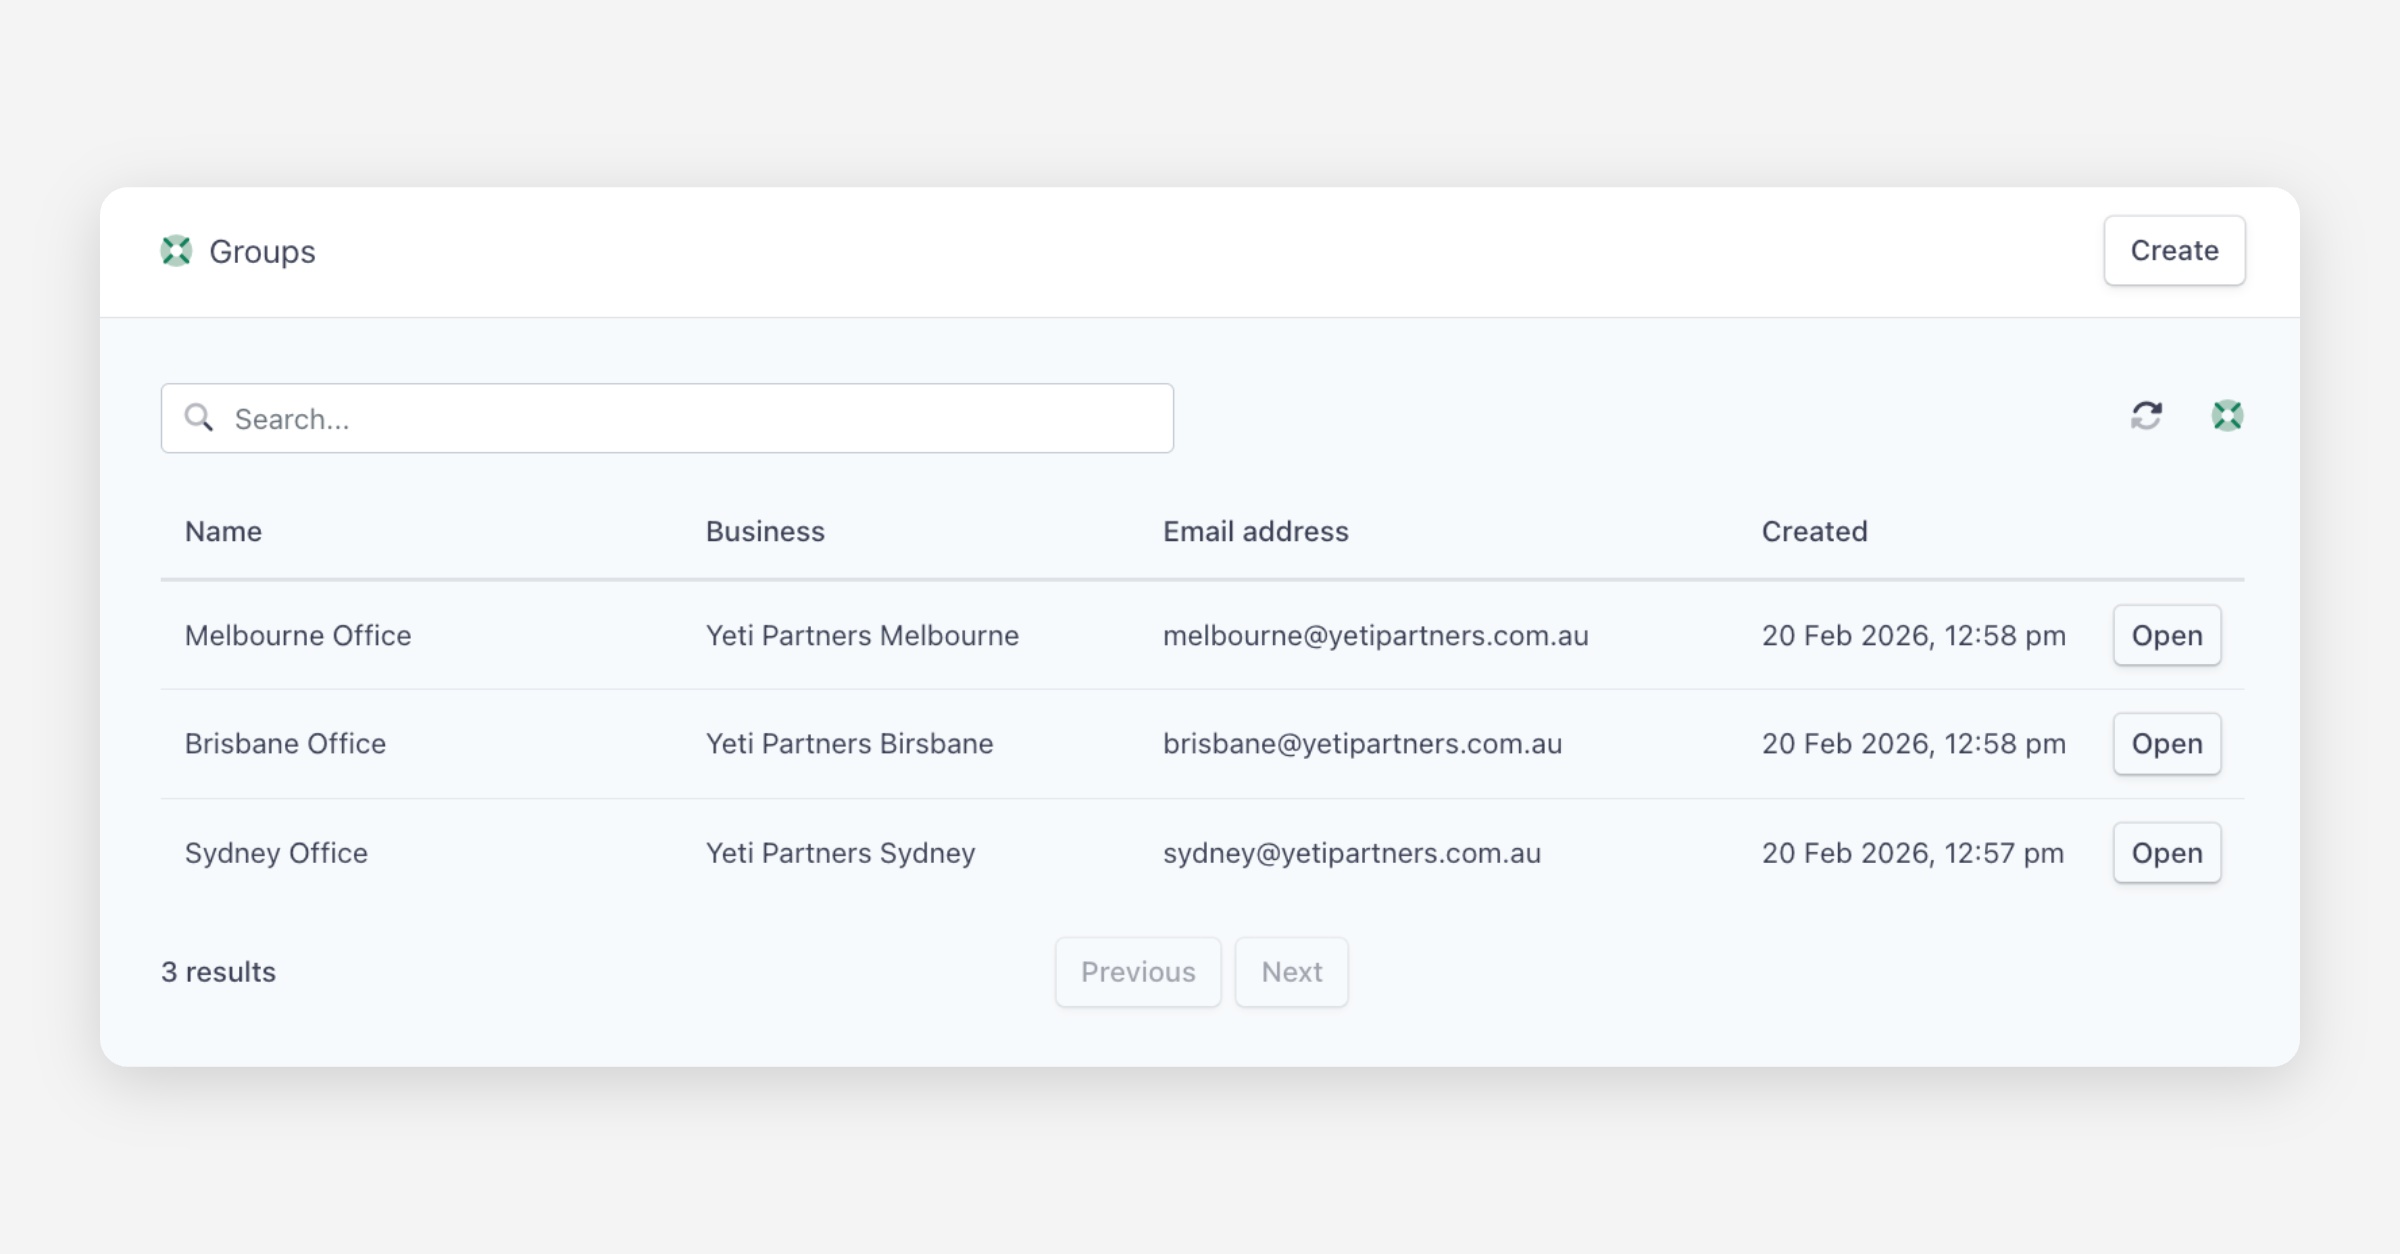
Groups List
The Groups page displays a table of all groups in your organisation, showing:
Name — The internal group name (visible only to your team).
Business — The business name used in outgoing envelopes.
Email address — The contact email associated with the group.
Created — The date the group was created (visible only to your team).
You can search for groups using the search bar at the top, and each group has an Open button to view or edit its details.
Creating a Group
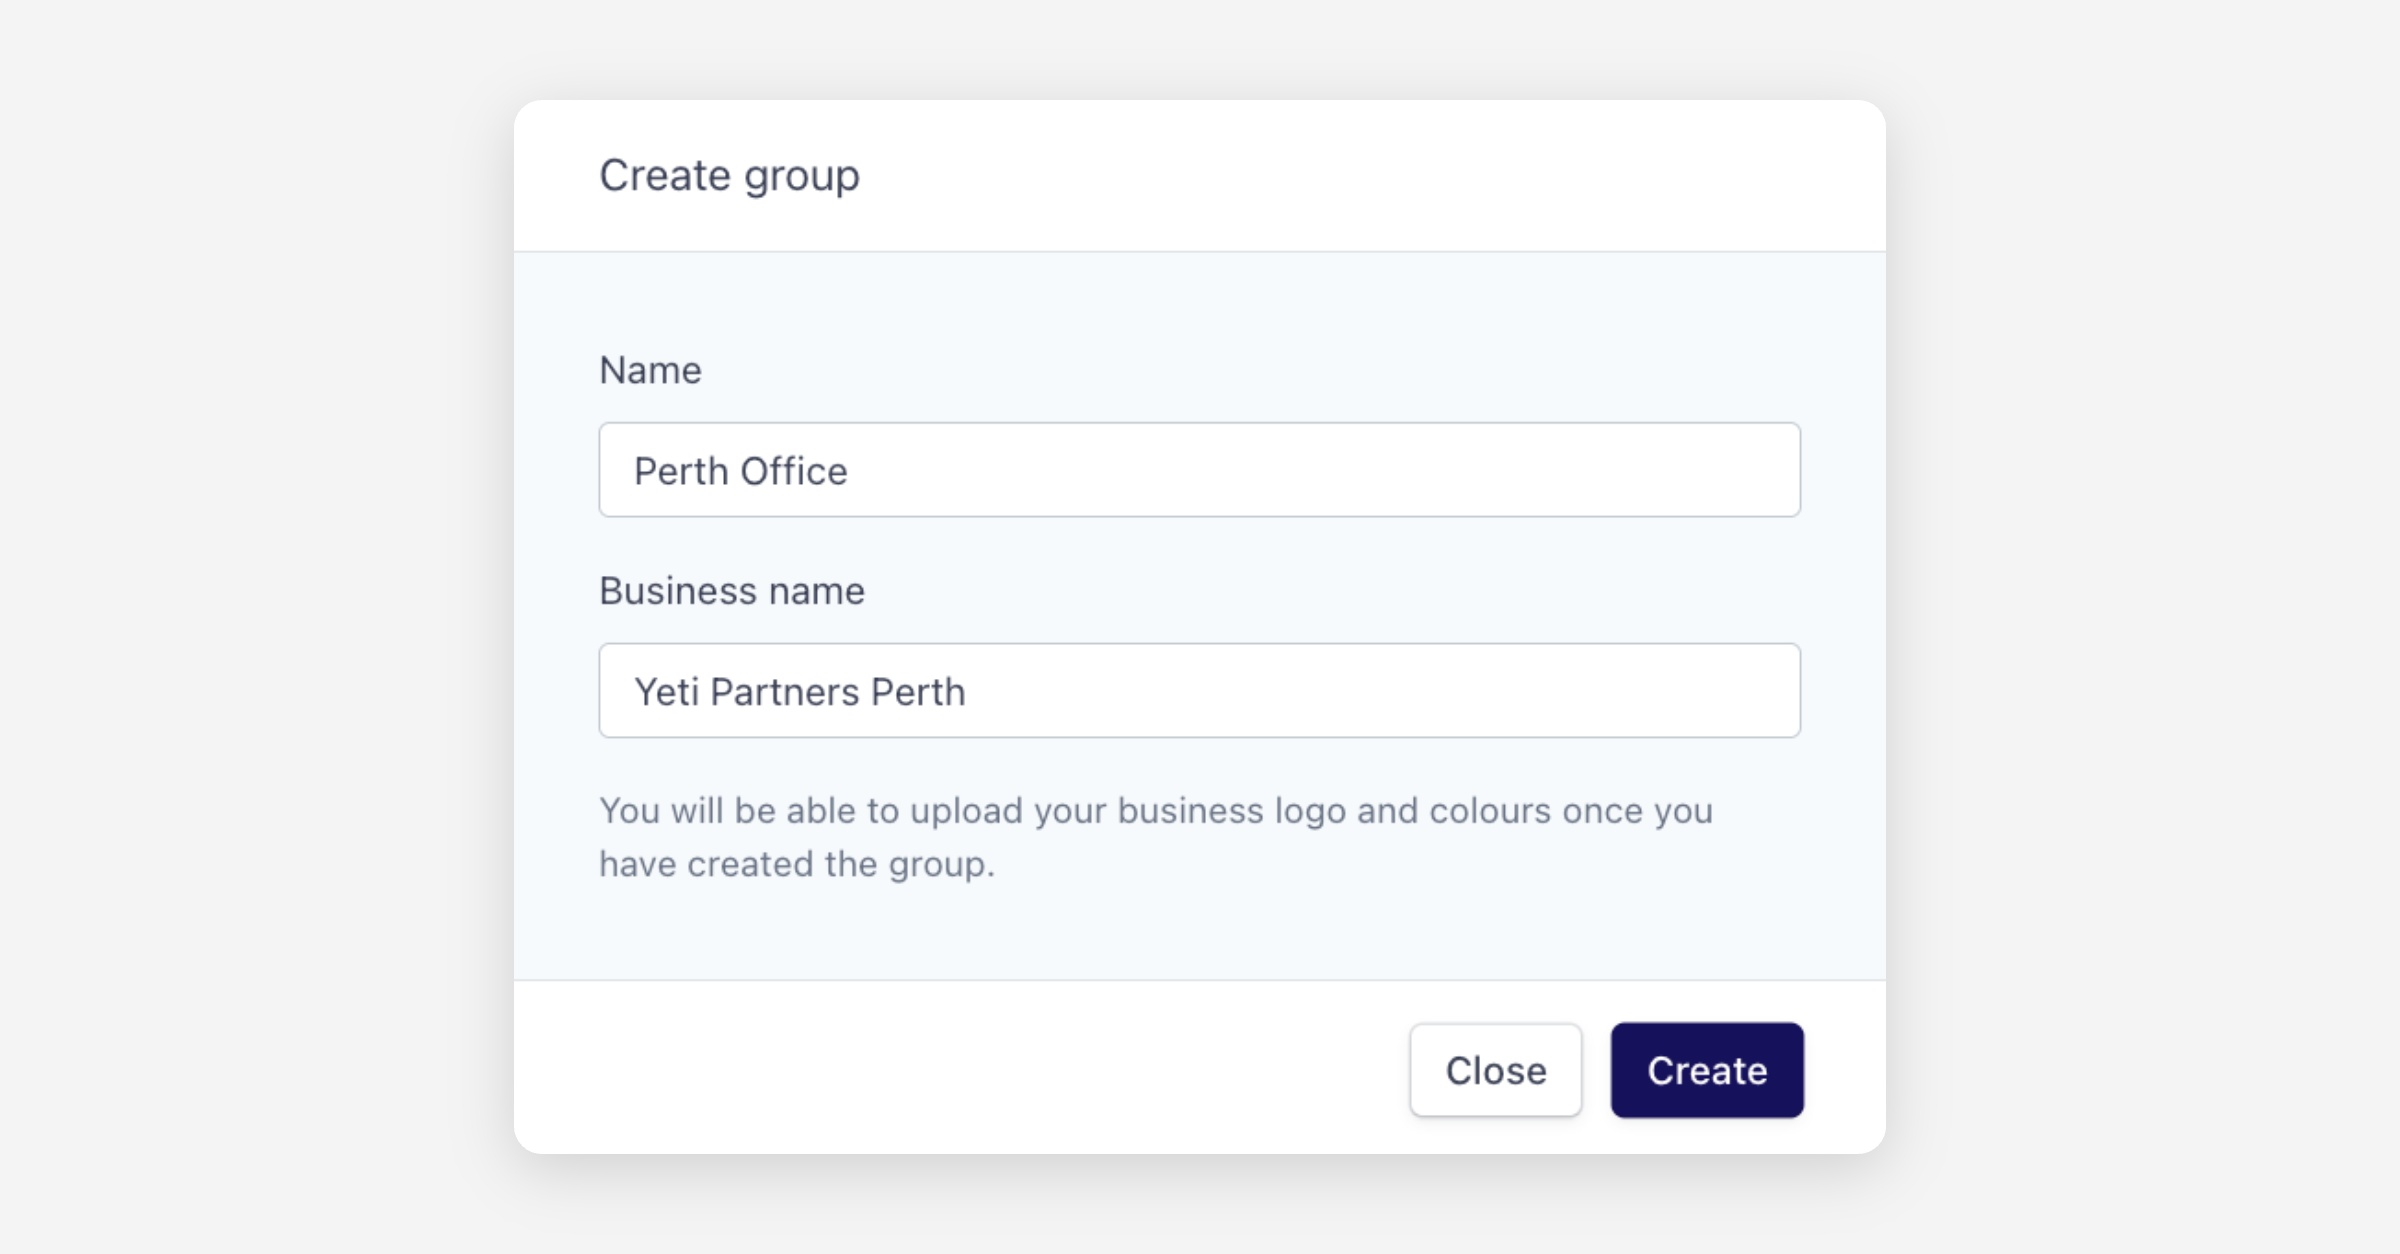
To create a group, navigate to Settings > Groups and click Create in the upper right corner.
You will be prompted to enter the following:
Group name — This is for internal use only and is how the group appears within your Annature dashboard.
Business name — This is the name that appears in envelopes sent by members of this group. If left blank, it will default to your organisation's business name.
Click Create to save the new group. Once created, you can open the group to configure its full details, branding, and contact information.
Editing a Group
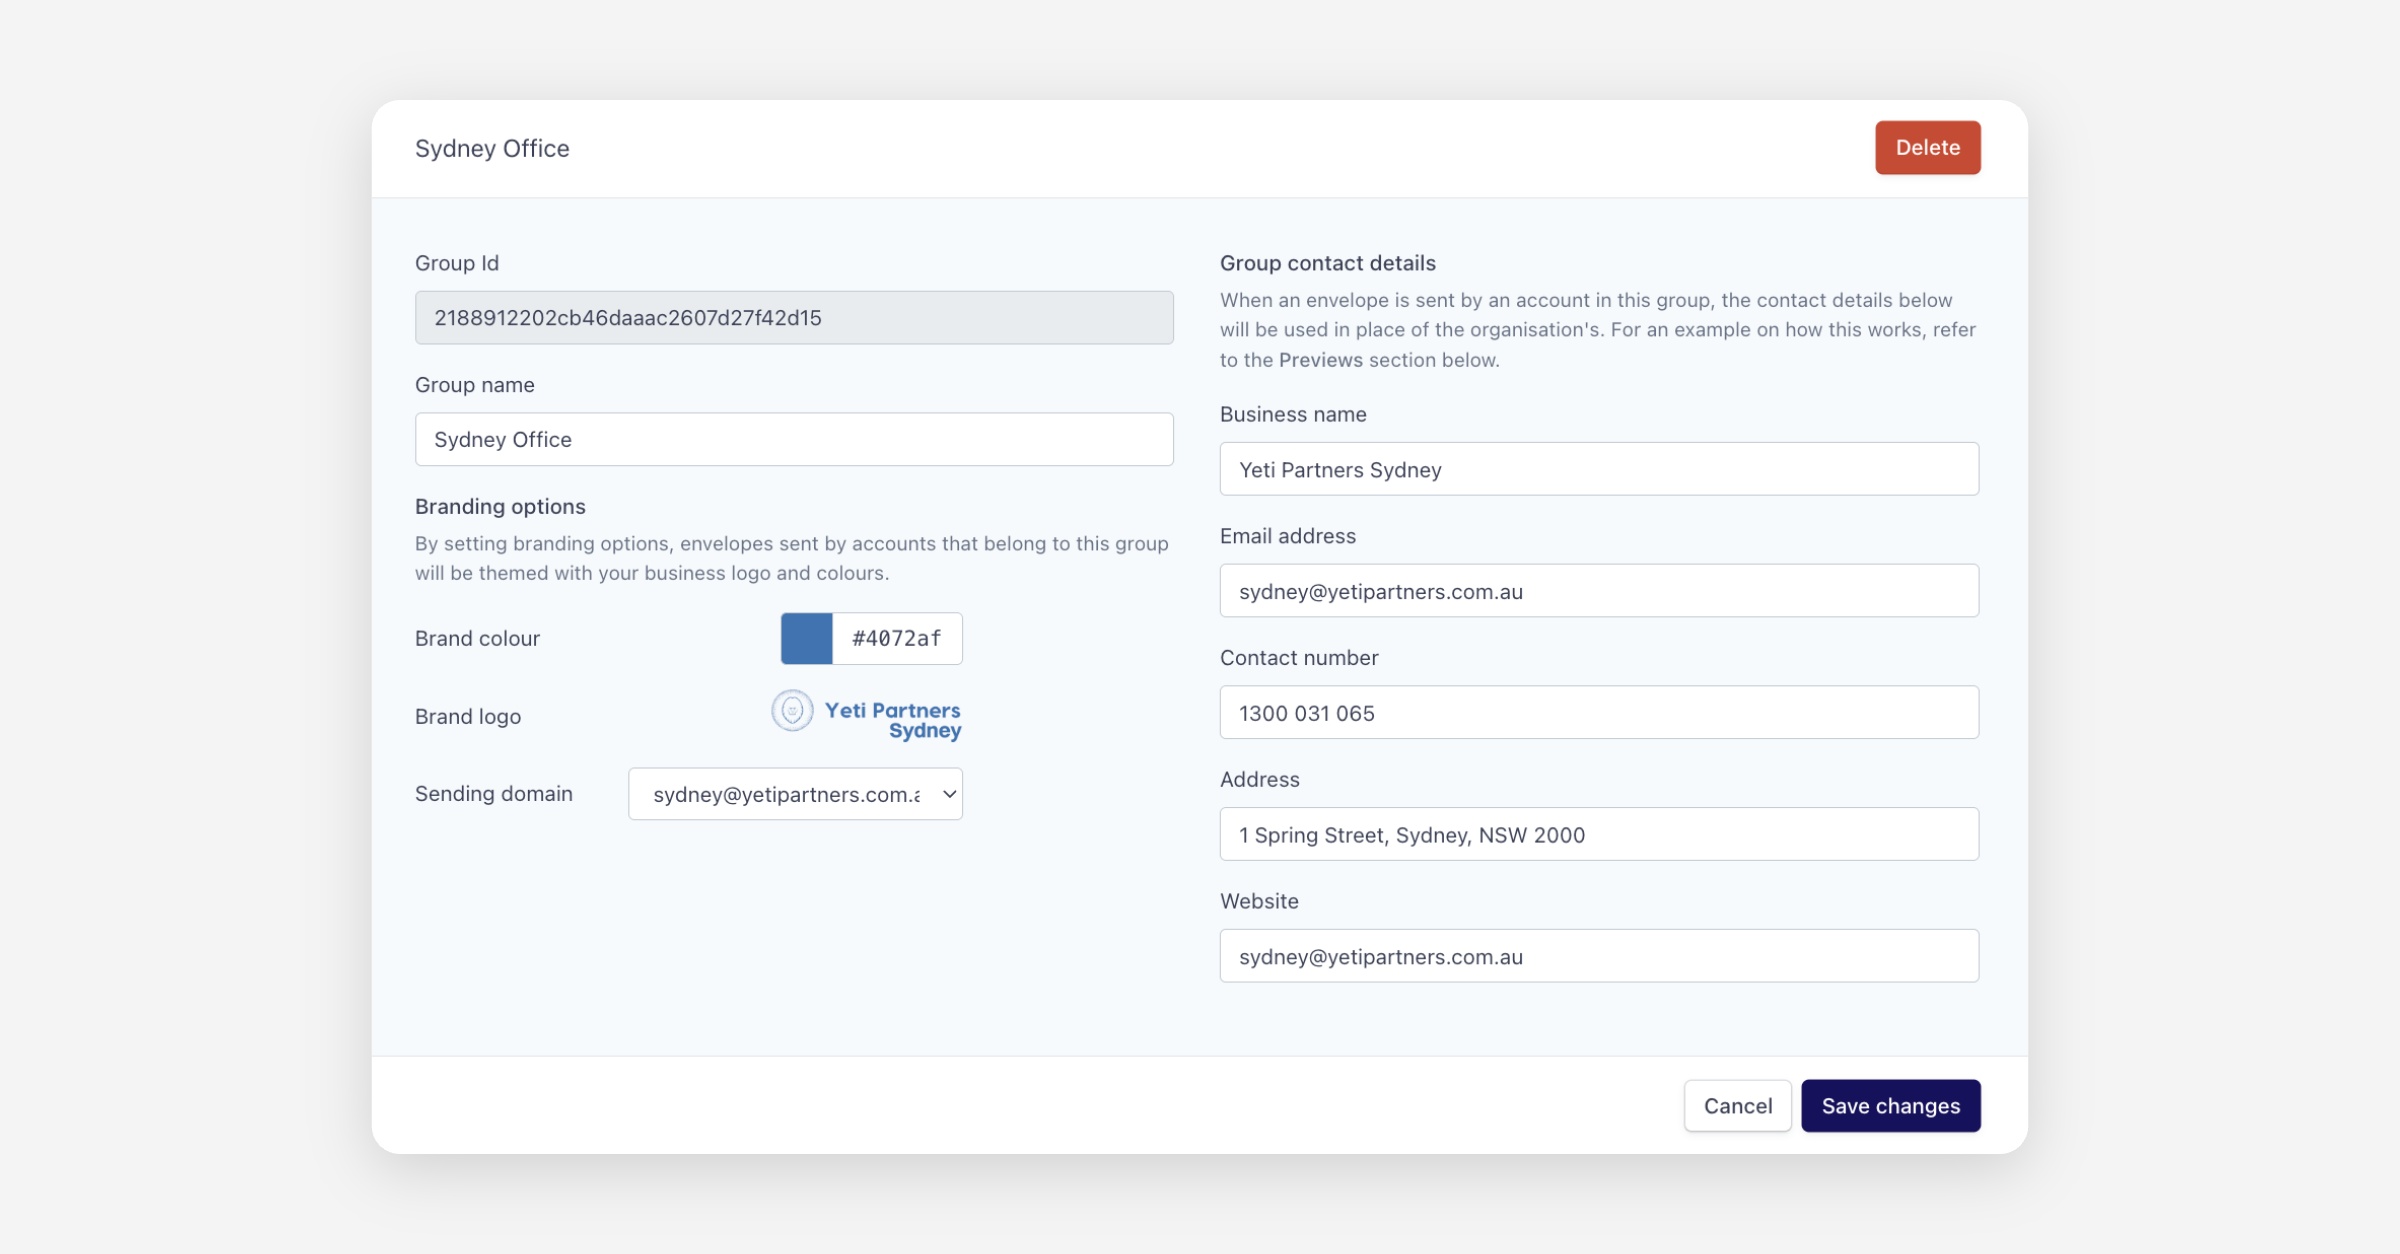
To edit a group, navigate to Settings > Groups, then click Open next to the group you want to update.
From the group detail view, you can configure the following:
Group details:
Group name — The internal name for the group.
Branding options:
Brand colour — Select a colour using the colour picker or enter a hex code. This colour will be applied to buttons and accents in envelope emails and the signing experience for envelopes sent by members of this group.
Brand logo — Upload a logo (GIF, JPEG, or PNG) that will appear in envelope emails and the signing page. You can remove an uploaded logo by clicking the remove icon.
Sending domain — Choose a sending domain for envelopes sent from this group. By default, envelopes are sent from
[email protected]. Custom sending domains must first be configured on the Sending Domains settings page and have their DNS records verified before they become available for selection here.
Group contact details:
Business name — The name that appears in outgoing envelopes.
Email address — A contact email for the group.
Contact number — A phone number for the group.
Address — The group's business address.
Website — The group's website URL.
When an envelope is sent by a team member in this group, the group's contact details will be used in place of the organisation's defaults.
Click Save changes to apply your updates, or Cancel to discard.
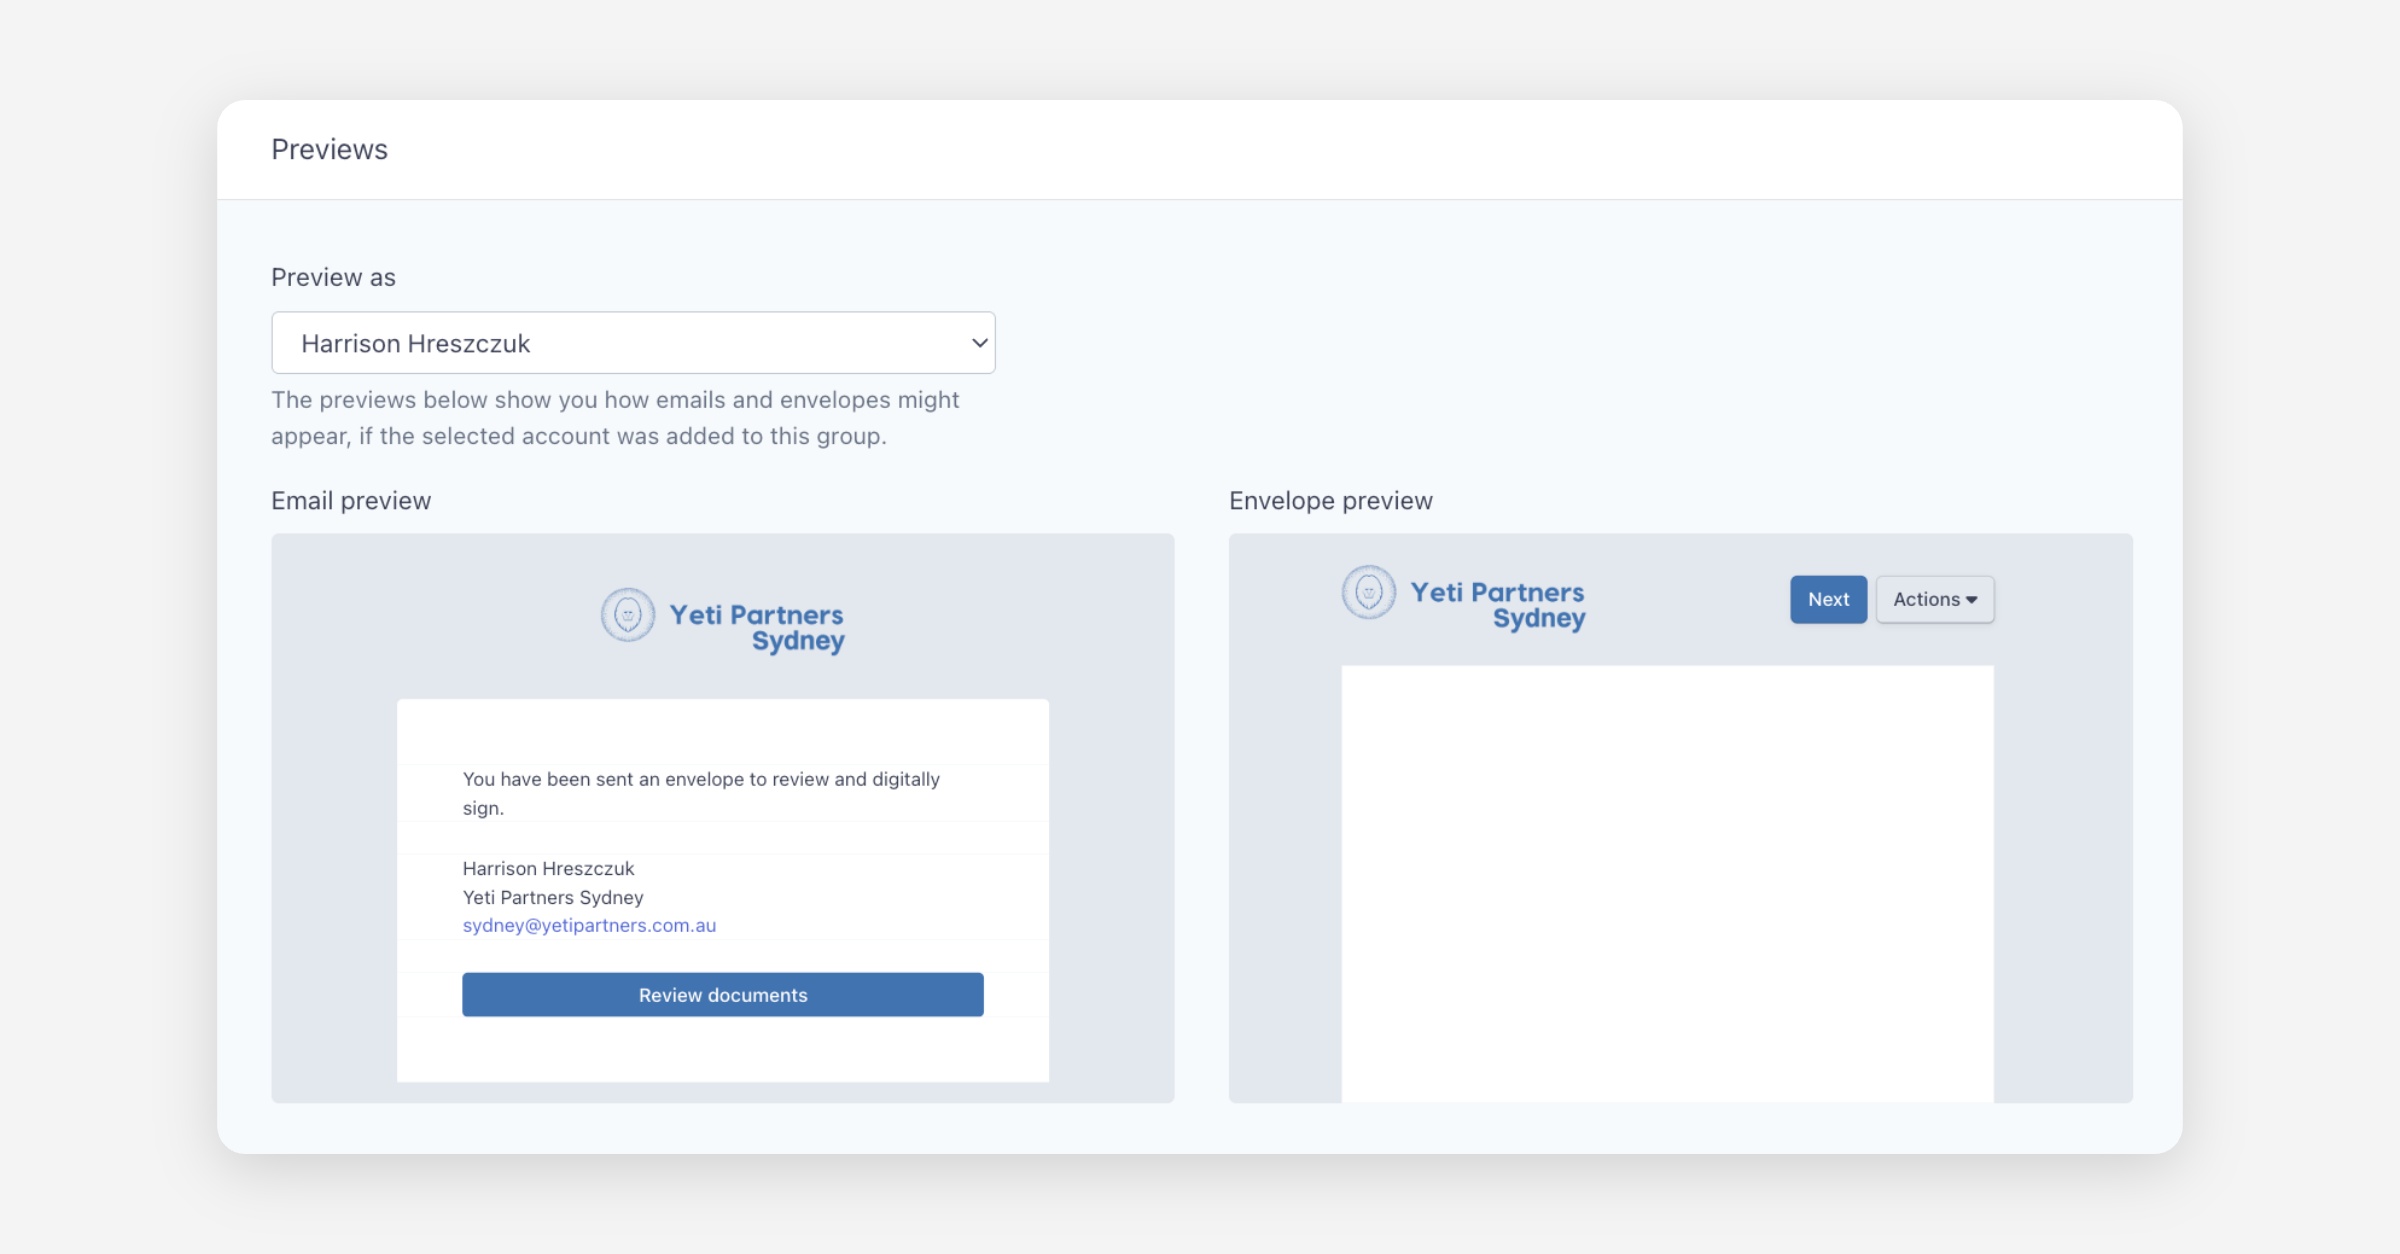
Previewing Group Branding
At the bottom of the group detail view, a Previews section lets you see how your group's branding will appear in practice. You can use the Preview as a dropdown to select a specific team member and see how emails and envelopes would look if that account was part of the group.
Two previews are provided:
Email preview — Shows the envelope notification email with the group's logo, brand colour, and sender details.
Envelope preview — Shows the signing experience header with the group's logo and branded button styling.
Deleting a Group
To delete a group, navigate to Settings > Groups, click Open next to the group, then click Delete in the upper right corner of the group detail view.
You will be asked to confirm the deletion. Deleting a group is permanent. Team members who belong to the group will remain in your organisation but will no longer be associated with any group.
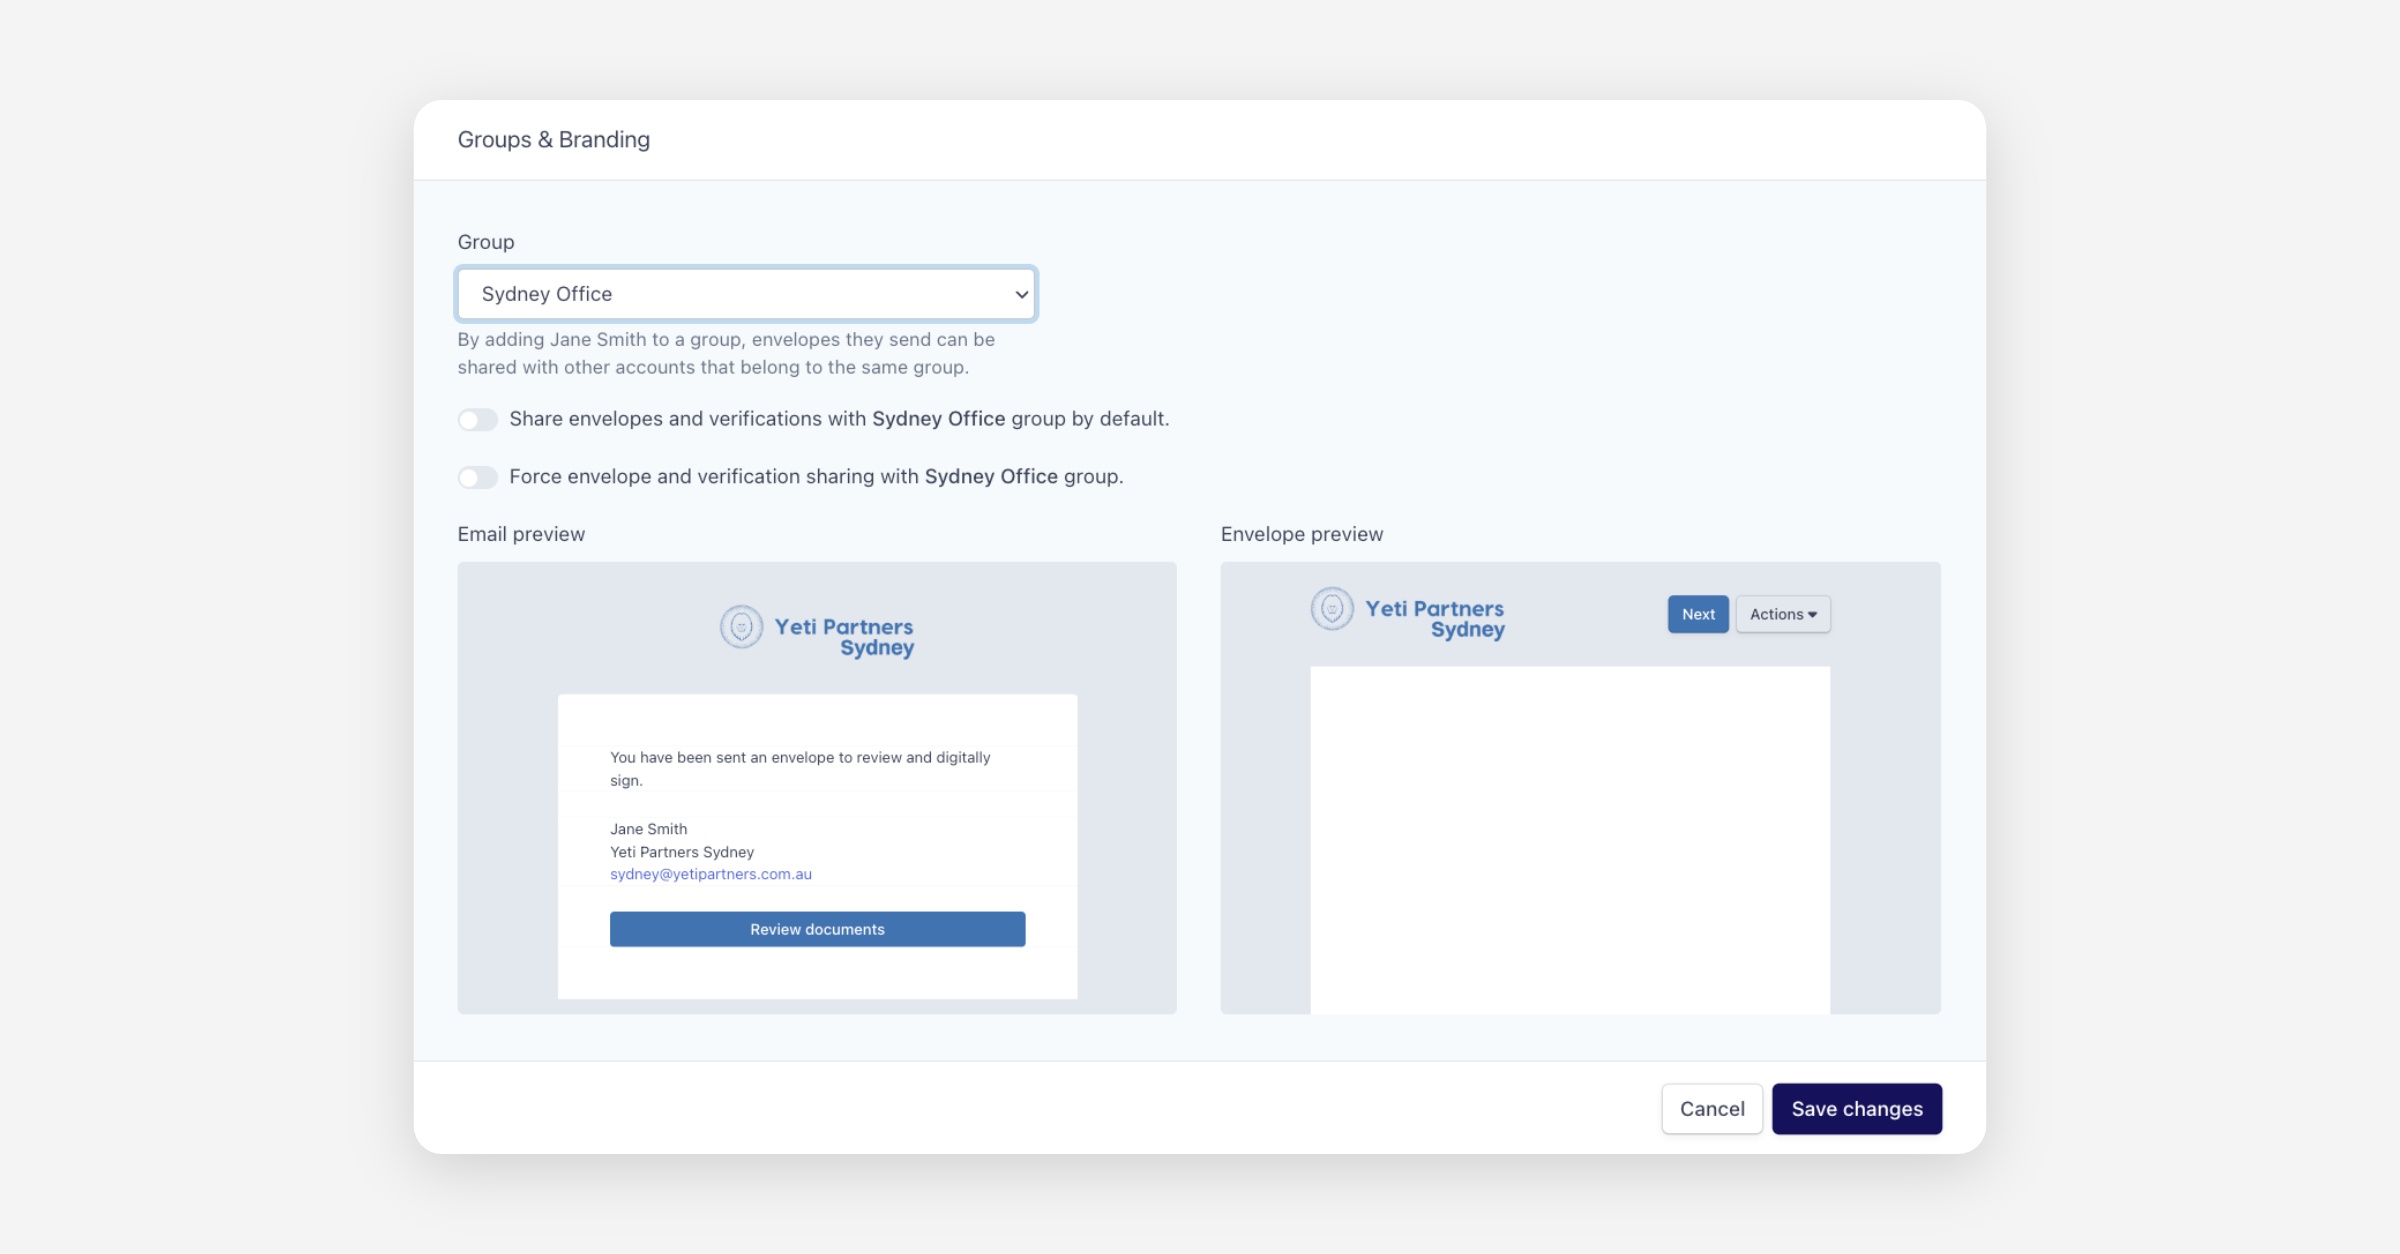
Adding a Team Member to a Group
To assign a team member to a group, navigate to Settings > Team Members and click Open next to the team member you want to update.
Scroll down to the Groups & Branding section. From the Group dropdown, select the group you want to assign the team member to.
By adding a team member to a group, the envelopes they send can be shared with other accounts that belong to the same group. The email and envelope previews below the dropdown will update to reflect how the team member's outgoing envelopes will look with the group's branding applied.
Click Save changes to apply the assignment.
Was this helpful?