Docs / Identity Verification
How to Send an Identity Verification Request
Create a verification request by entering your client's details, with options for biometrics and tax detail collection.
Annature's identity verification allows you to verify your client's identity electronically. When you send a verification request, your client receives an email and SMS with instructions to complete the process — including submitting identity documents for automated verification.
The Identity Verification page can be accessed by clicking Identity verification in the left-hand navigation menu.
Verification List
The Identity Verification page displays a table of all verification requests in your organisation, showing:
Name — The client's full name.
Email address — The client's email address.
Status — The current status of the request: In progress, Verified, Unverified, or Cancelled.
Sender — The team member who created the request.
Created — The date the request was created.

You can search for verifications using the search bar, and each request has an Open button to view its details.
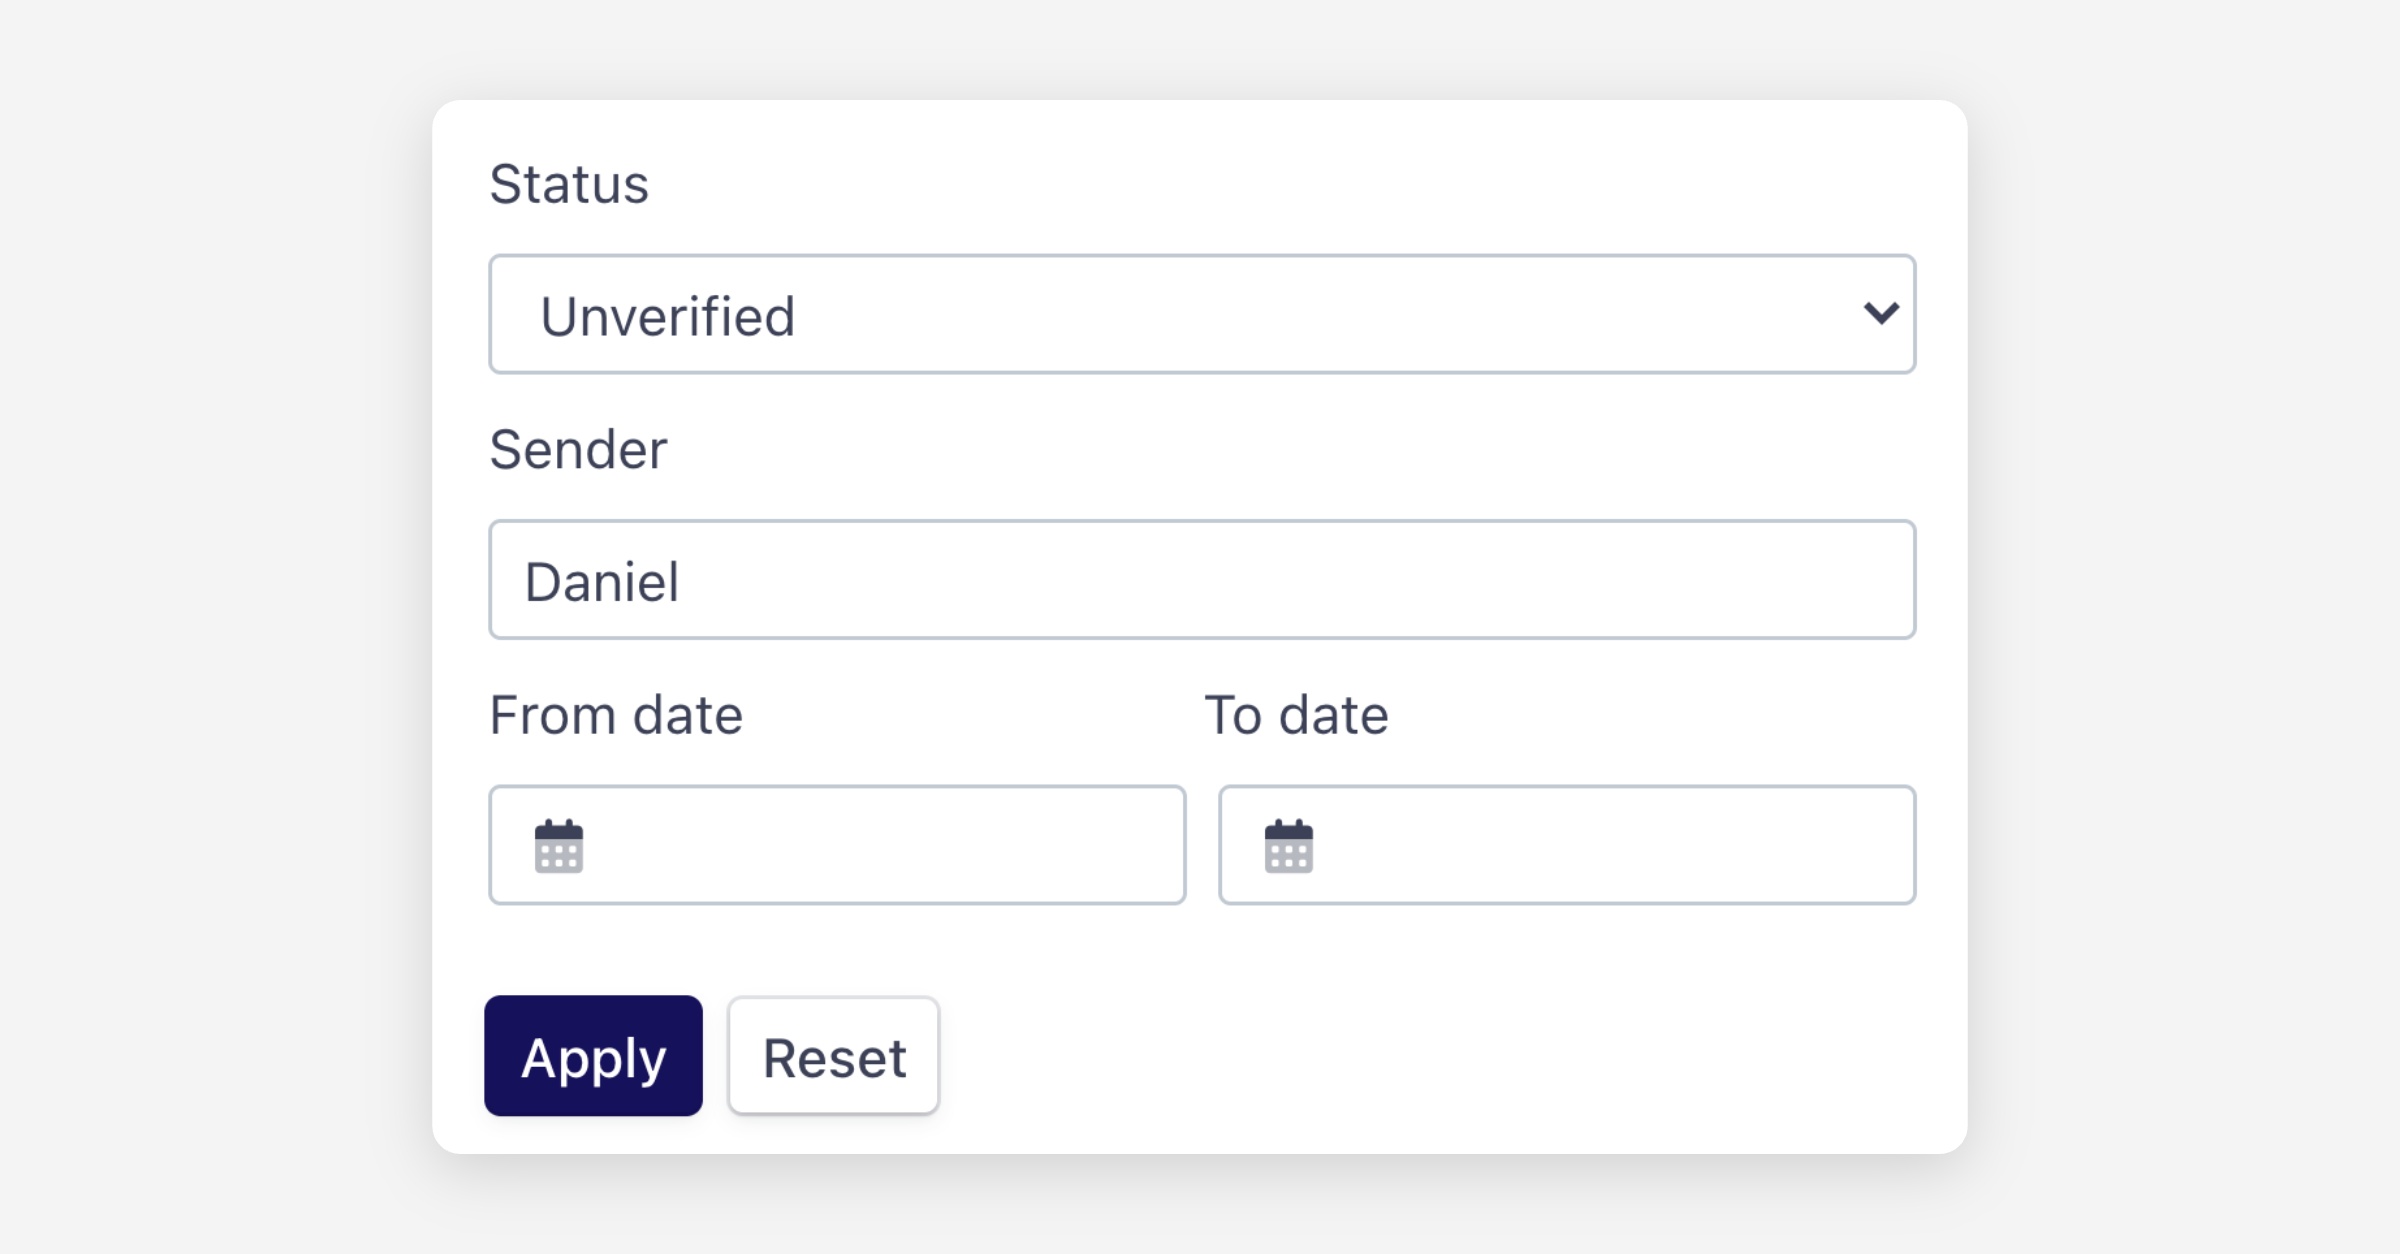
Filtering:
Click Filters to narrow down the results by:
Status — In progress, Verified, Unverified, or Cancelled.
Sender — The team member who sent the request.
Date range — Filter by a from and to date.
Click Apply to update the results, or Reset to clear all filters.
Creating a Verification Request
To create a new identity verification request, navigate to Identity verification and click Create verification.
Enter the following details:
Full name — Your client's name.
Email address — Your client's email address.
Mobile number — Your client's phone number.
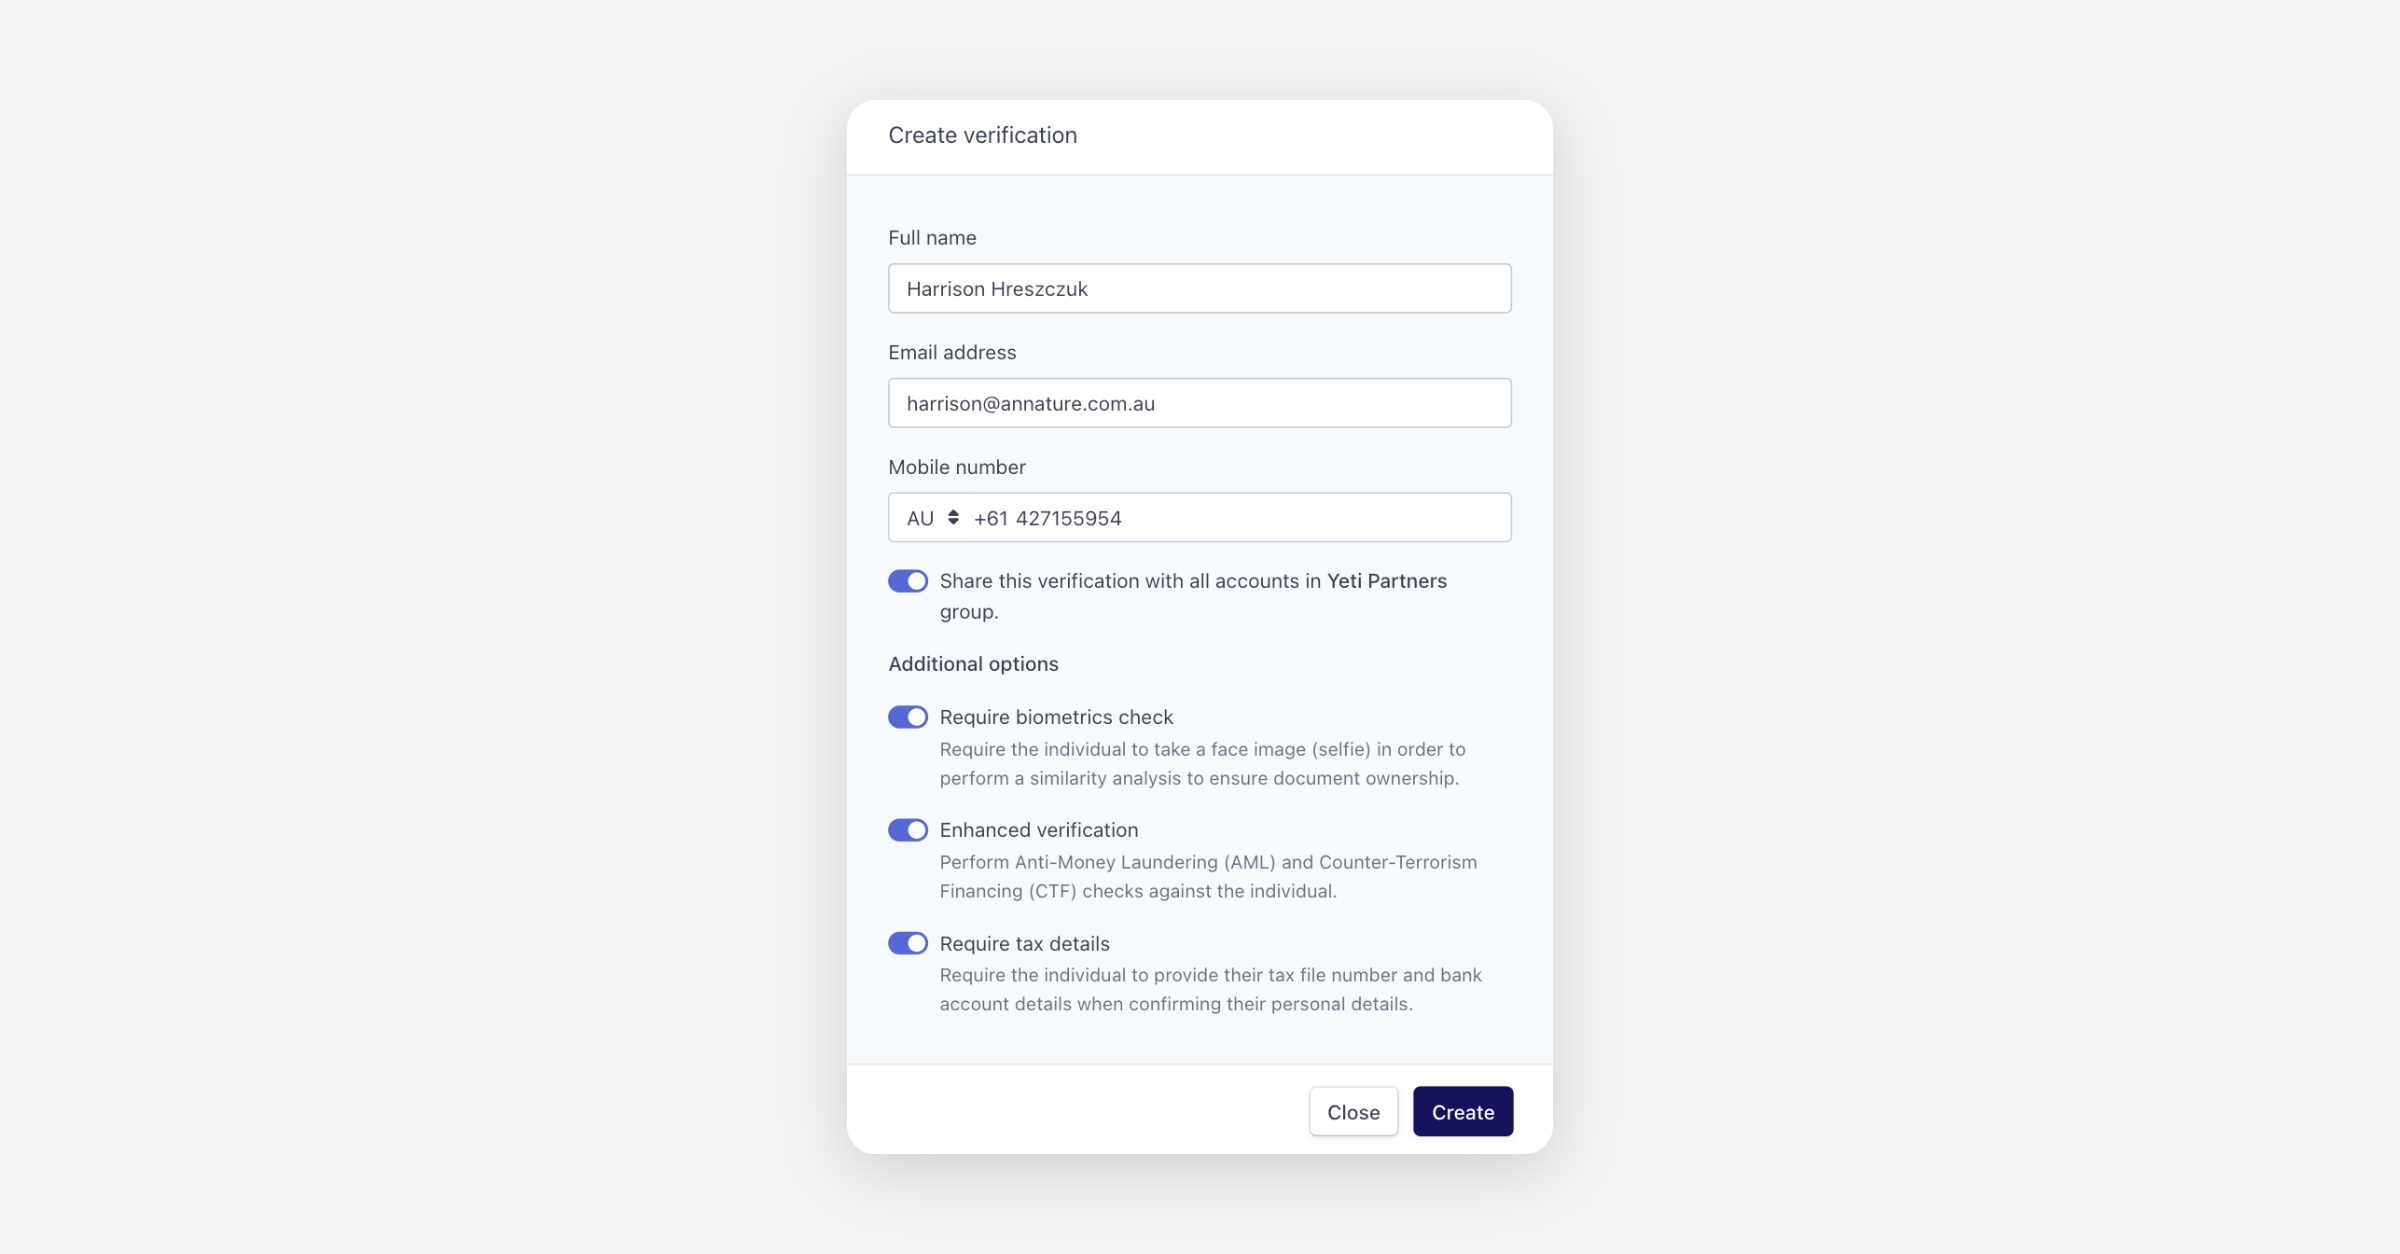
If your organisation uses groups, you can toggle on Share this verification with all accounts in [group name] group to apply the group's branding and share the verification within that group.
Additional options:
Require biometrics check — Require the individual to take a face image (selfie) in order to perform a similarity analysis to ensure document ownership. Learn more in the Biometrics Check article. Learn more here.
Enhanced verification — Perform Anti-Money Laundering (AML) and Counter-Terrorism Financing (CTF) checks against the individual. Learn more here.
Require tax details — Require the individual to provide their Tax File Number (TFN) and bank account details (BSB and account number) when confirming their personal details. Learn more in the Tax Details article. Learn more here.
If you do not see the Enhanced verification or Require tax details options, you may need to enable them under Settings > Add-ons. Learn more in the Add-ons article.
Click Create to send the request. Your client will receive an email and SMS with instructions to complete the identity verification process.
After Verification
Once your client completes the verification process, you will receive an email notification. For your client's security, the email will not contain any personal documents or data — it will include a link to Annature where you can view the full details of the verification.
To learn more about what happens after a verification is complete, see the following articles:
Was this helpful?