Docs / Integrations
Microsoft Entra SSO (Single Sign-On)
Your team can log in using their existing Microsoft credentials, streamlining access and reducing password management headaches.

Single Sign-On (SSO) with Microsoft Entra (formerly Azure Active Directory) gives your organisation enterprise-level security — included on every Annature plan, even Pay-As-You-Go.
Setting up Entra SSO takes only a few minutes. Once configured, your staff can sign in instantly through Microsoft, and new users can even be created automatically on their first login.
Getting Started
Connect Microsoft Entra to Annature
To begin, go to Settings → Integrations and select Configure under Azure Active Directory.
Annature will display your Identity Provider (IdP) configuration. Copy these values into the Basic SAML Configuration section of your Microsoft Entra application:
Identifier (Entity ID)
Reply URL (Assertion Consumer Service URL)
Sign-on URL
Then, copy your Service Provider configuration details from Microsoft Entra into Annature:
Login URL
Azure AD Identifier
Certificate (Base64) — must begin with
----BEGIN CERTIFICATE-----
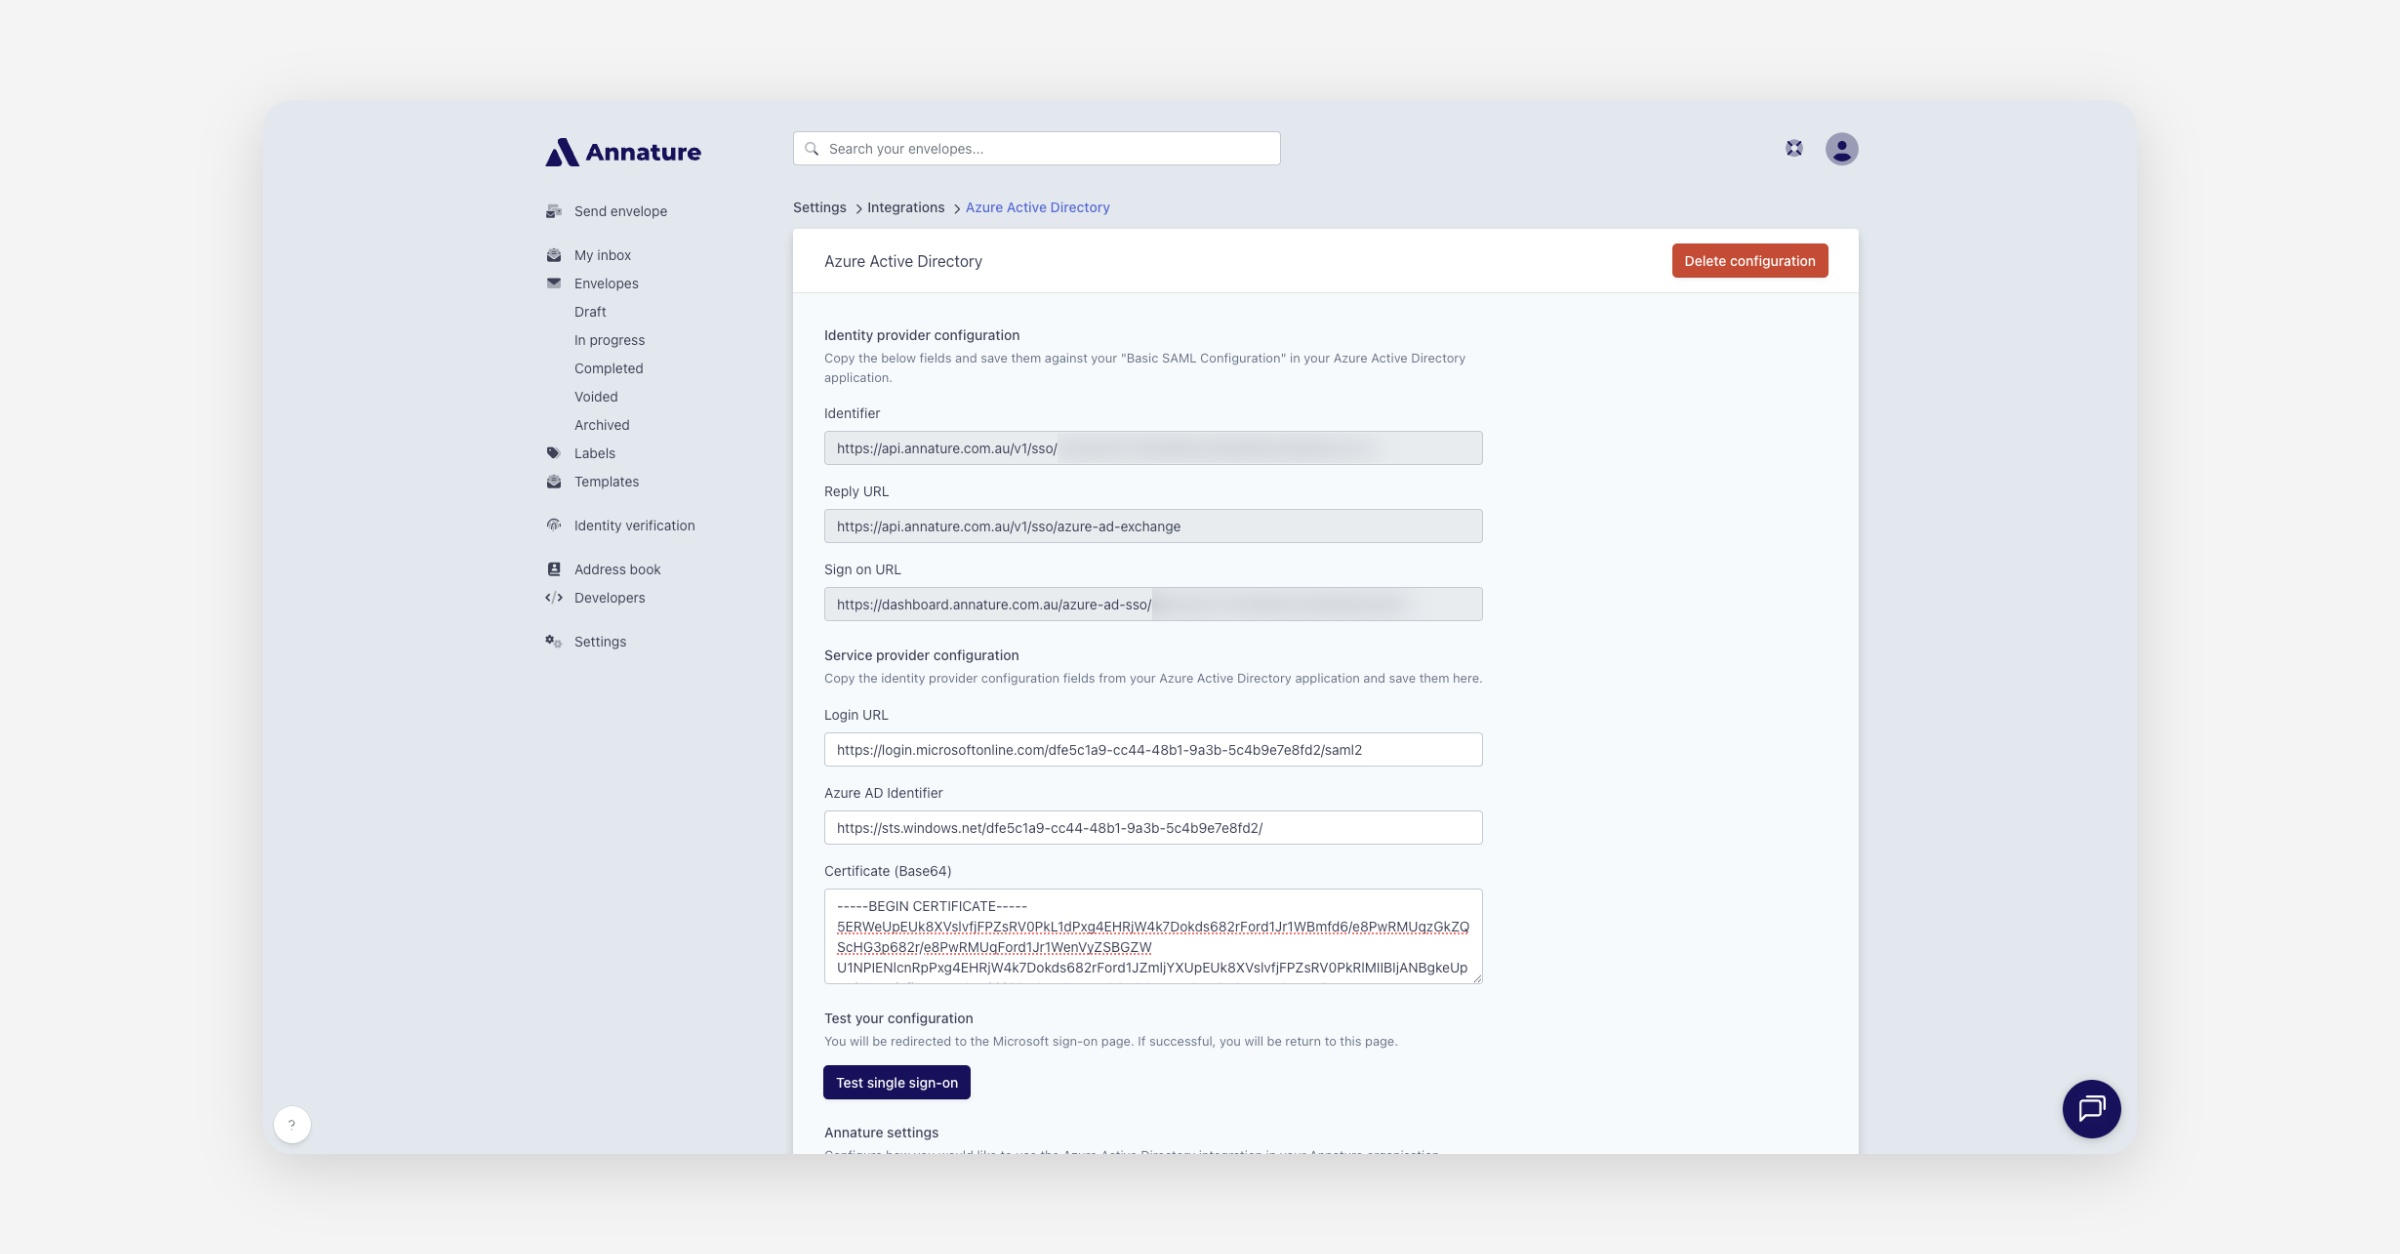
Once these fields are complete, click Test Single Sign-On to confirm your connection is working correctly.
Annature Settings
Enable Single Sign-On (SSO)
After Microsoft Entra has been configured, toggle Single Sign-On on in Annature.
Your team can now log in directly through your Entra app, available from the Microsoft App Launcher.
💡 Note:
When SSO is enabled, only the organisation owner can log in using an email and password.
All other users must access Annature through Microsoft Entra.
Enable Automatic User Provisioning
You can streamline onboarding by enabling Automatic Provisioning. When activated, Annature will automatically create user accounts for new team members the first time they sign in through Entra.
There’s no need to manually invite new users — as long as they have access to the Annature application within Microsoft Entra, their Annature account will be created instantly.
Automatic Provisioning and Group Mapping
When automatic provisioning is turned on, you can also assign users to the correct Annature group automatically during sign-in.
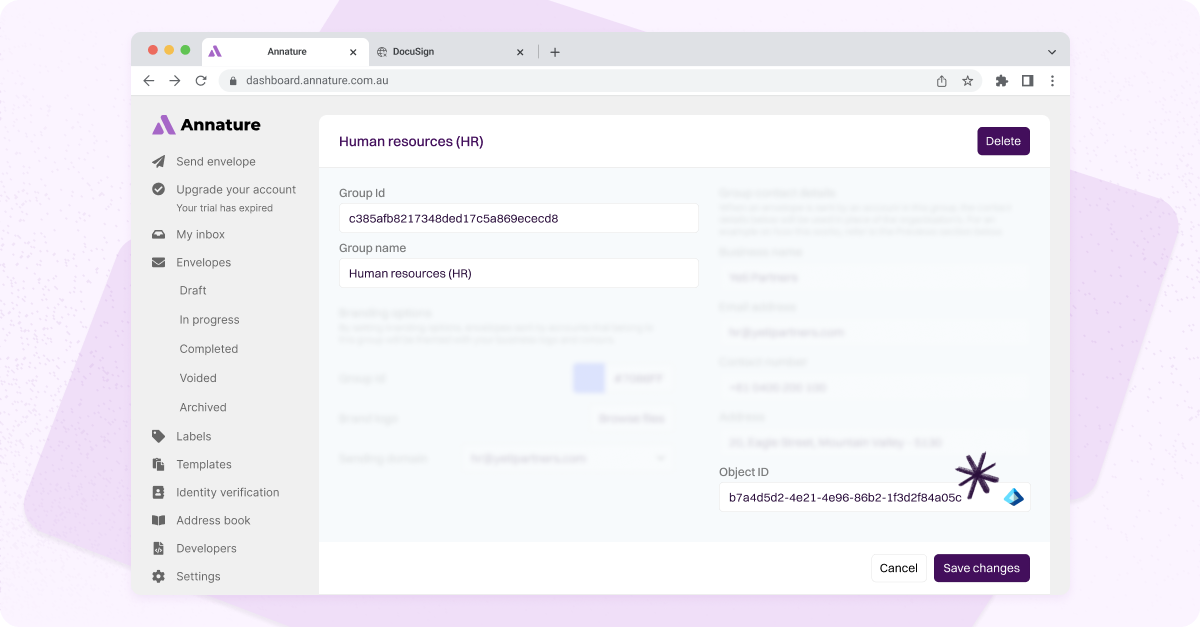
Once Entra SSO is active, you’ll see a Group Settings option in Annature. This allows you to connect an Entra Group Object ID to a specific Annature group, ensuring new users are assigned correctly the moment they log in.
To enable this, you’ll need to add a Group Claim in Microsoft Entra — this lets Annature receive each user’s group information securely when they sign in.
Find the Object ID of a Microsoft Entra Group
Sign in to the Microsoft Entra admin centre with admin credentials.
In the left menu, select Groups.
Choose the group you want to link (for example, Finance Team).
On the Overview tab, copy the Object ID using the copy icon.
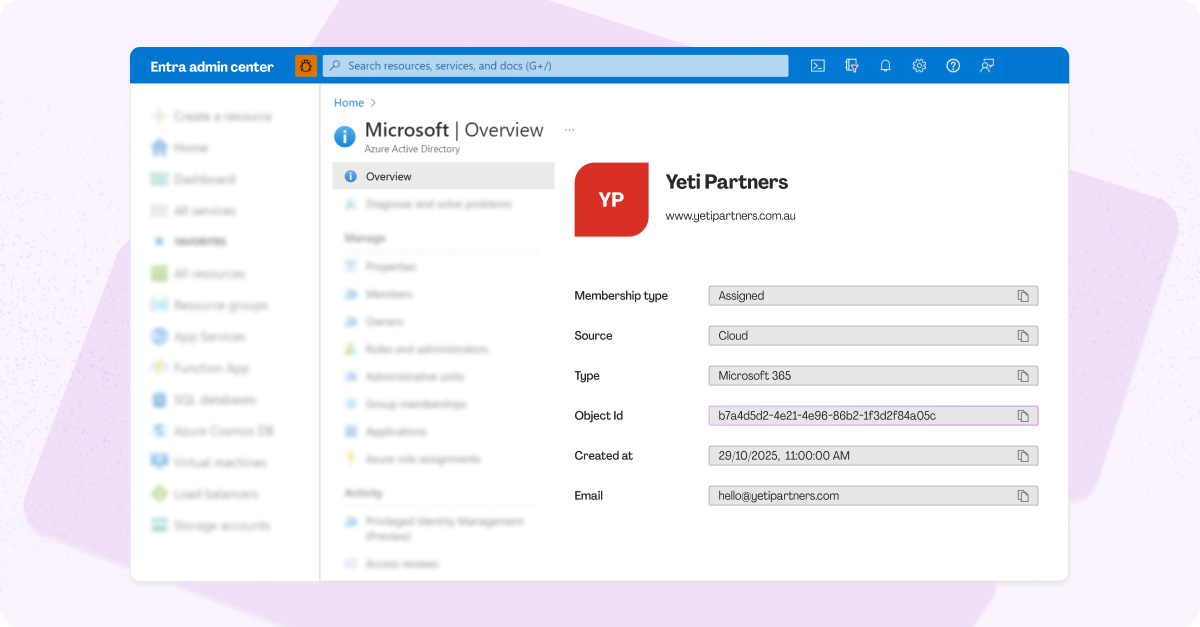
Paste this Object ID into the corresponding Annature group’s settings.
Add a Group Claim in Microsoft Entra
To send group information to Annature, add a Group Claim in your SSO configuration:
In your Entra application, open Attributes & Claims and click Edit.
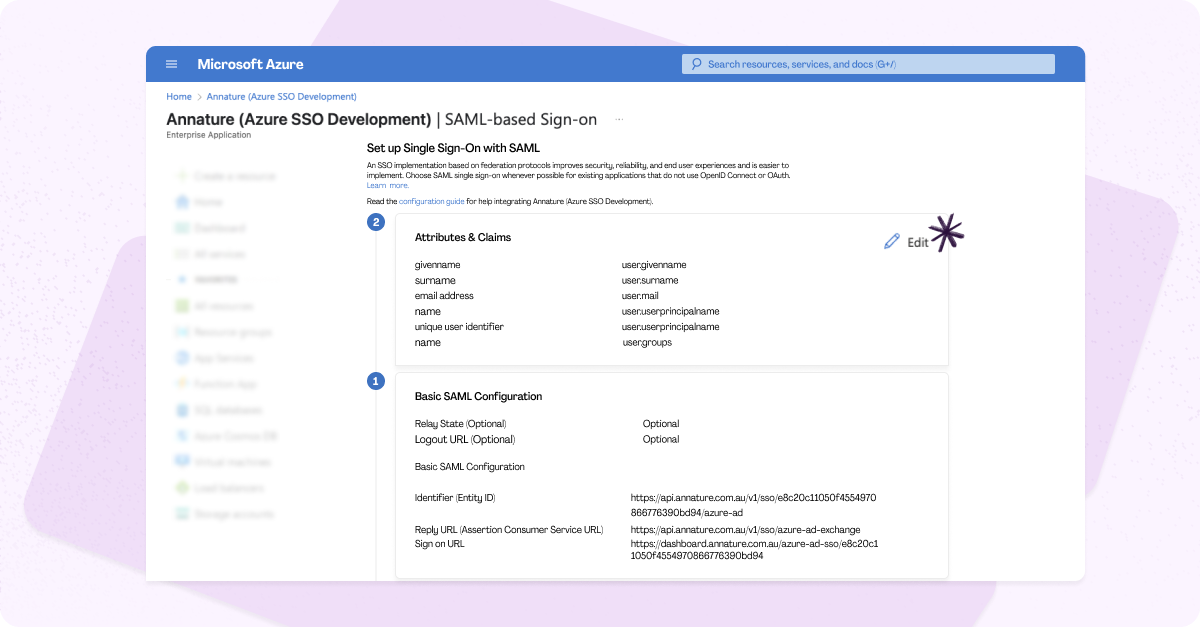
Choose Add a group claim.
Under Group claims type, select Groups assigned to the application.
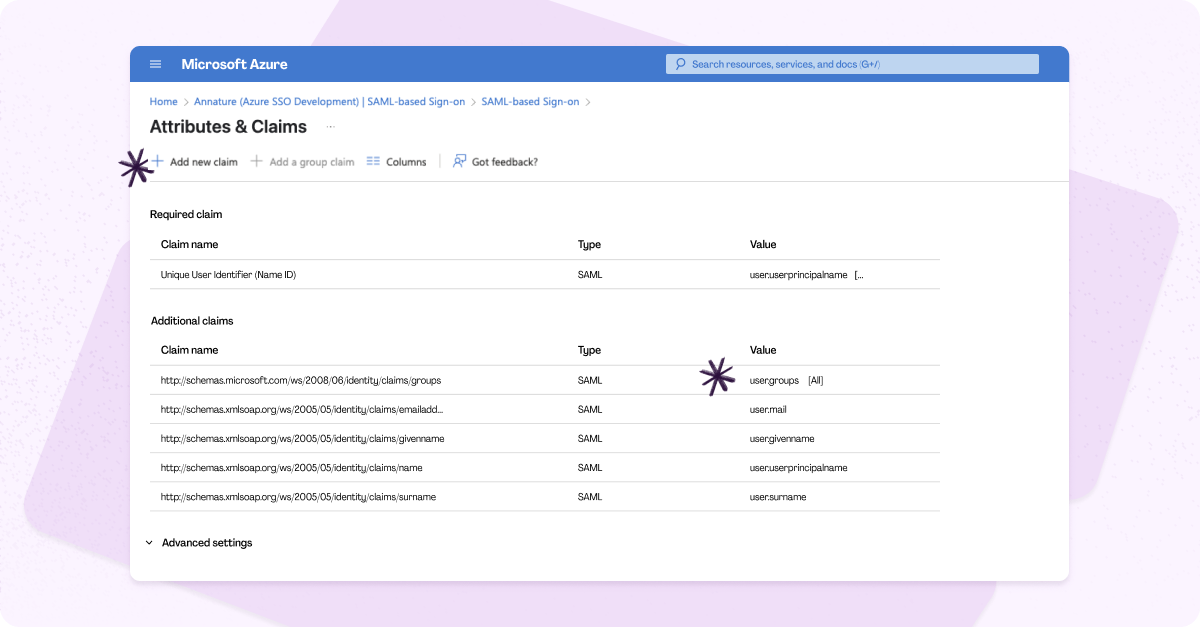
Set Source attribute to Group ID.
This ensures Entra sends the Group Object ID with the user’s SAML response.
Save your changes.
Once saved, you’ll see your new group claim listed in your configuration.
How It Works
When a user signs in through Microsoft Entra:
Entra includes the user’s Group Object IDs in the SAML response.
Annature checks these IDs against your linked group settings.
If a match is found, the user is automatically added to the corresponding Annature group.
This provides a seamless onboarding experience — every user is securely authenticated, provisioned, and placed in the right group without any manual setup.
Need Help?
Our team is here to help you review and test your configuration to ensure your Entra SSO setup is working perfectly.
Reach out anytime at [email protected].
Was this helpful?