Docs / Guides & Videos
Setting up a SharePoint sync with Power Automate [video]
Build a two-way sync between SharePoint and Annature using Microsoft Power Automate — send documents from SharePoint to Annature for signing, and have signed copies file back automatically. Allow ~ 45mins for setup.
![Setting up a SharePoint sync with Power Automate [video]](/_next/image?url=https%3A%2F%2Fuploads.productlane.com%2Fb12bdb2f4e0c8c91babf96e57bbf044a.png&w=3840&q=75)
This guide walks through how to set up a SharePoint sync using Annature's Microsoft Power Automate connector. Once configured, you'll be able to select a document in SharePoint, push it into Annature as a draft envelope, and have the signed PDF file back into SharePoint once it's completed.
While SharePoint is the focus of this guide, the same building blocks apply to any Power Automate flow with Annature. You can swap SharePoint for OneDrive, Dynamics 365, Outlook, Microsoft Teams, or hundreds of other apps. Use this as a starting point and adapt it to your own use case.
Triggers and actions
Every Power Automate flow has a trigger and one or more actions.
Trigger — what kicks the flow off (for example, a file being selected in SharePoint, or an envelope being completed in Annature).
Action — what happens next (for example, creating an envelope, saving a file back to SharePoint, sending a Teams notification, or logging to Excel).
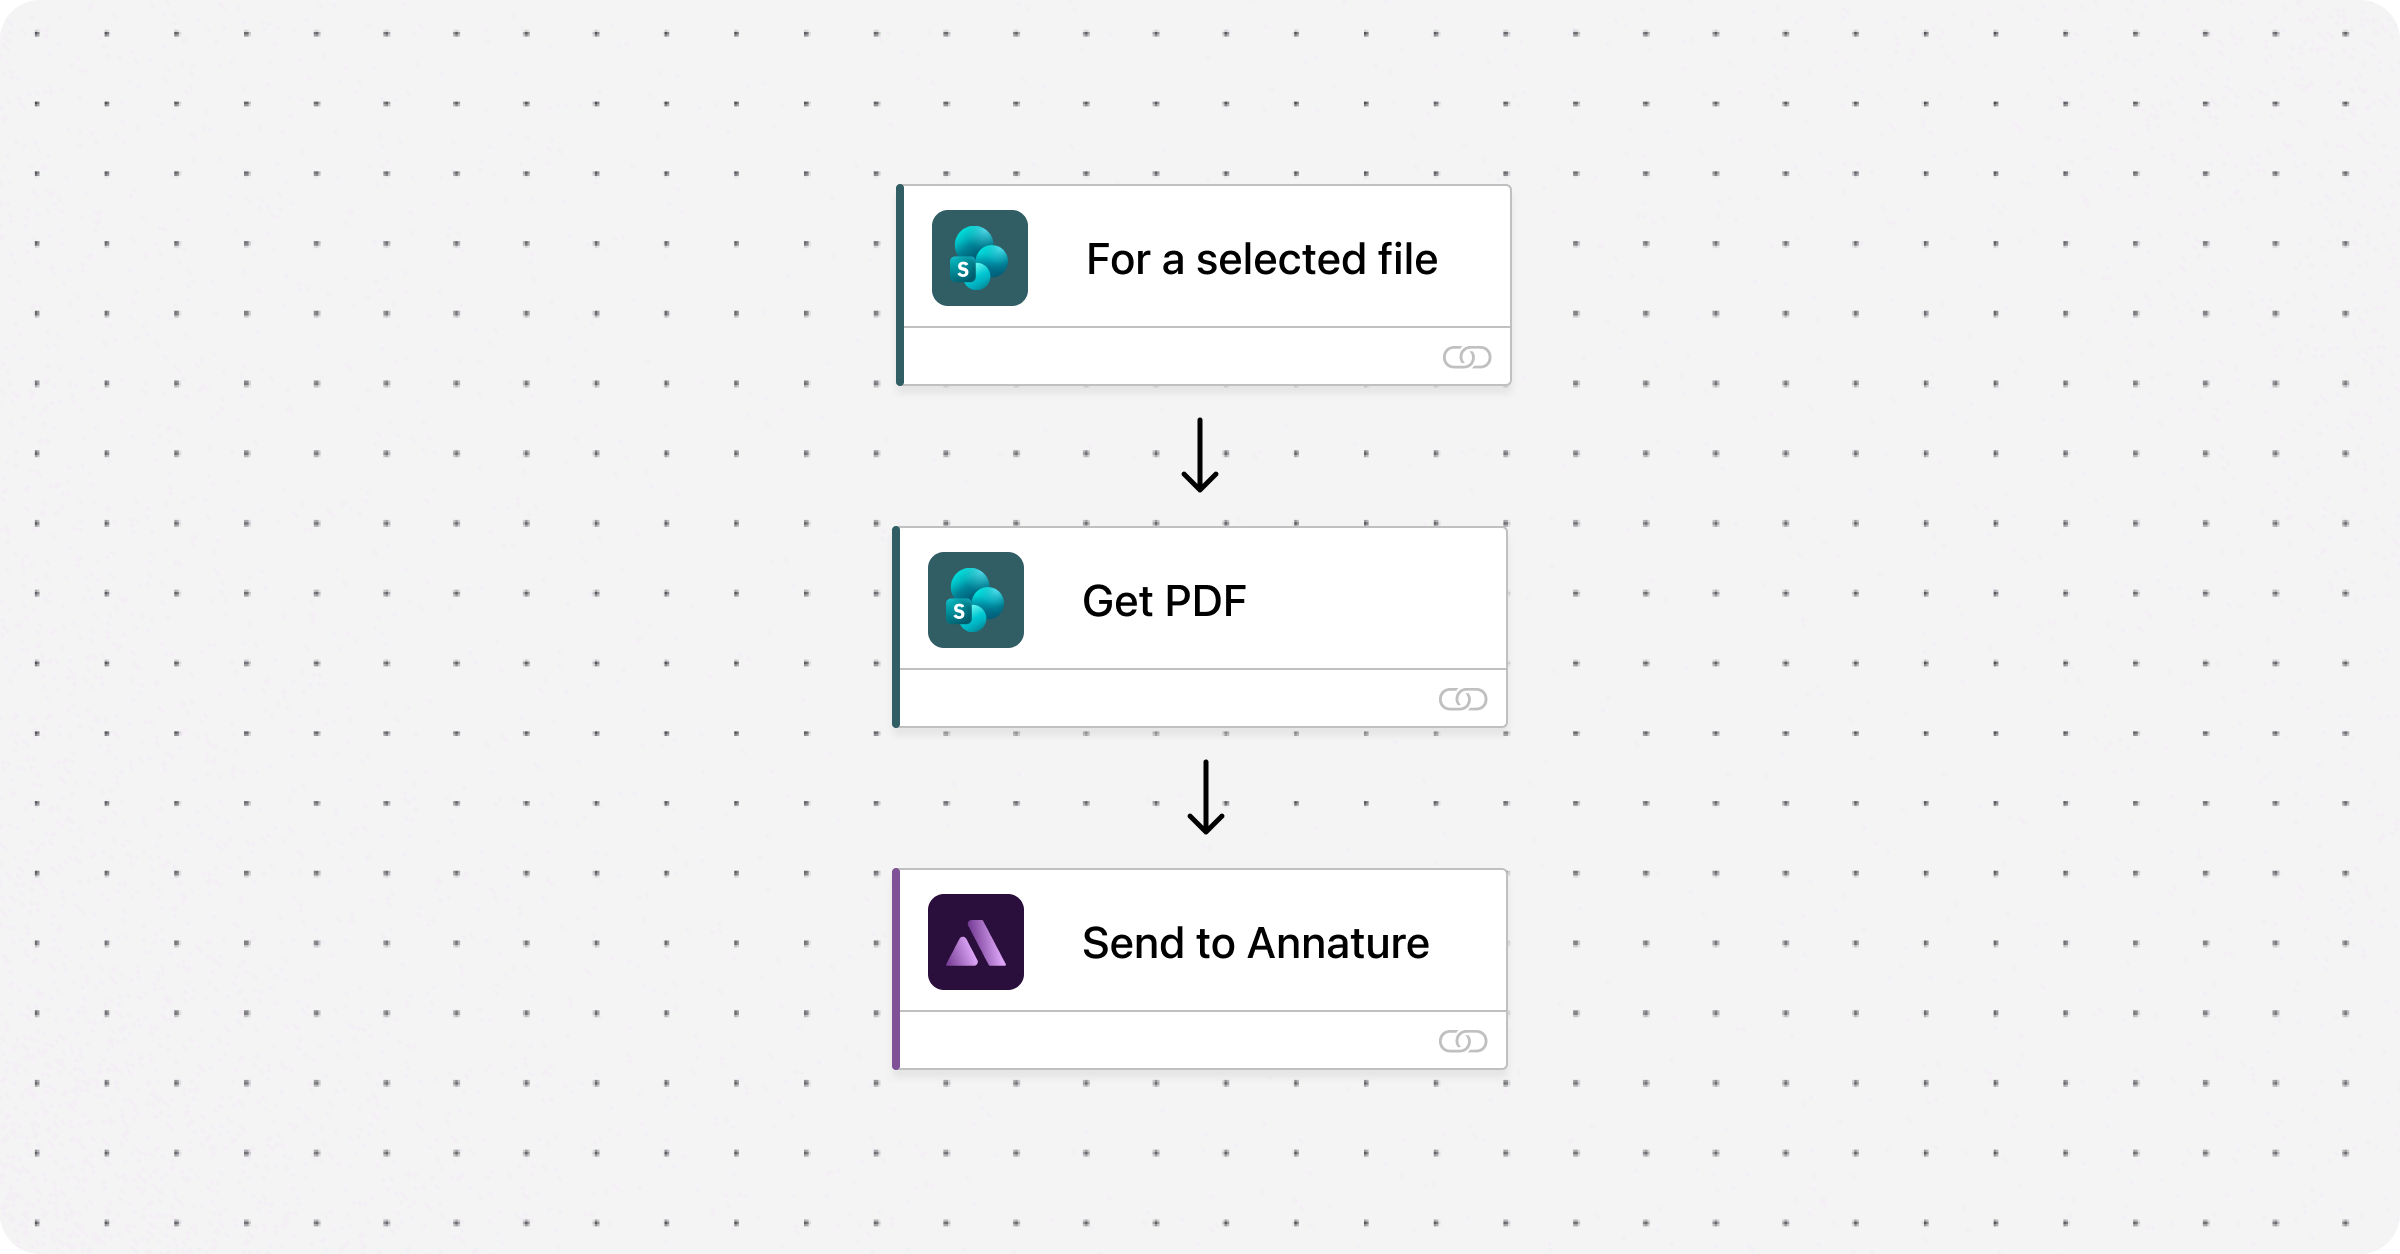
In this guide we build two flows that work together. Flow one uses a SharePoint trigger to create an envelope in Annature. Flow two uses an Annature trigger to push the completed document back into SharePoint.
What you'll need
A Microsoft Power Automate license assigned to the user creating the flows. If you don't have one, Power Automate will prompt you to request one from your admin.
An Annature account with access to Settings > Developers to generate an API key.
The SharePoint site you want to sync with.
Watch the walkthrough
The video covers the full setup from start to finish. If you'd prefer to follow written instructions, the complete step-by-step is below.
Written instructions
The setup is broken into two flows. You'll build them in order — Flow 1 sends documents from SharePoint to Annature, and Flow 2 sends signed documents back.
Generate your Annature API key
You'll need an Annature API key to connect Power Automate to your account. Generate this first so it's ready when Power Automate prompts for it.
In Annature, go to Settings > Developers.
Click Create new key in the top-right.
Name the key (for example, "Power Automate") and click Create.
Keep this tab open — you'll need to copy the ID and Key values shortly.
Notes: Treat your Annature API key like a password. Don't share it or paste it anywhere outside Power Automate.
Flow 1 — SharePoint to Annature
This flow gives you a button inside SharePoint that, when clicked on a selected file, creates a draft envelope in Annature with that file attached.
Create the flow
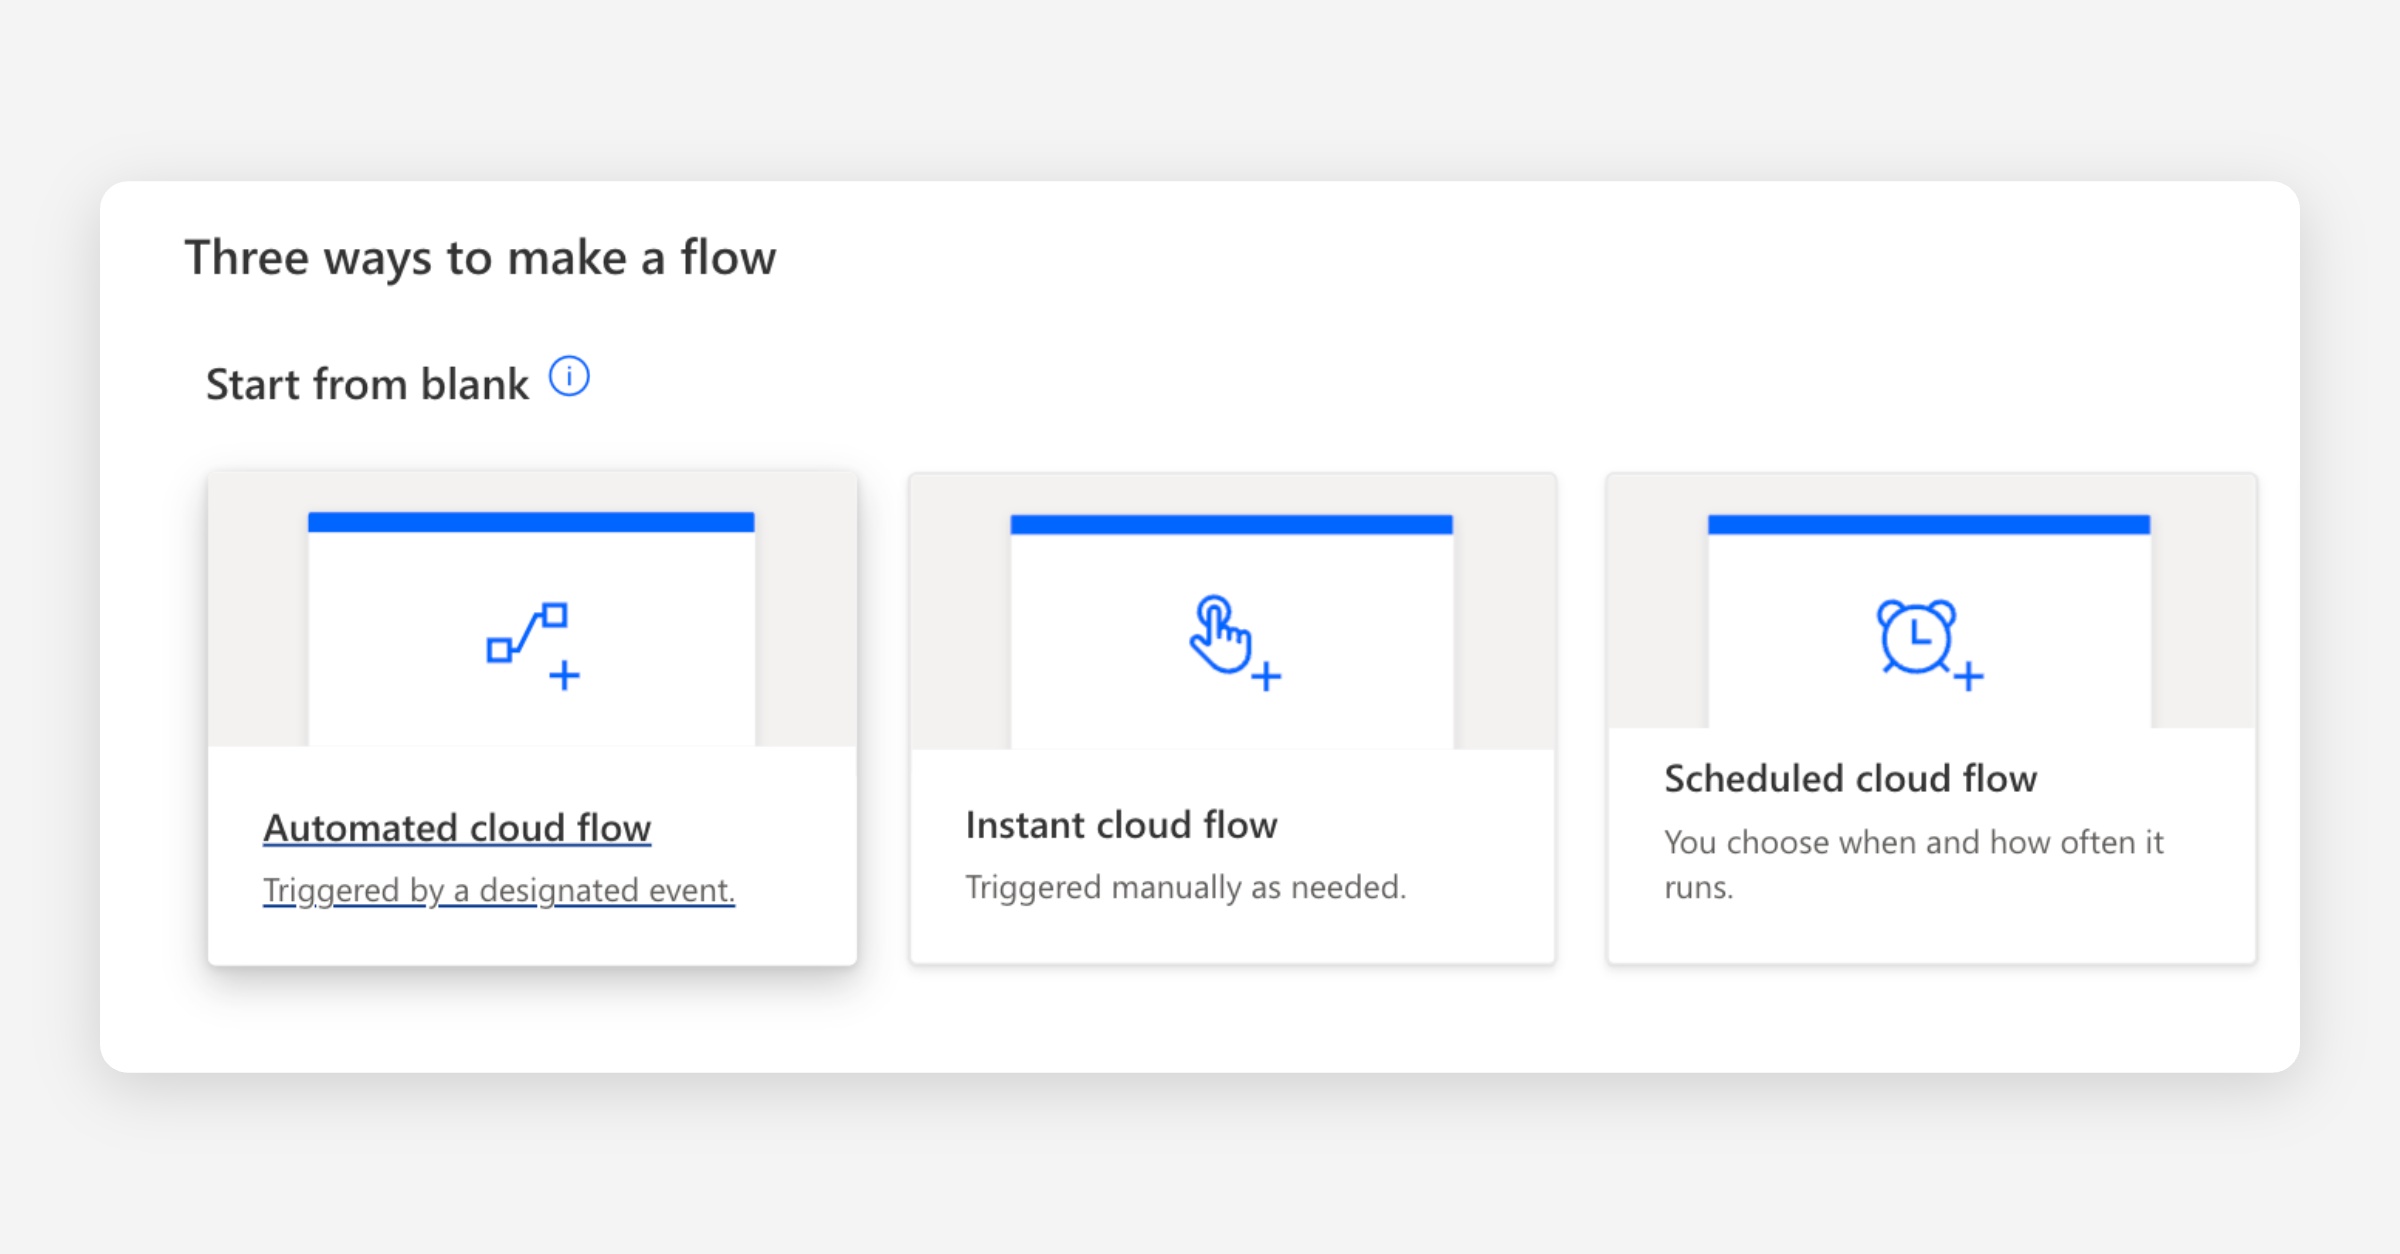
Open Power Automate and click Create in the left-hand menu.
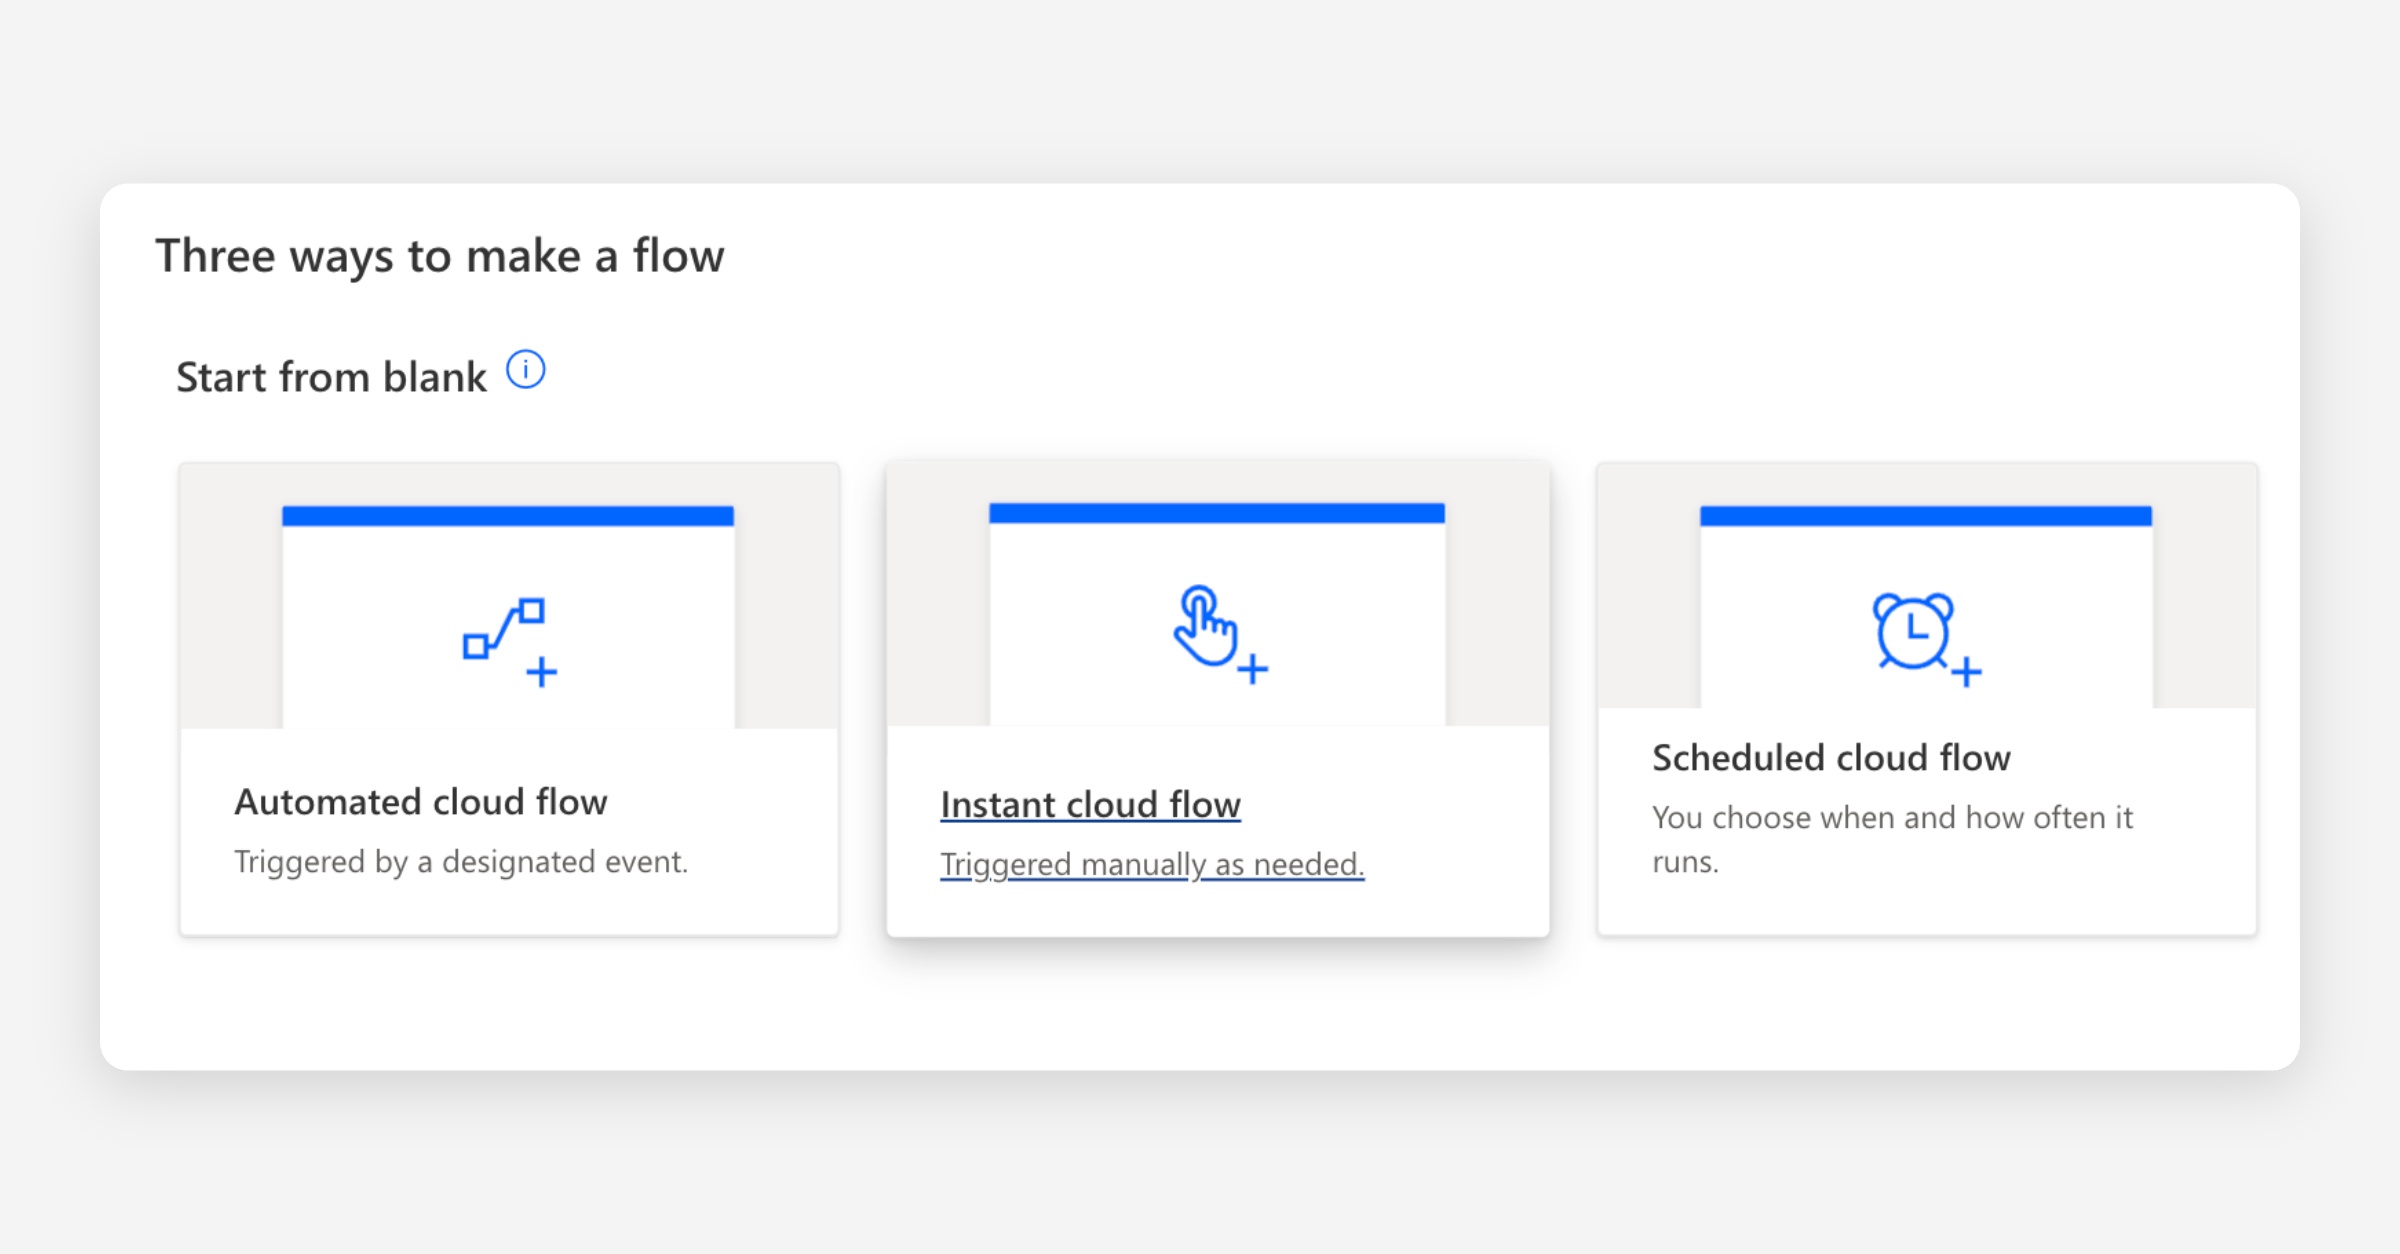
Choose Instant cloud flow.
Give the flow a name, for example "Send to Annature from SharePoint".
In the trigger list, find the SharePoint trigger called For a selected file and select it.

Click Create.
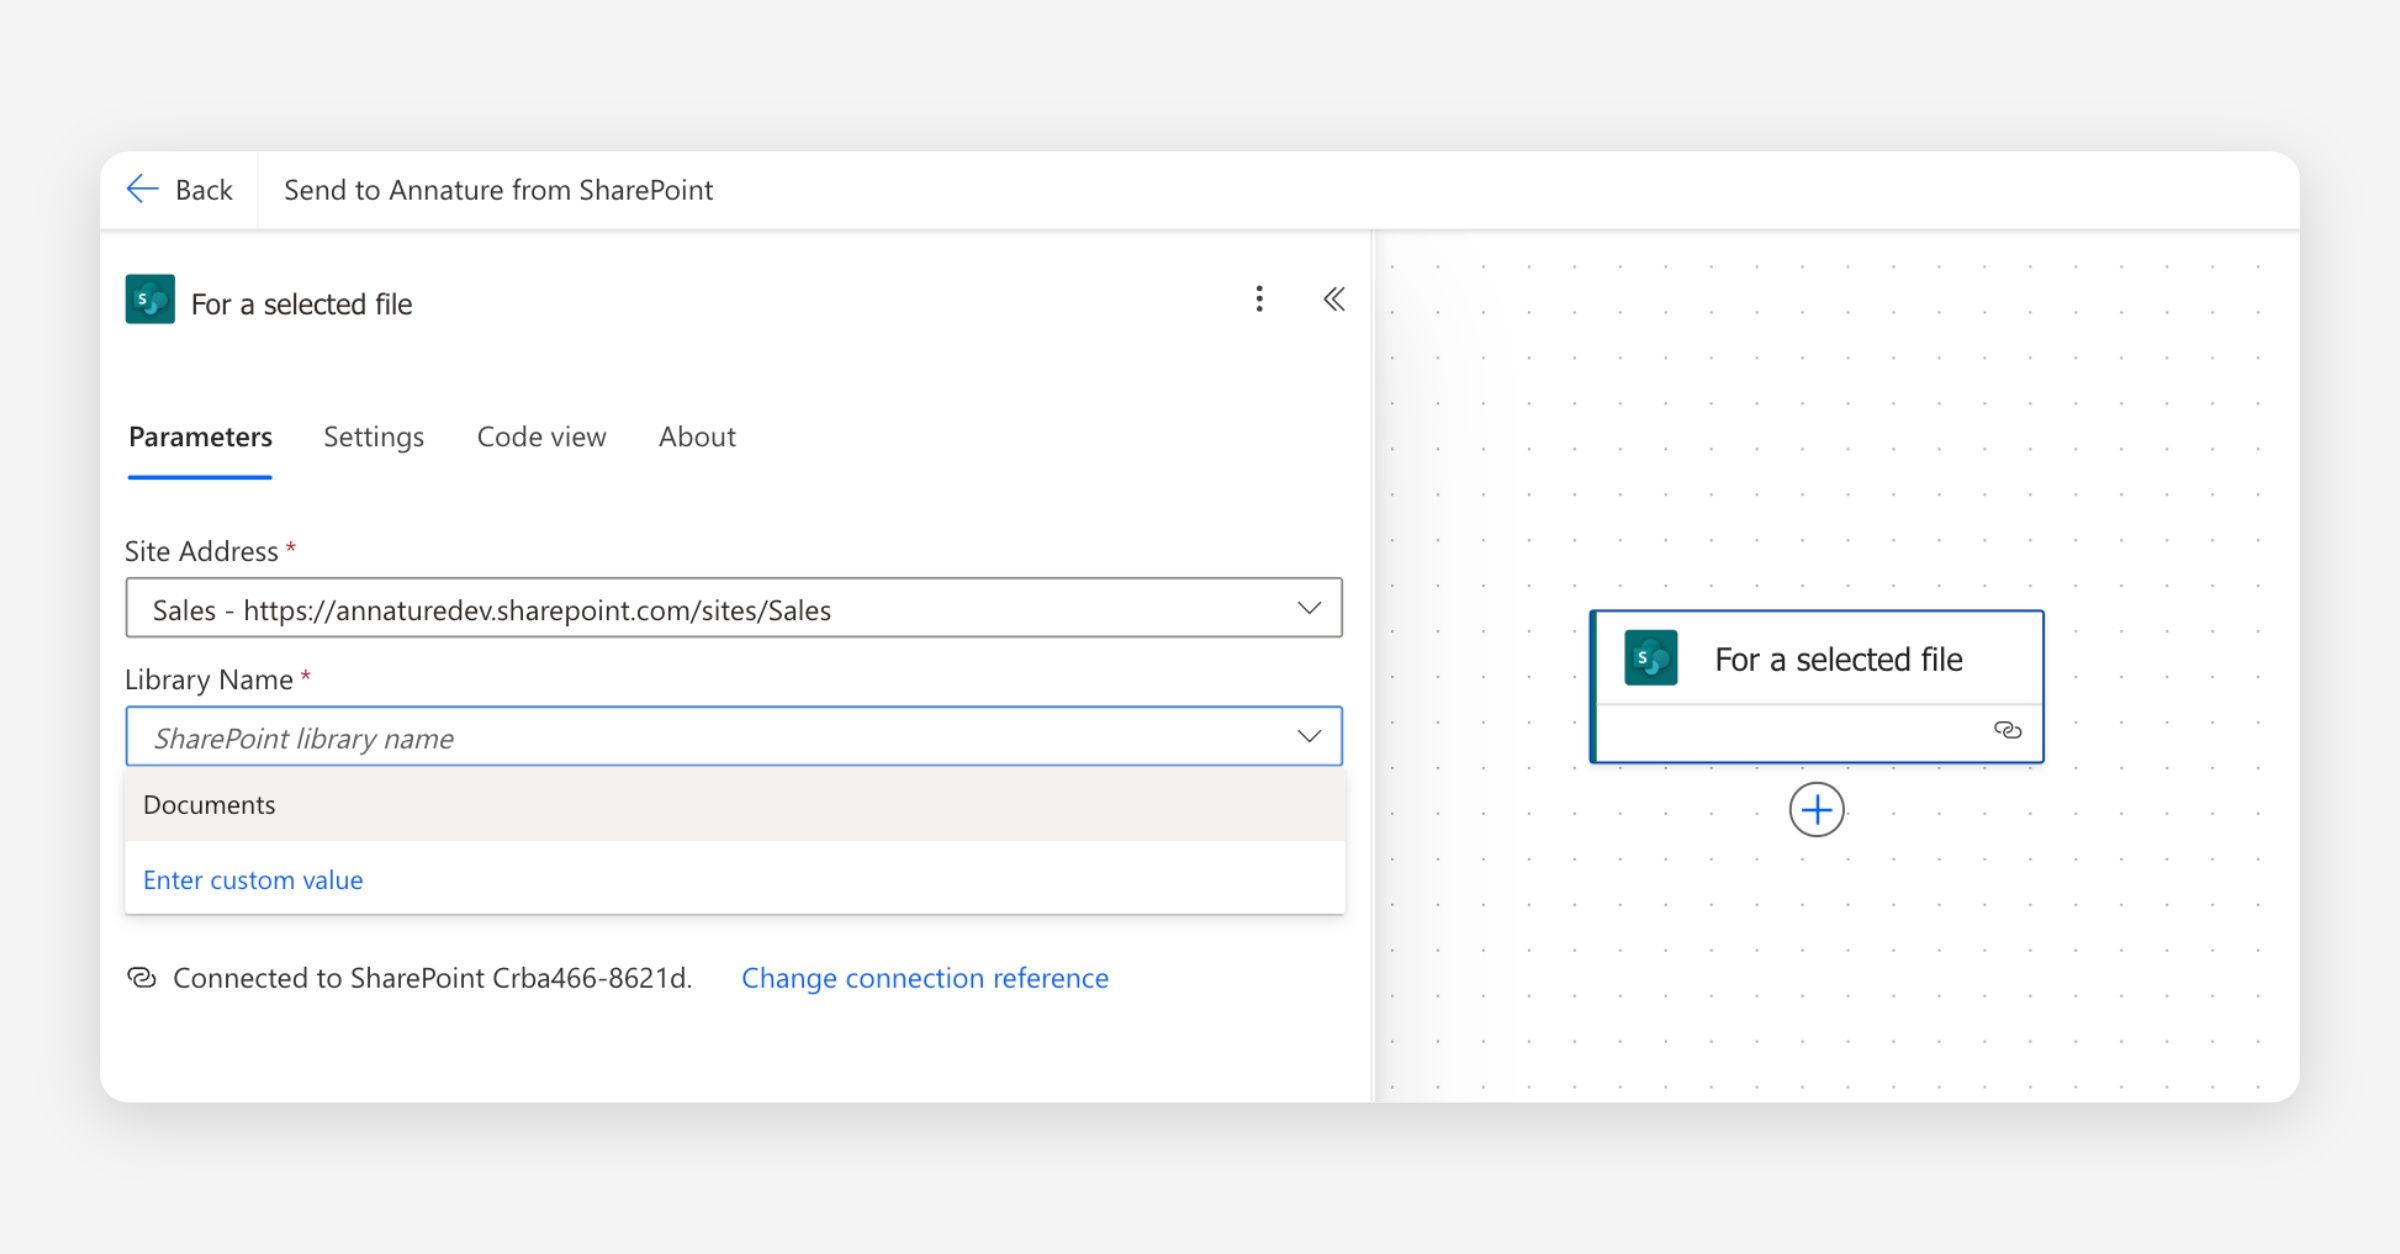
Configure the trigger
Click the trigger to expand it.
For Site address, select the SharePoint site you want to use.
For Library name, select Documents (this is usually the default option).
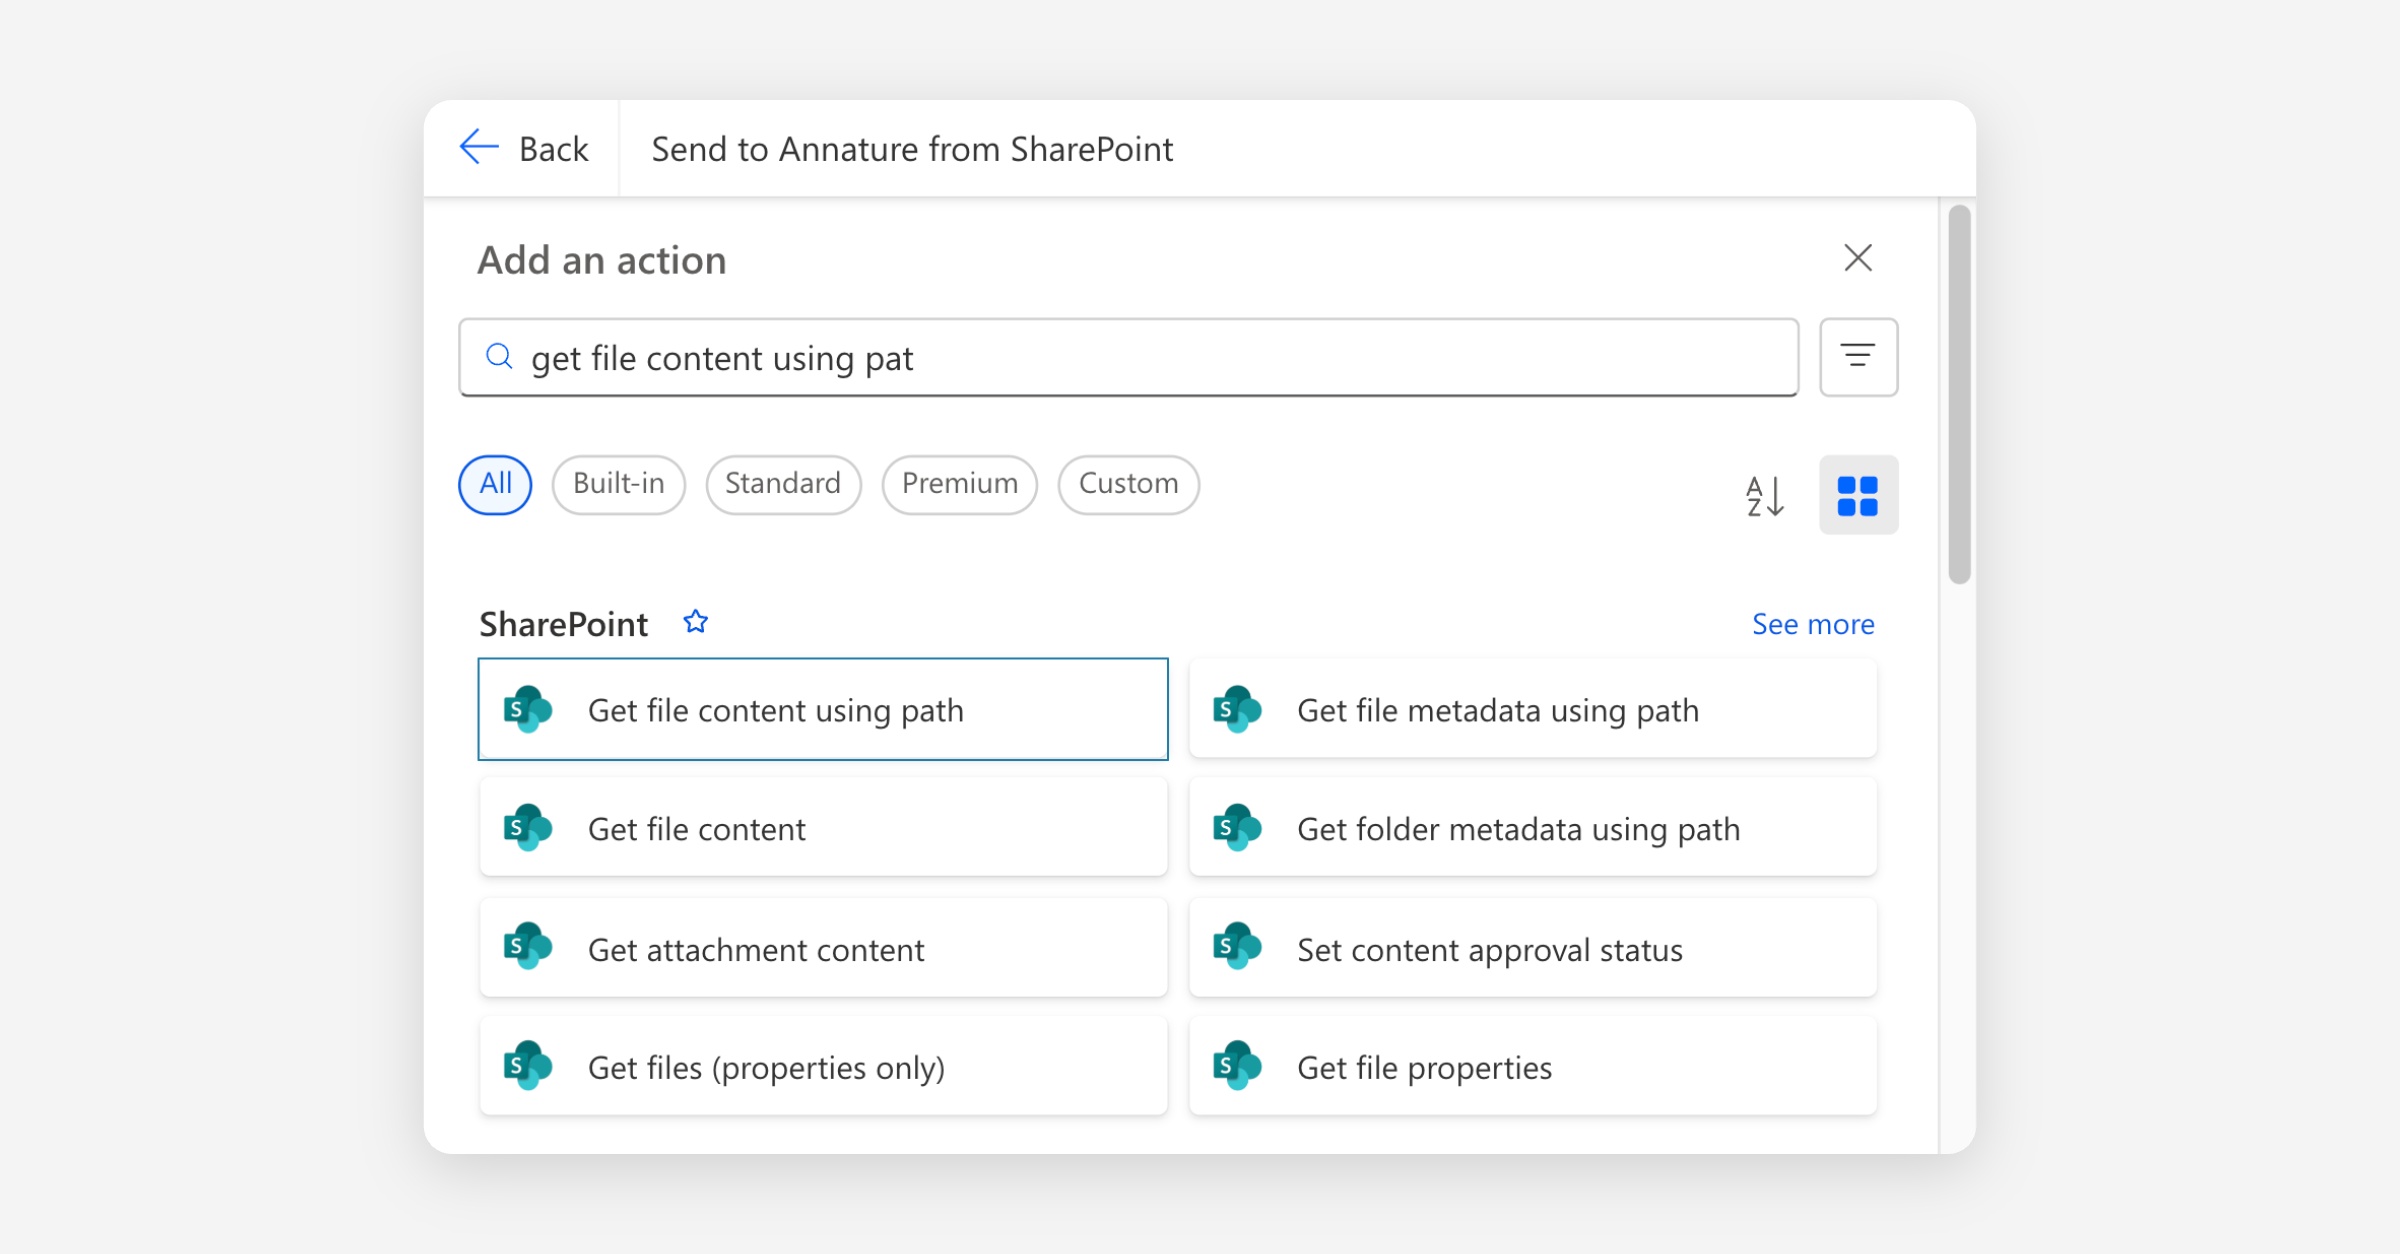
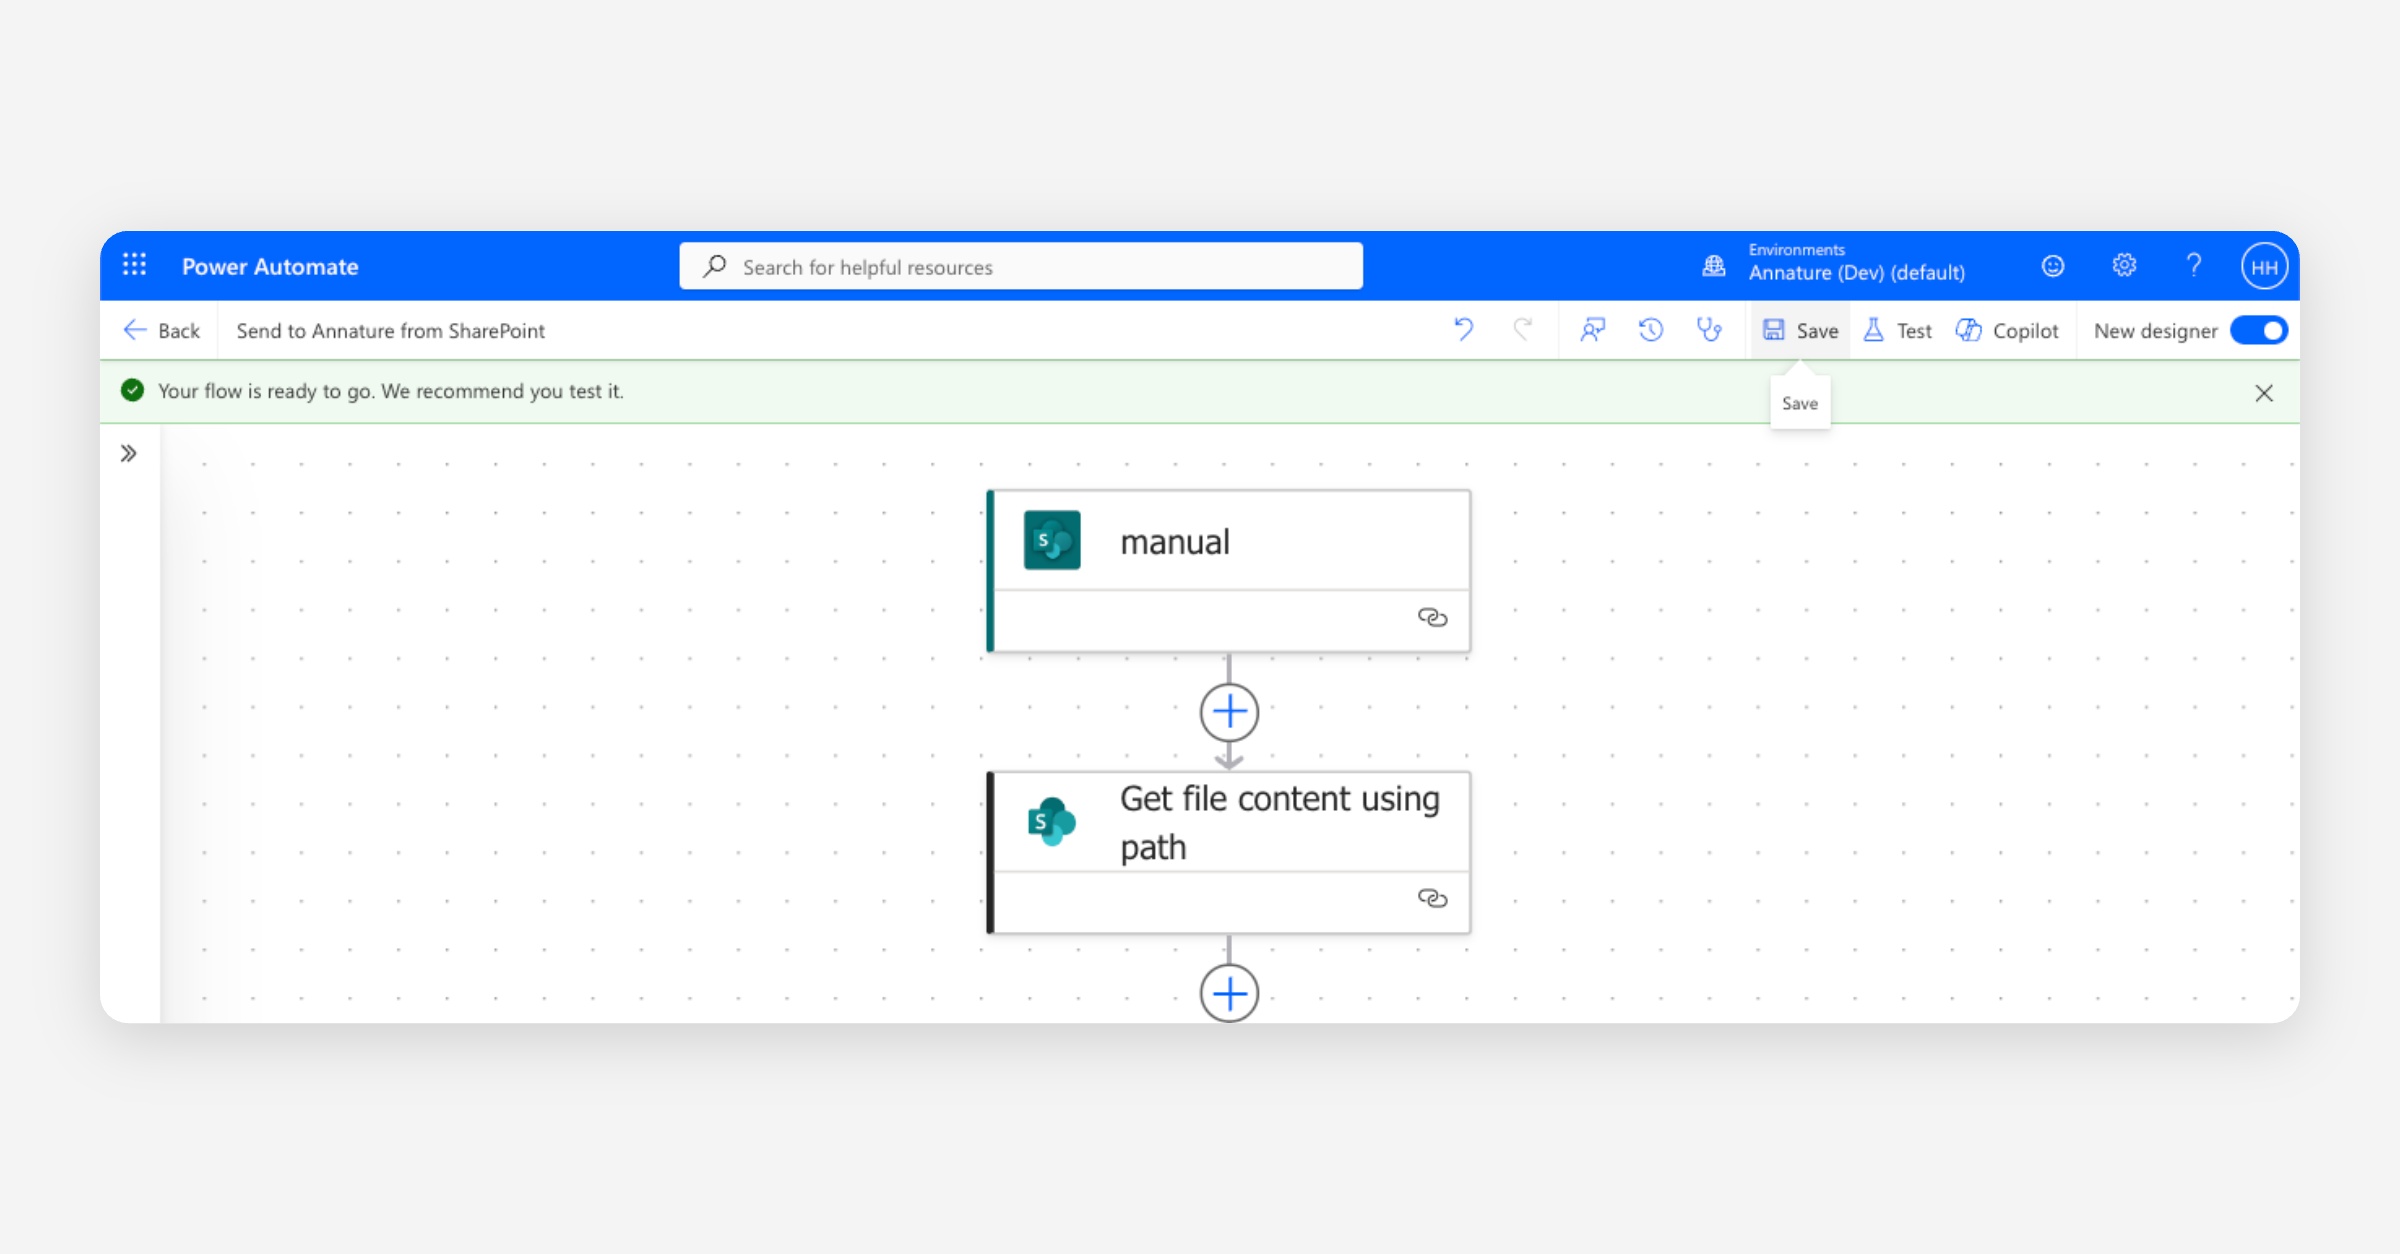
Add the Get file content action
Click the plus button below the trigger to add a new action.
Search for Get file content using path and select the SharePoint action with that name.
Set Site Address to the same SharePoint site as the trigger.
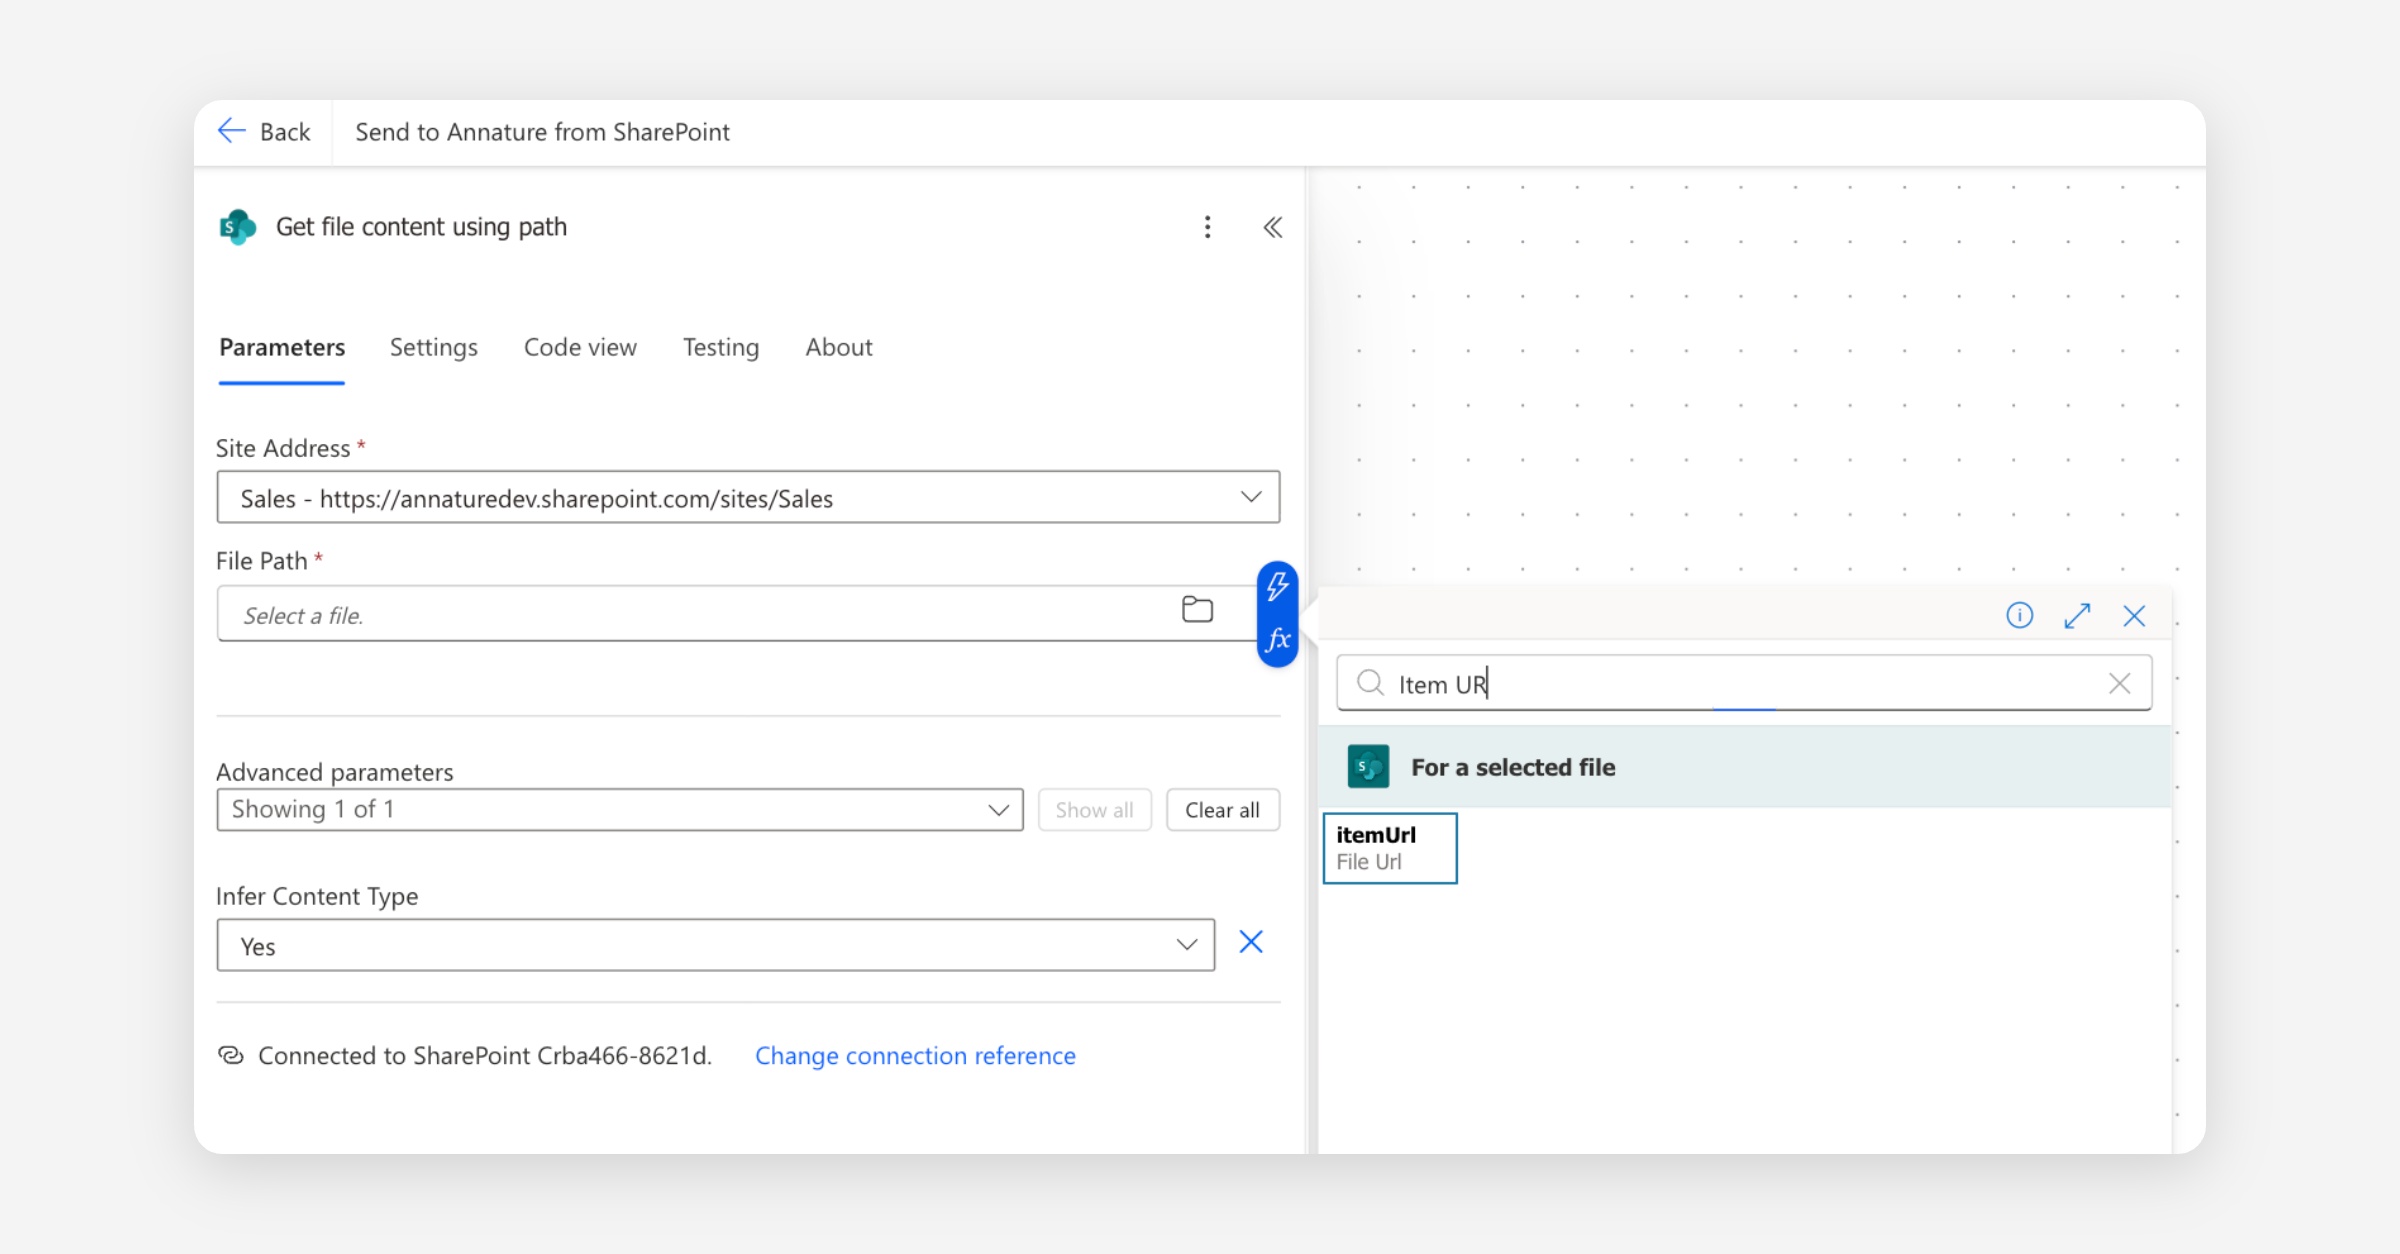
Click into the File Path field and use the dynamic content picker to select itemUrl from the manual trigger.
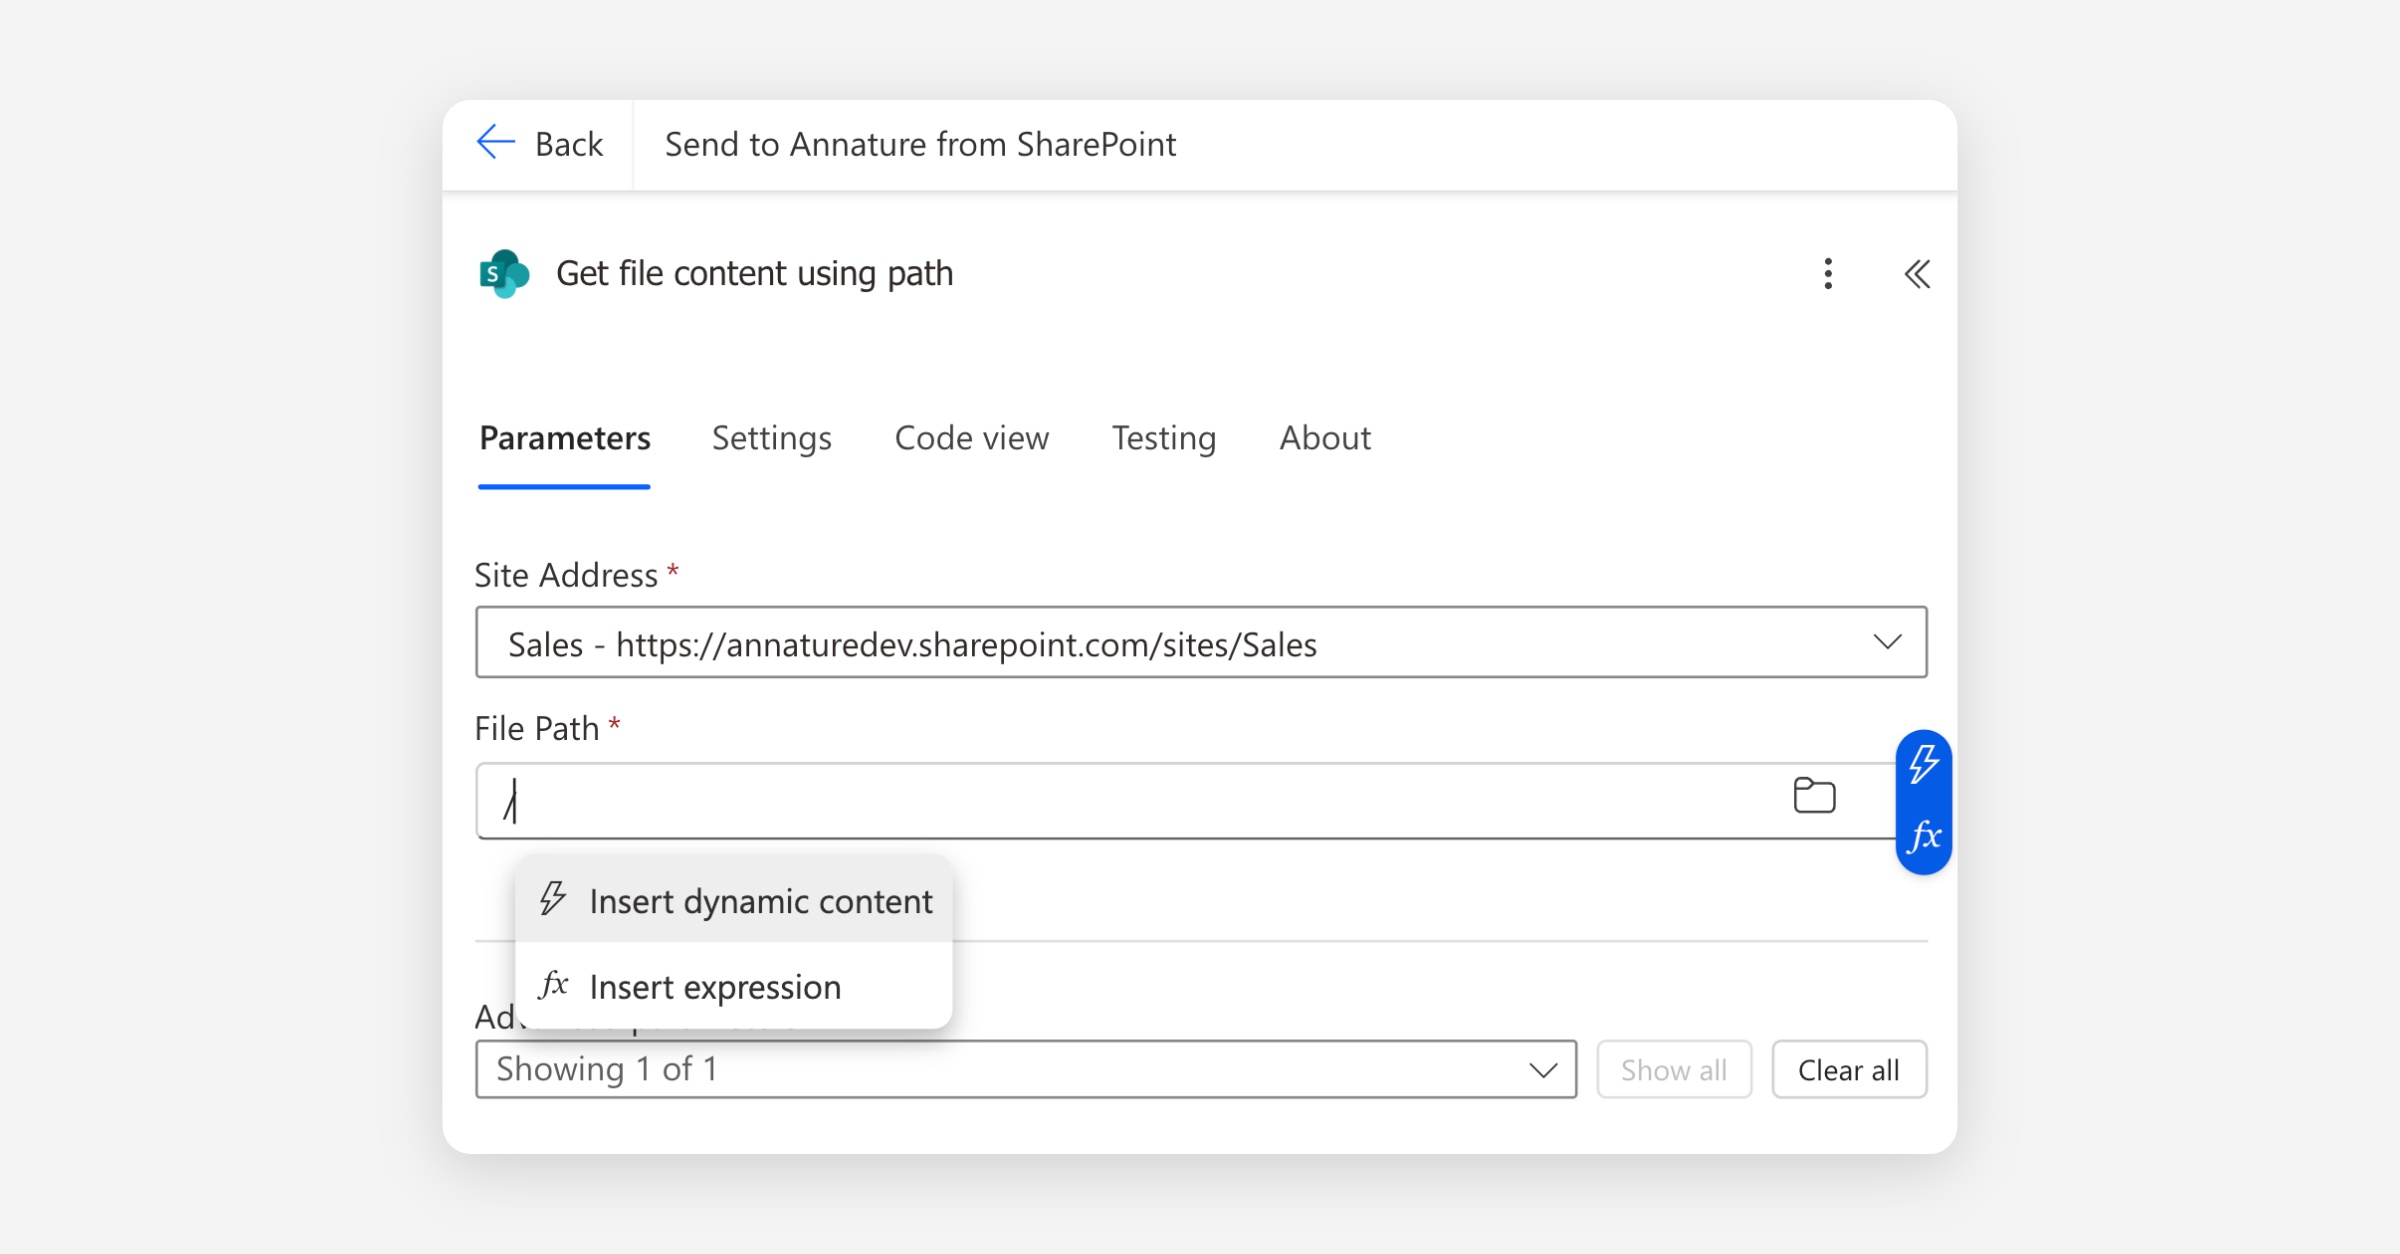
Expand Advanced parameters and set Infer Content Type to Yes.
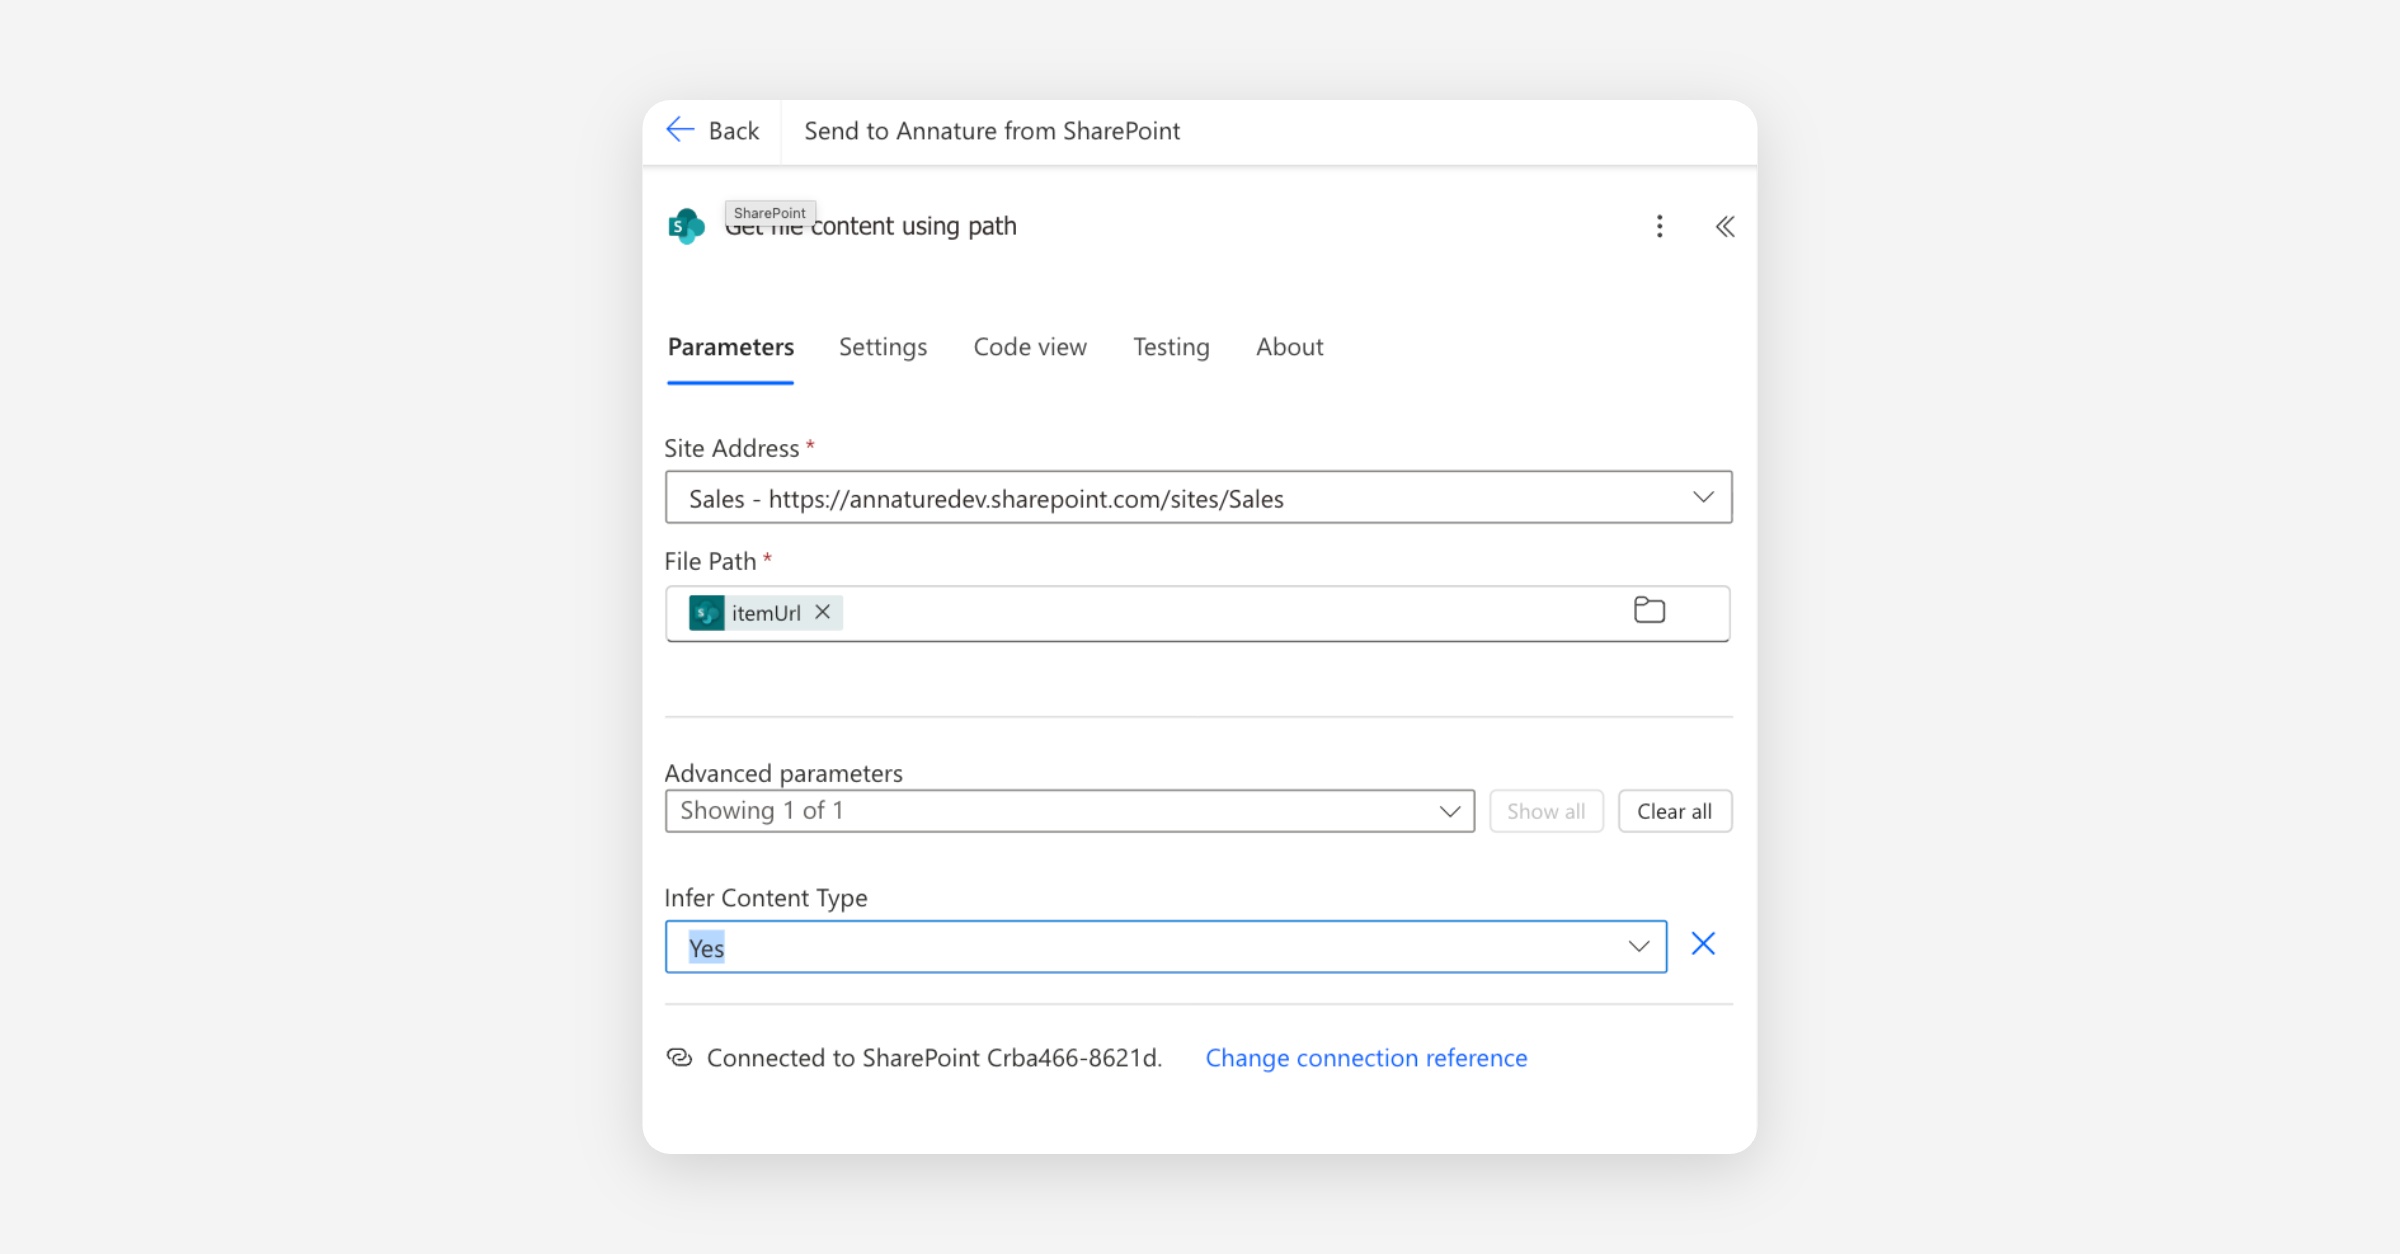
This passes the path of the selected file from SharePoint into the action so it can be retrieved.
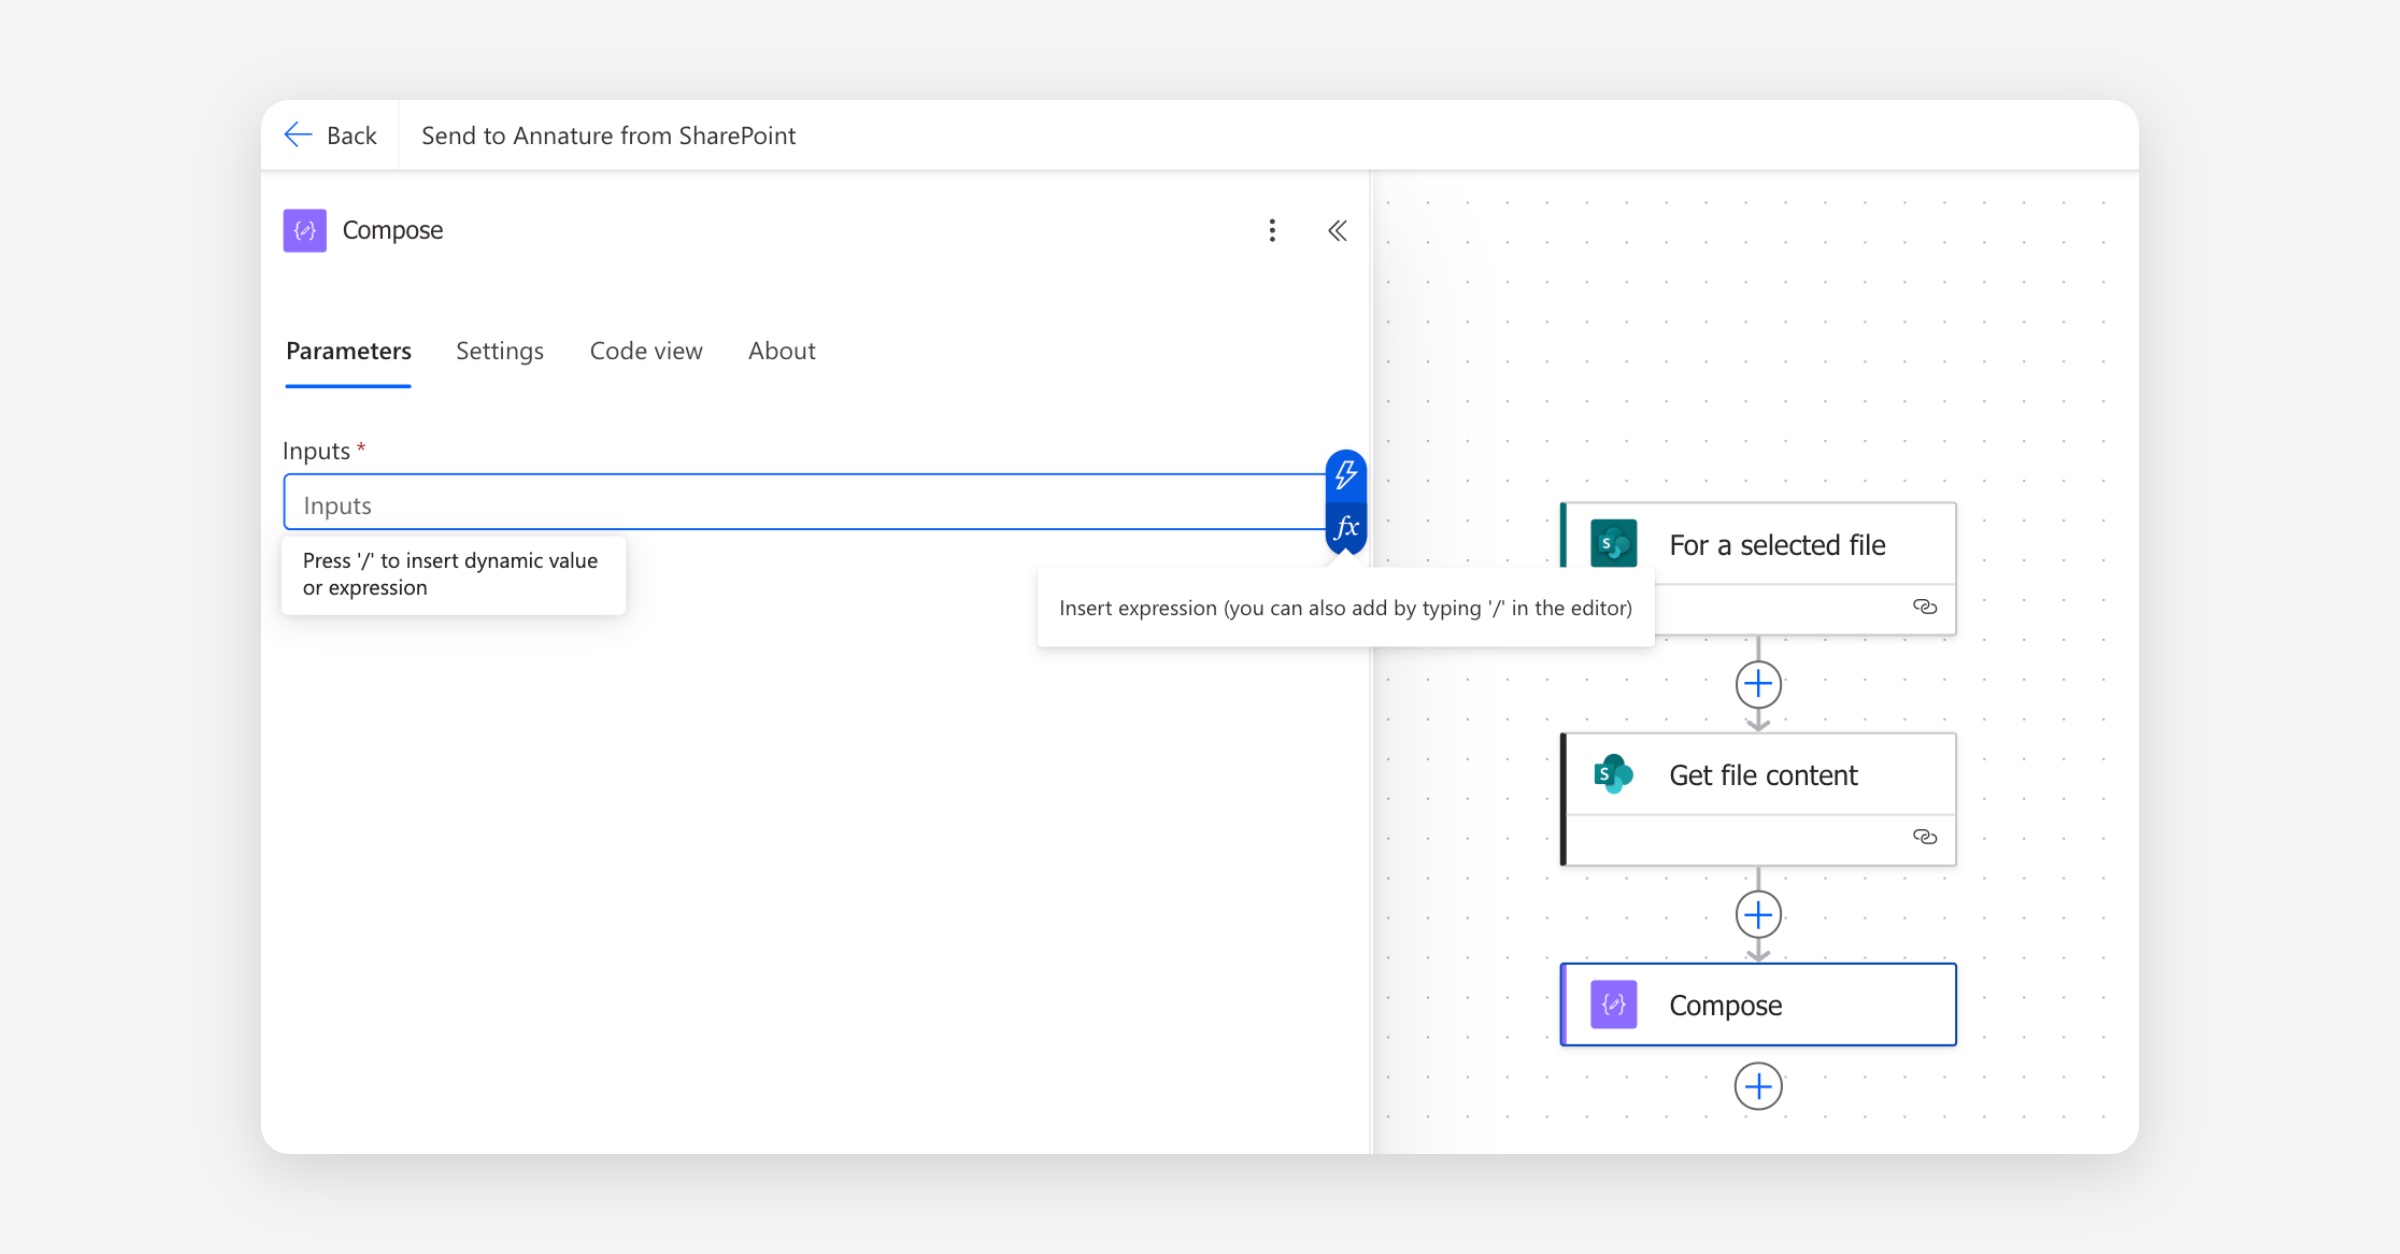
Add the Compose action
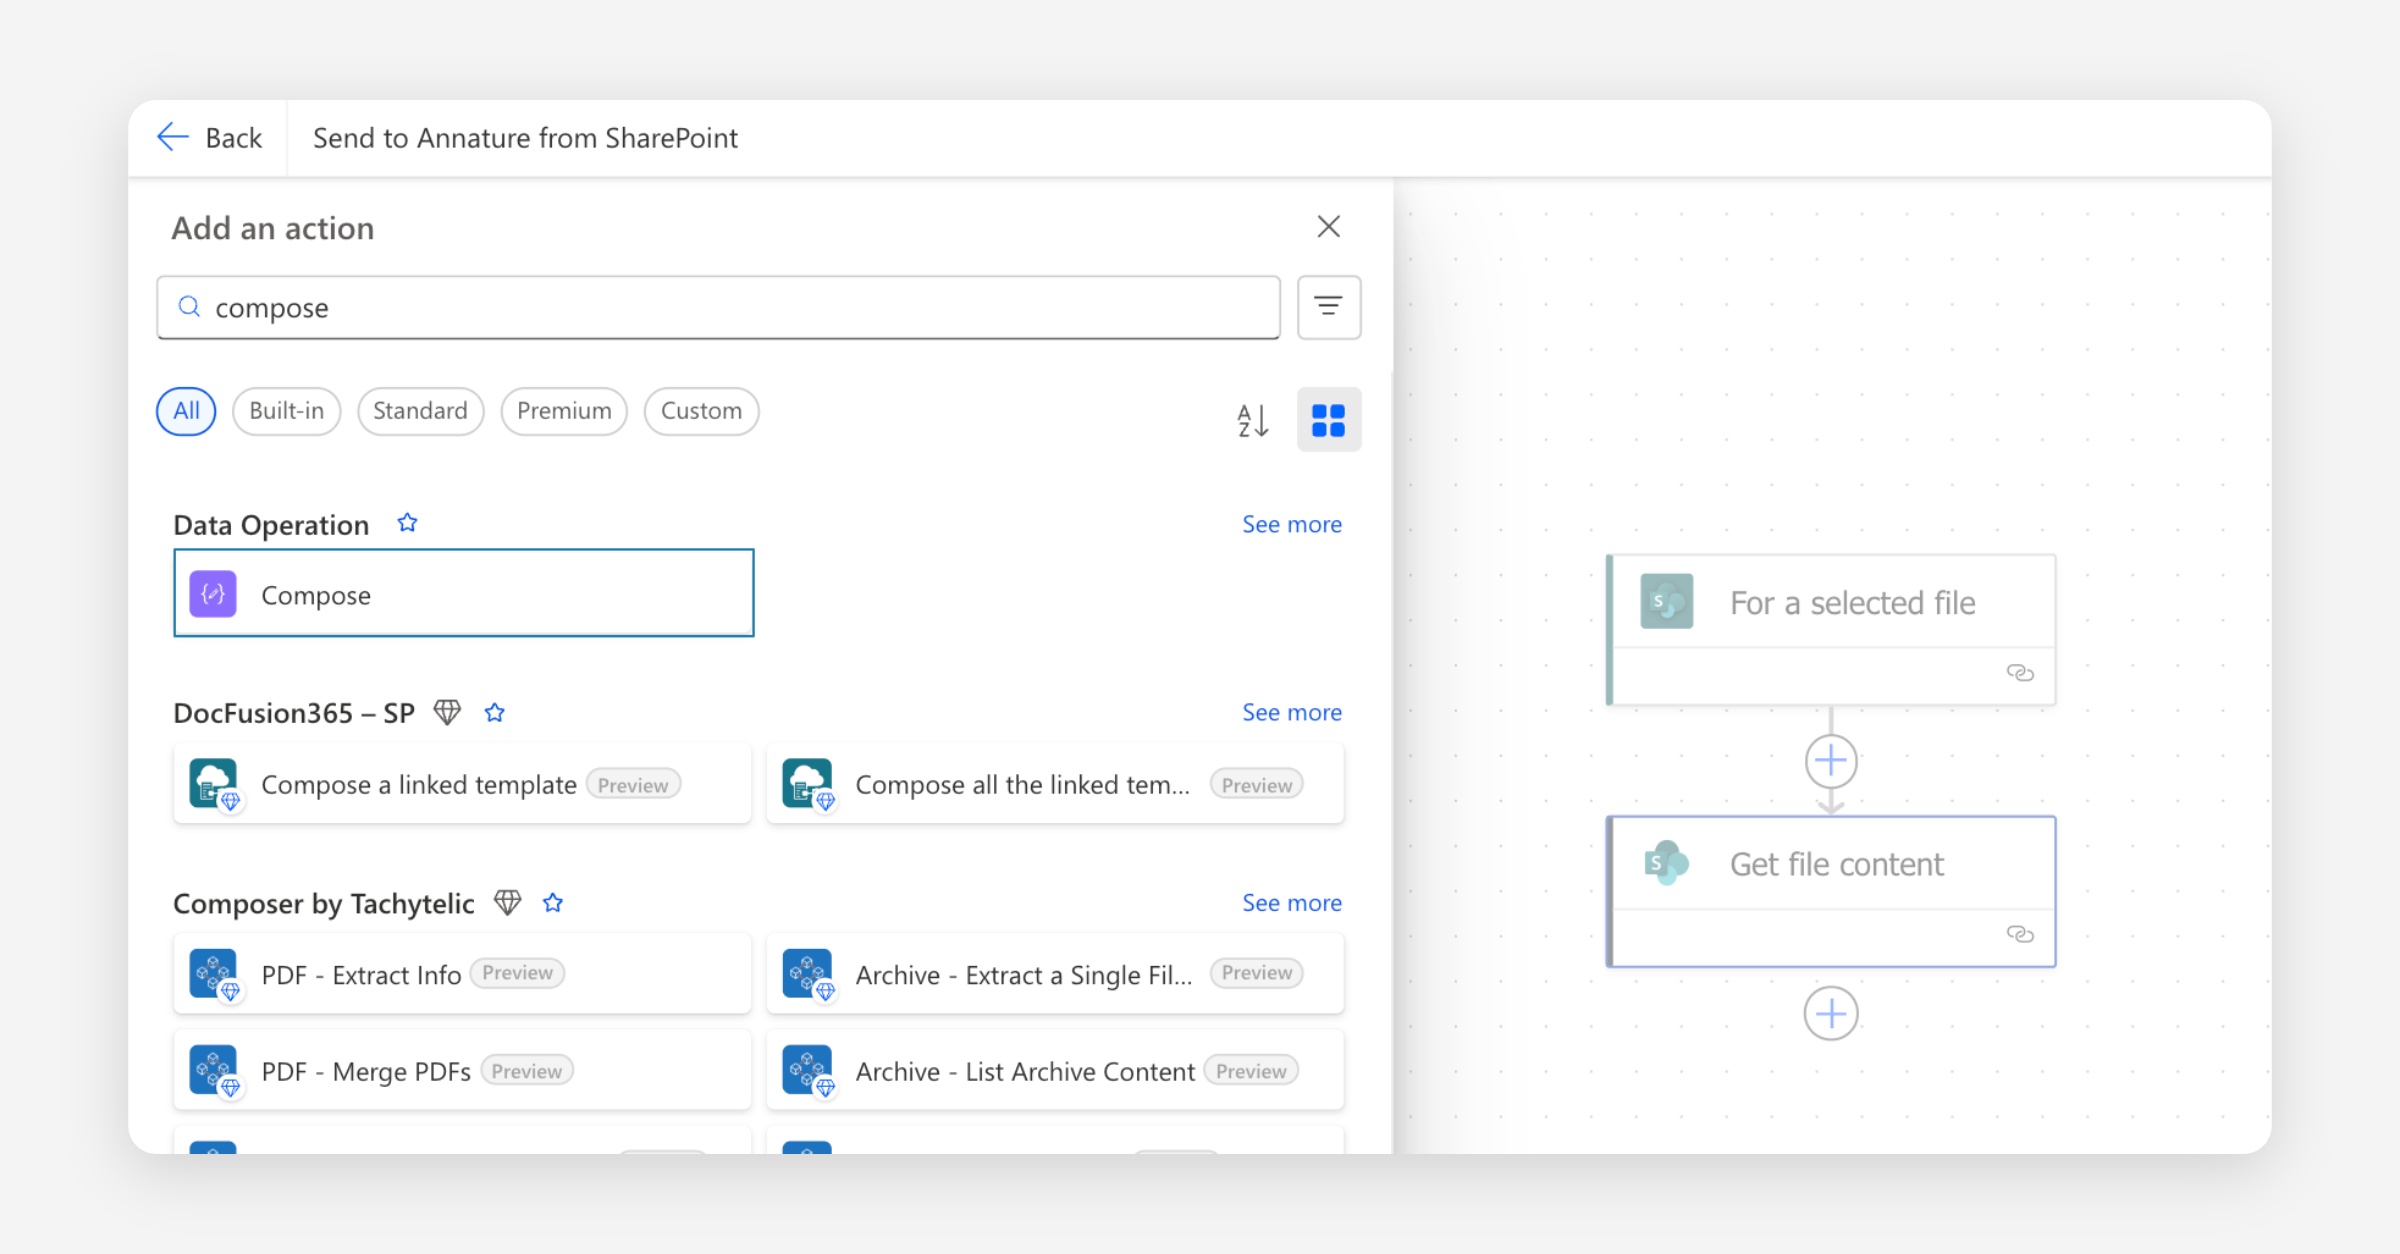
Click the plus button below the previous action.
Search for Compose and select it.
Click the fx icon next to the Inputs field.
Paste in the following expression and click Add:
base64(body('Get_file_content_using_path'))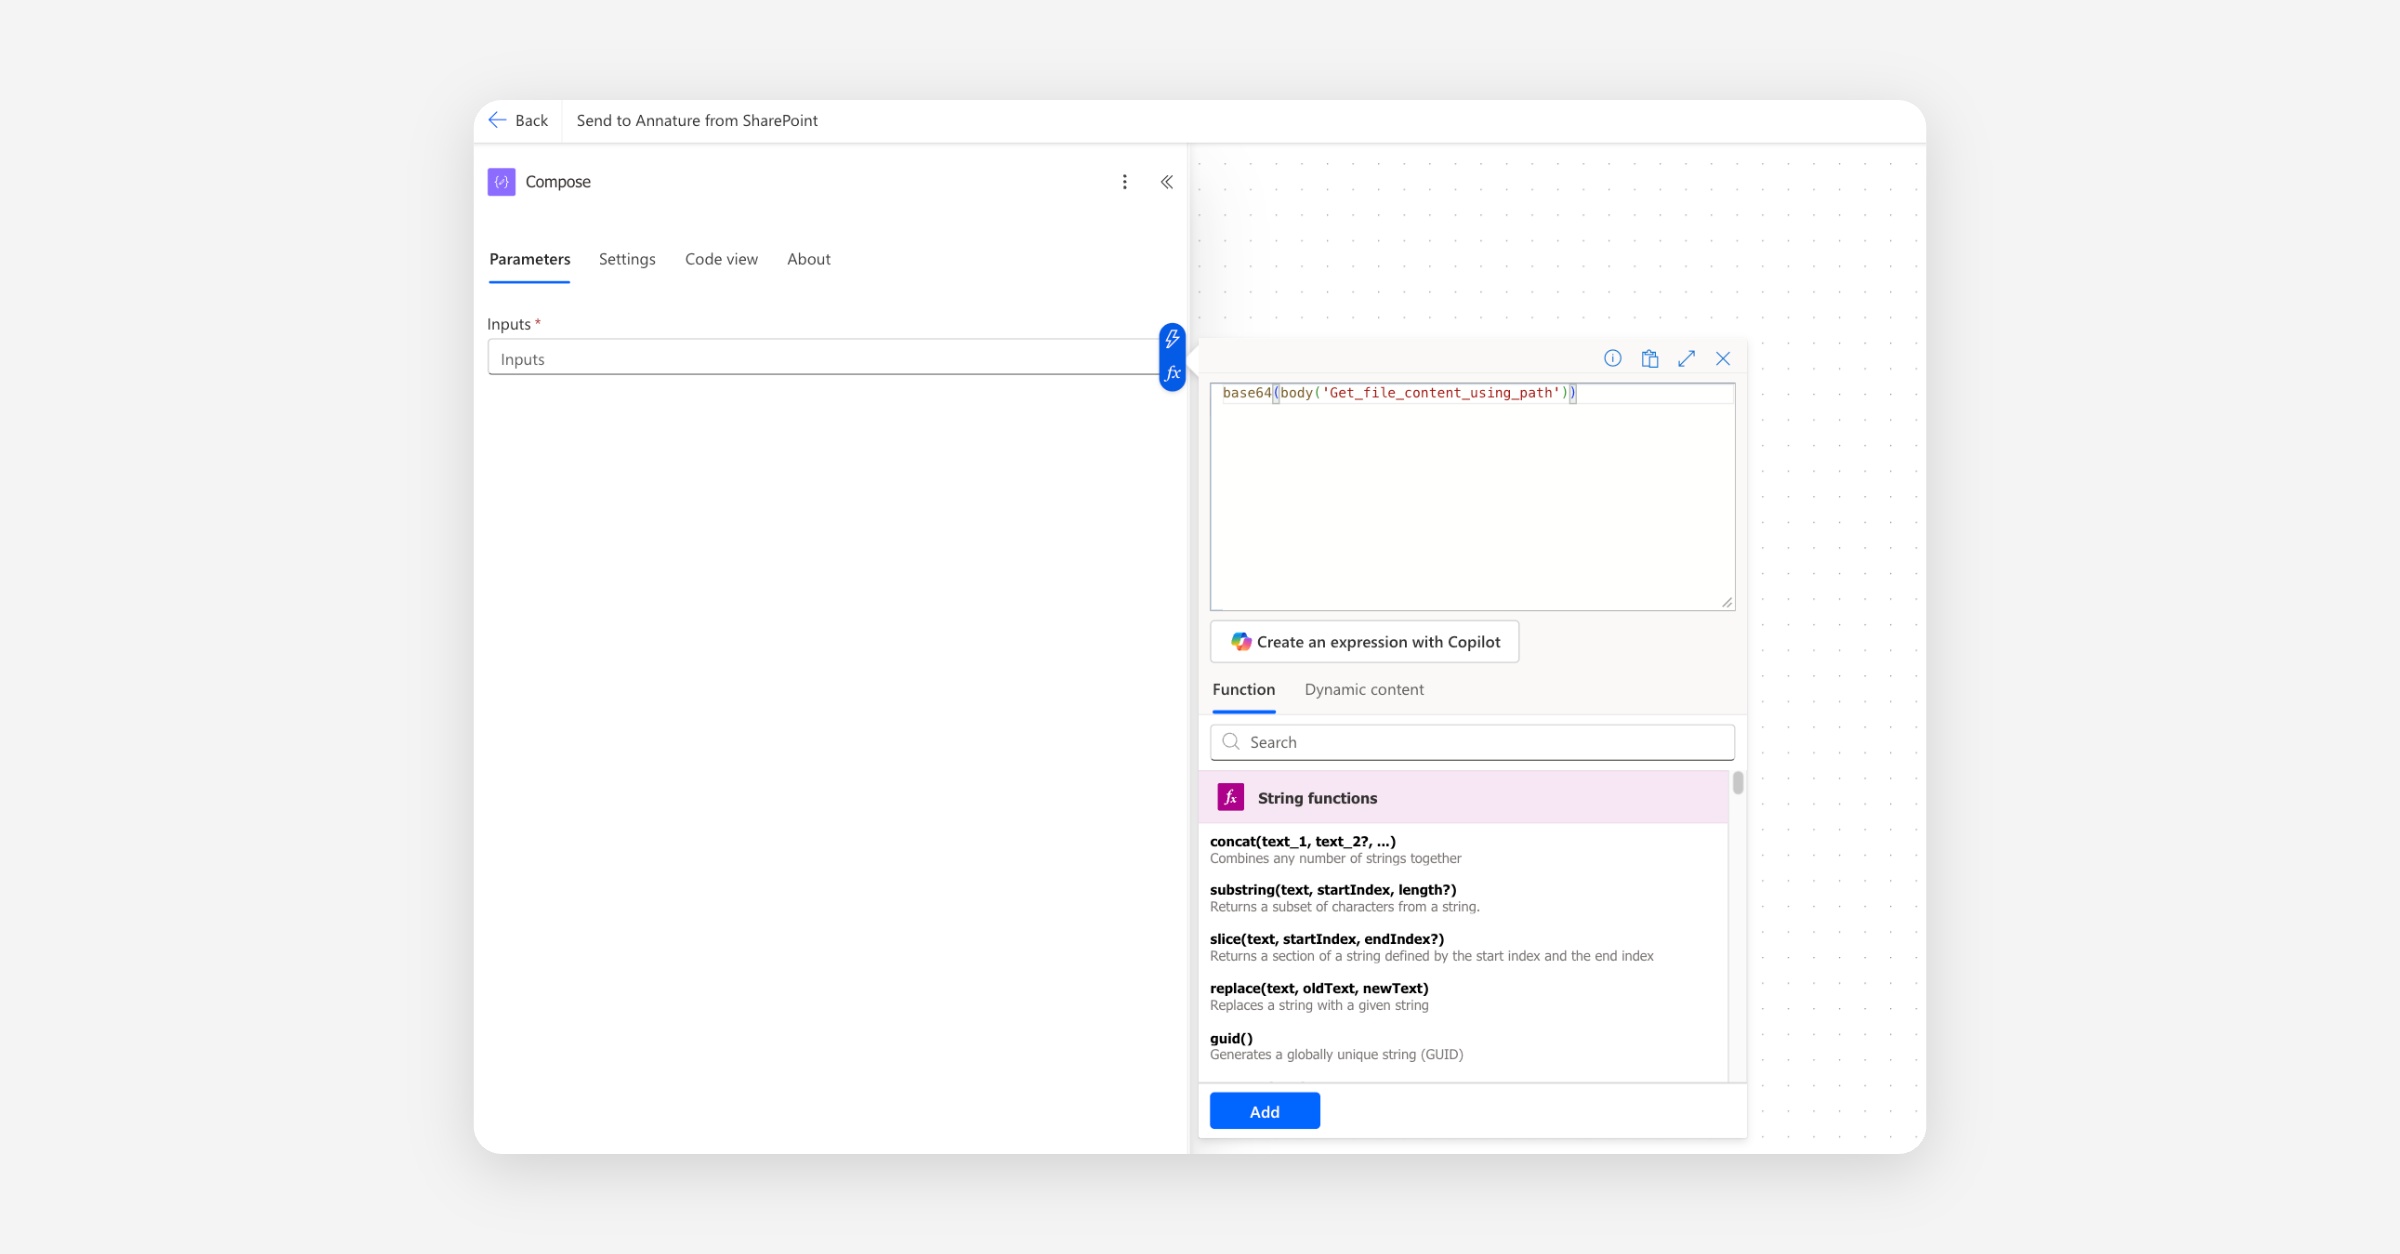
This converts the document into a base64 string, which is the format Annature requires.
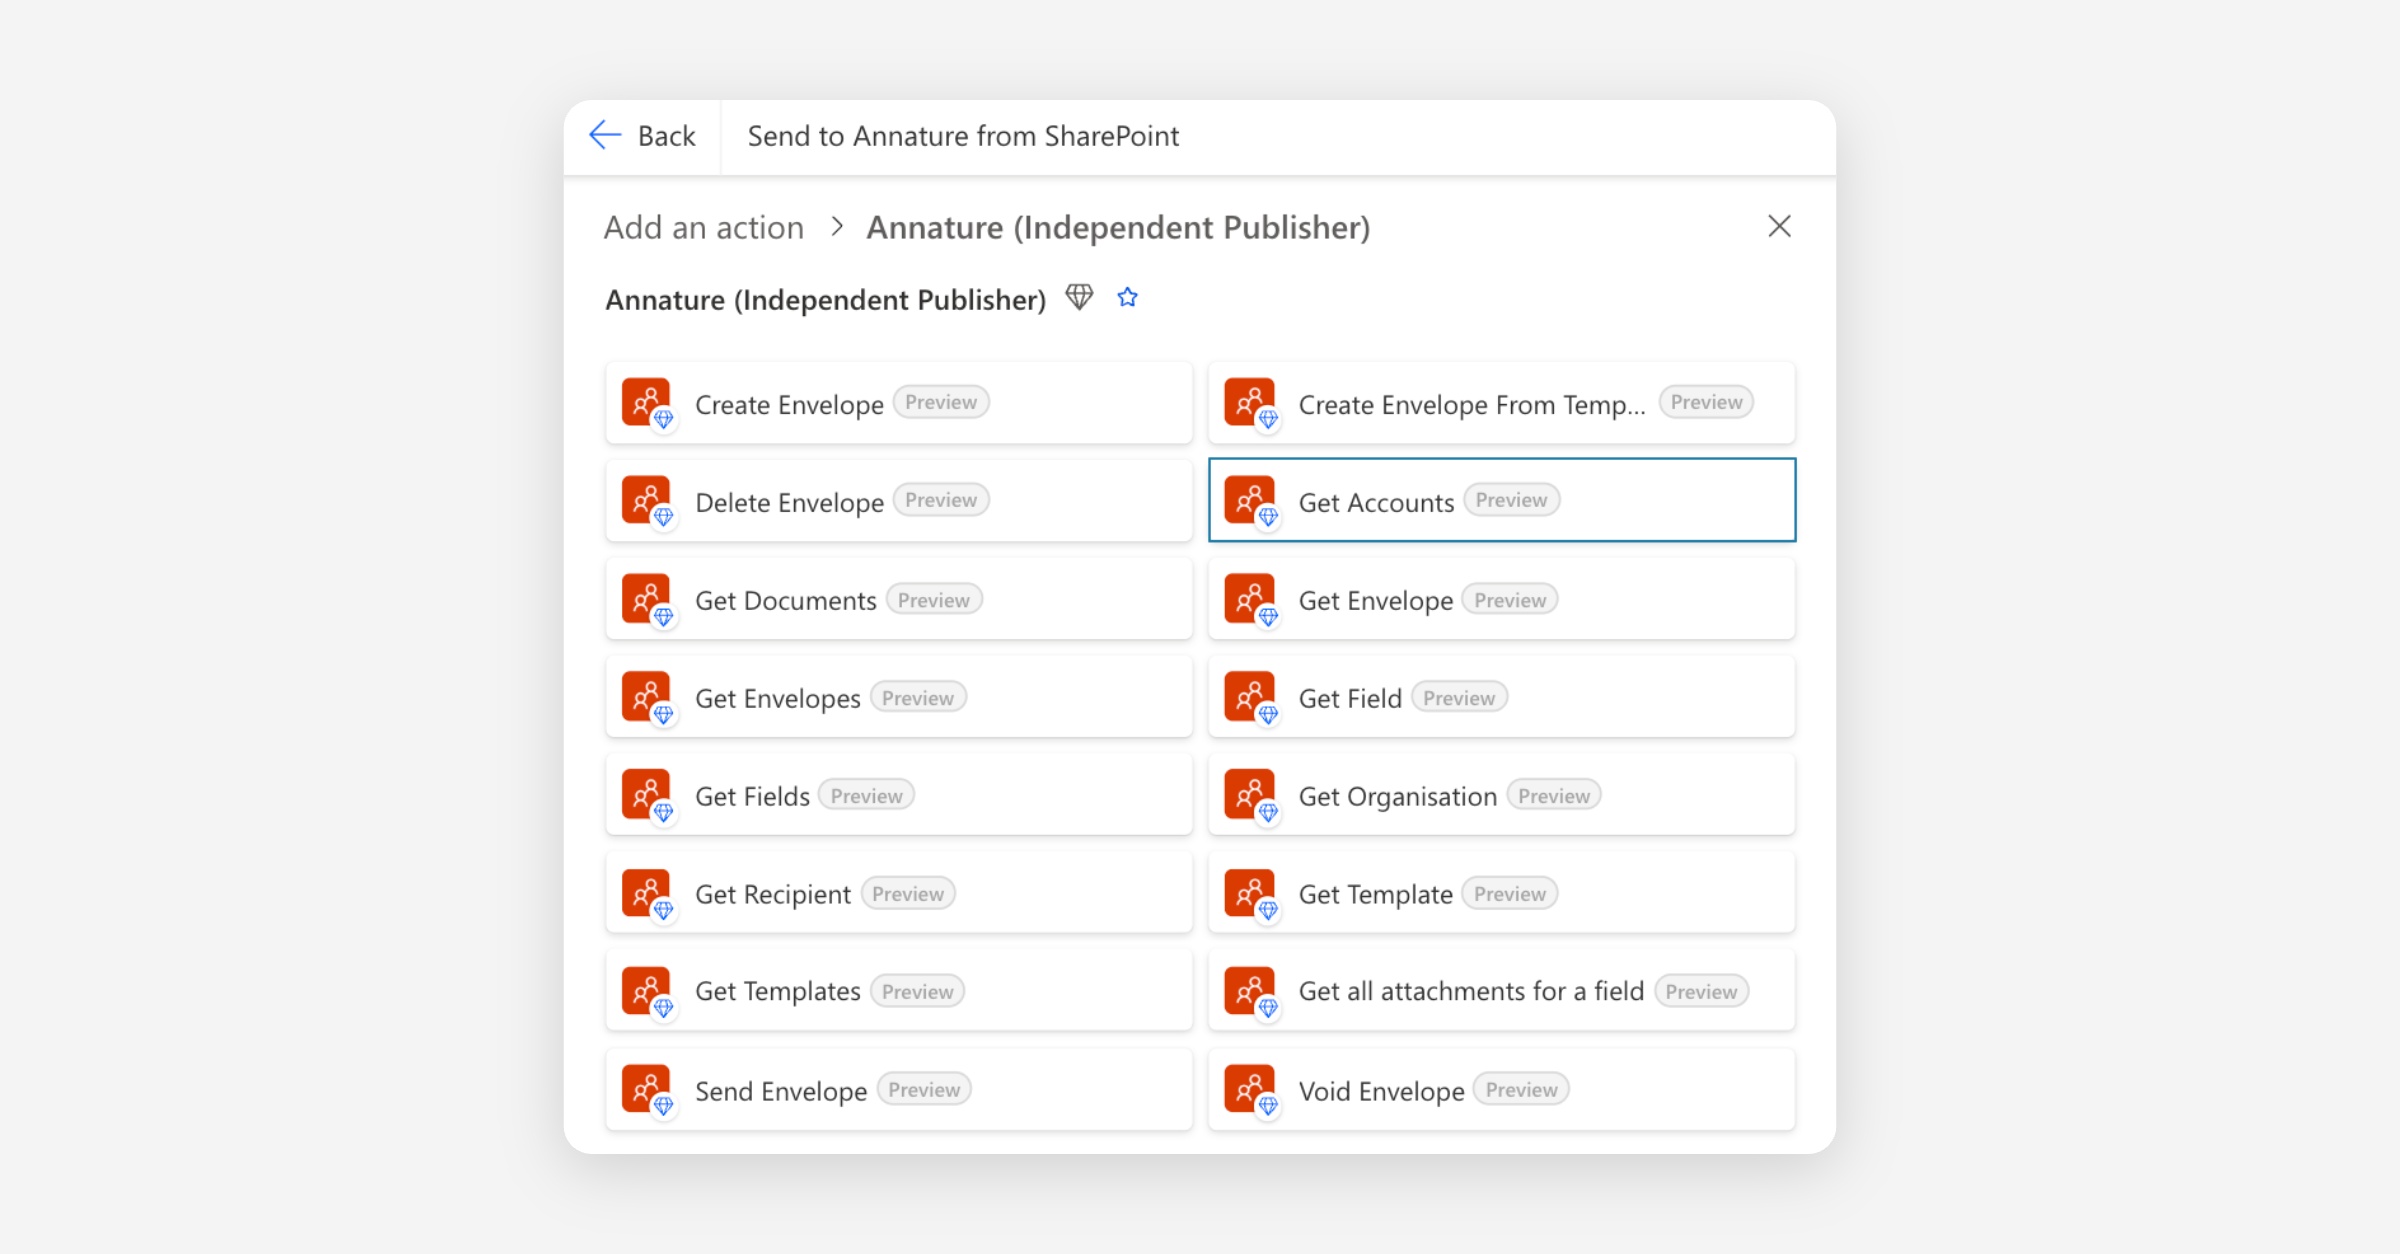
Add the Annature Get Accounts action
We're going to set the envelope's sender to whoever clicked the button in SharePoint. To do that, we need to look up the matching Annature account. The next two actions handle that lookup.
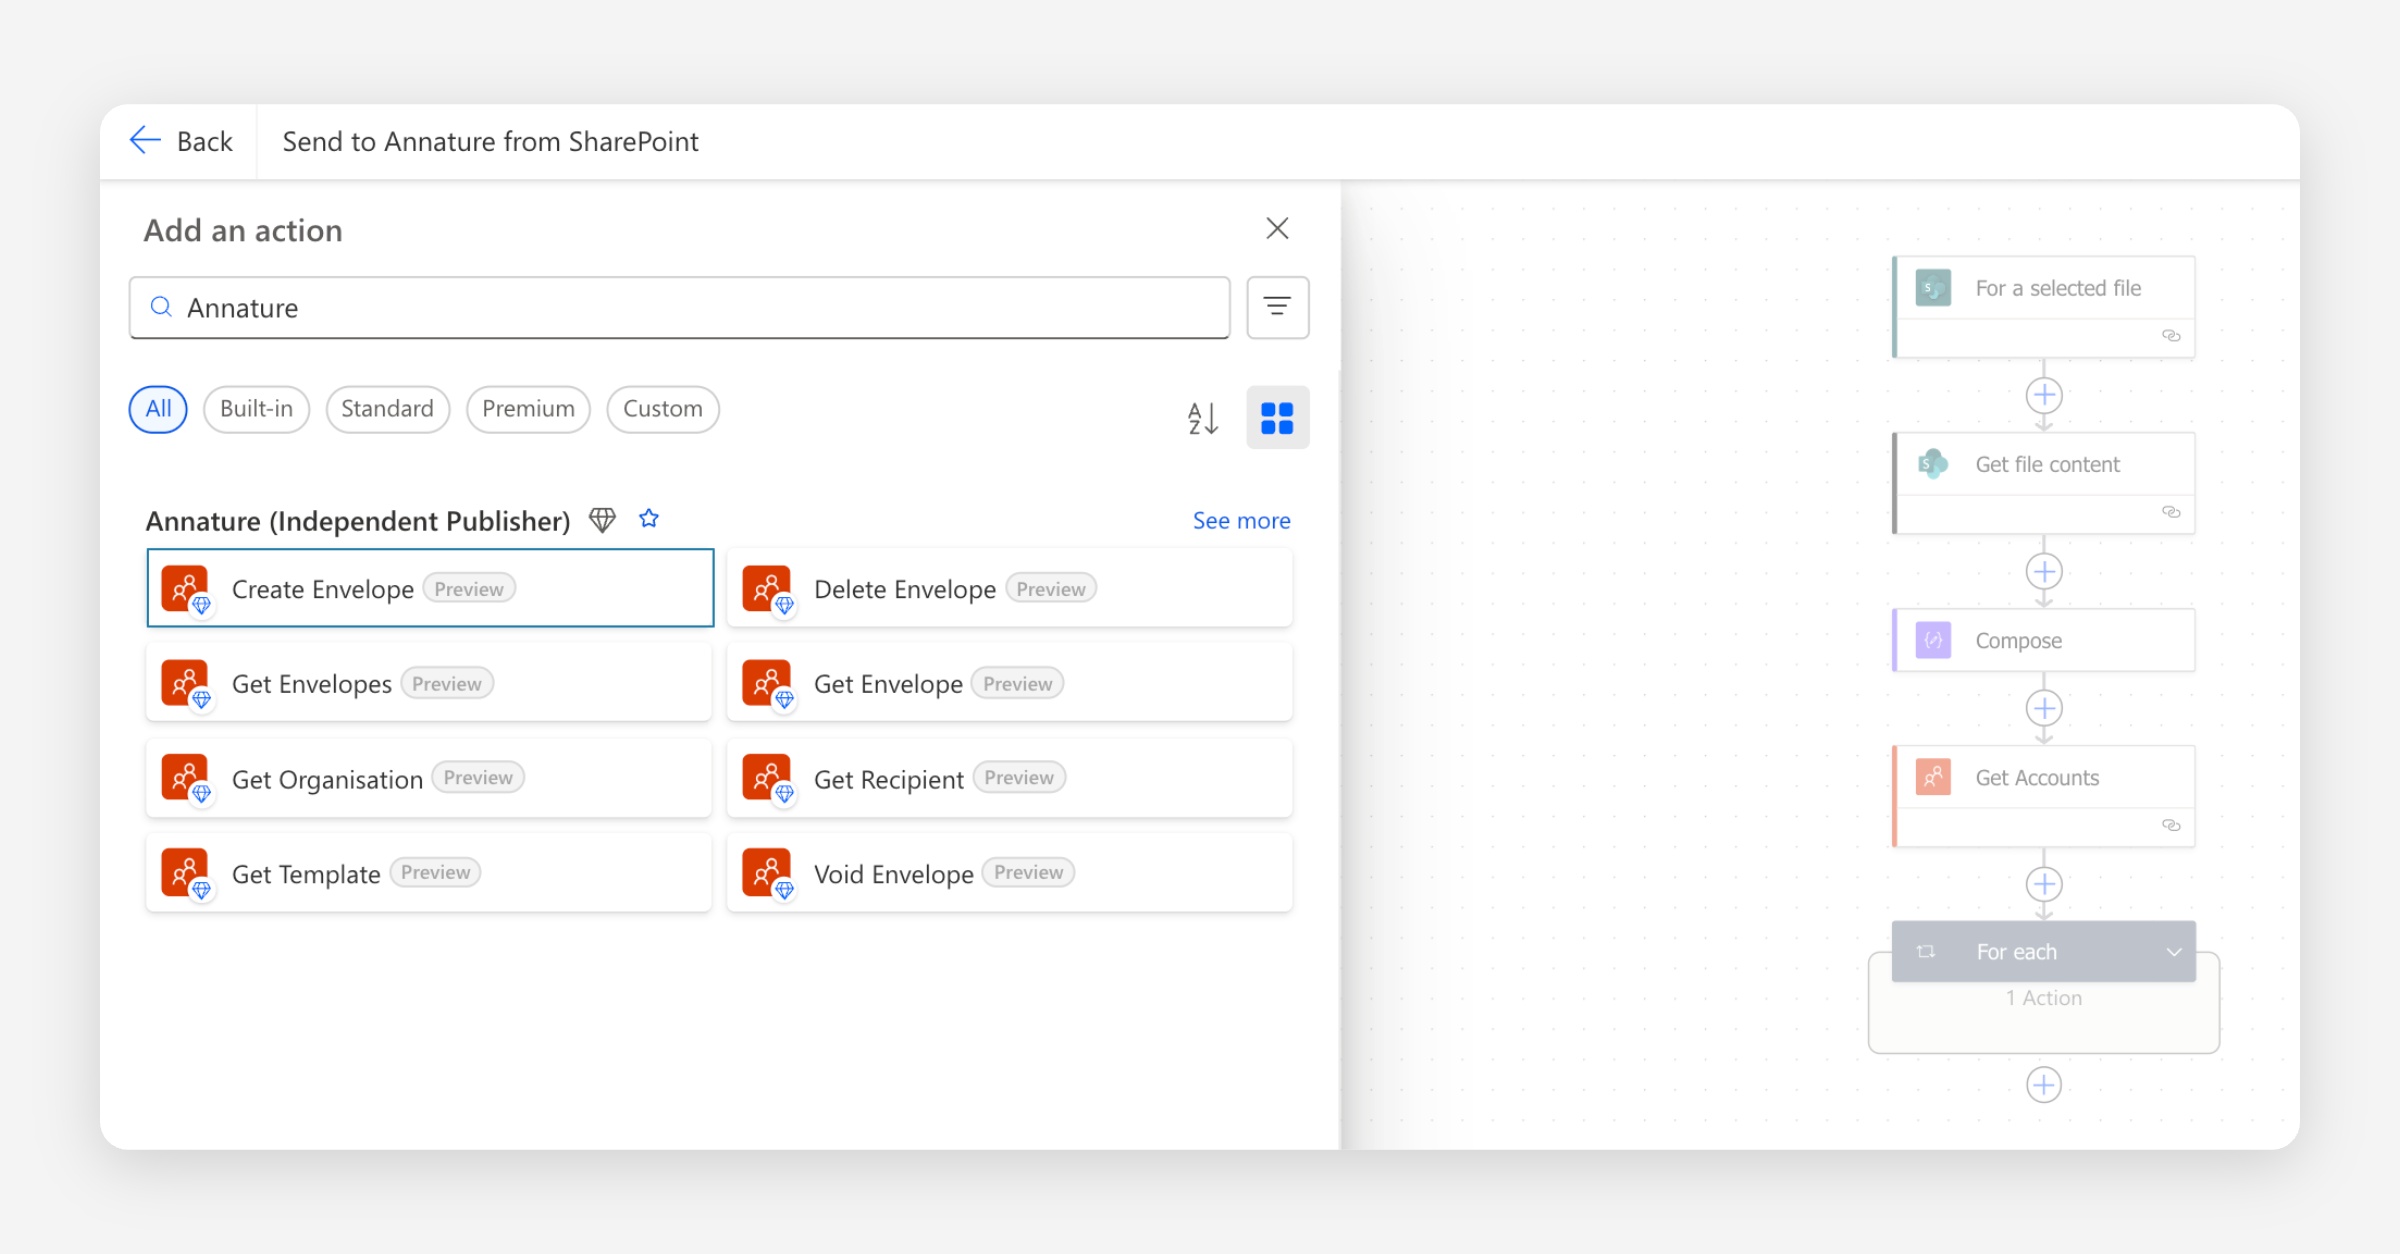
Click the plus button below the Compose action.
Search for Annature and select Get Accounts (you may need to select see more).
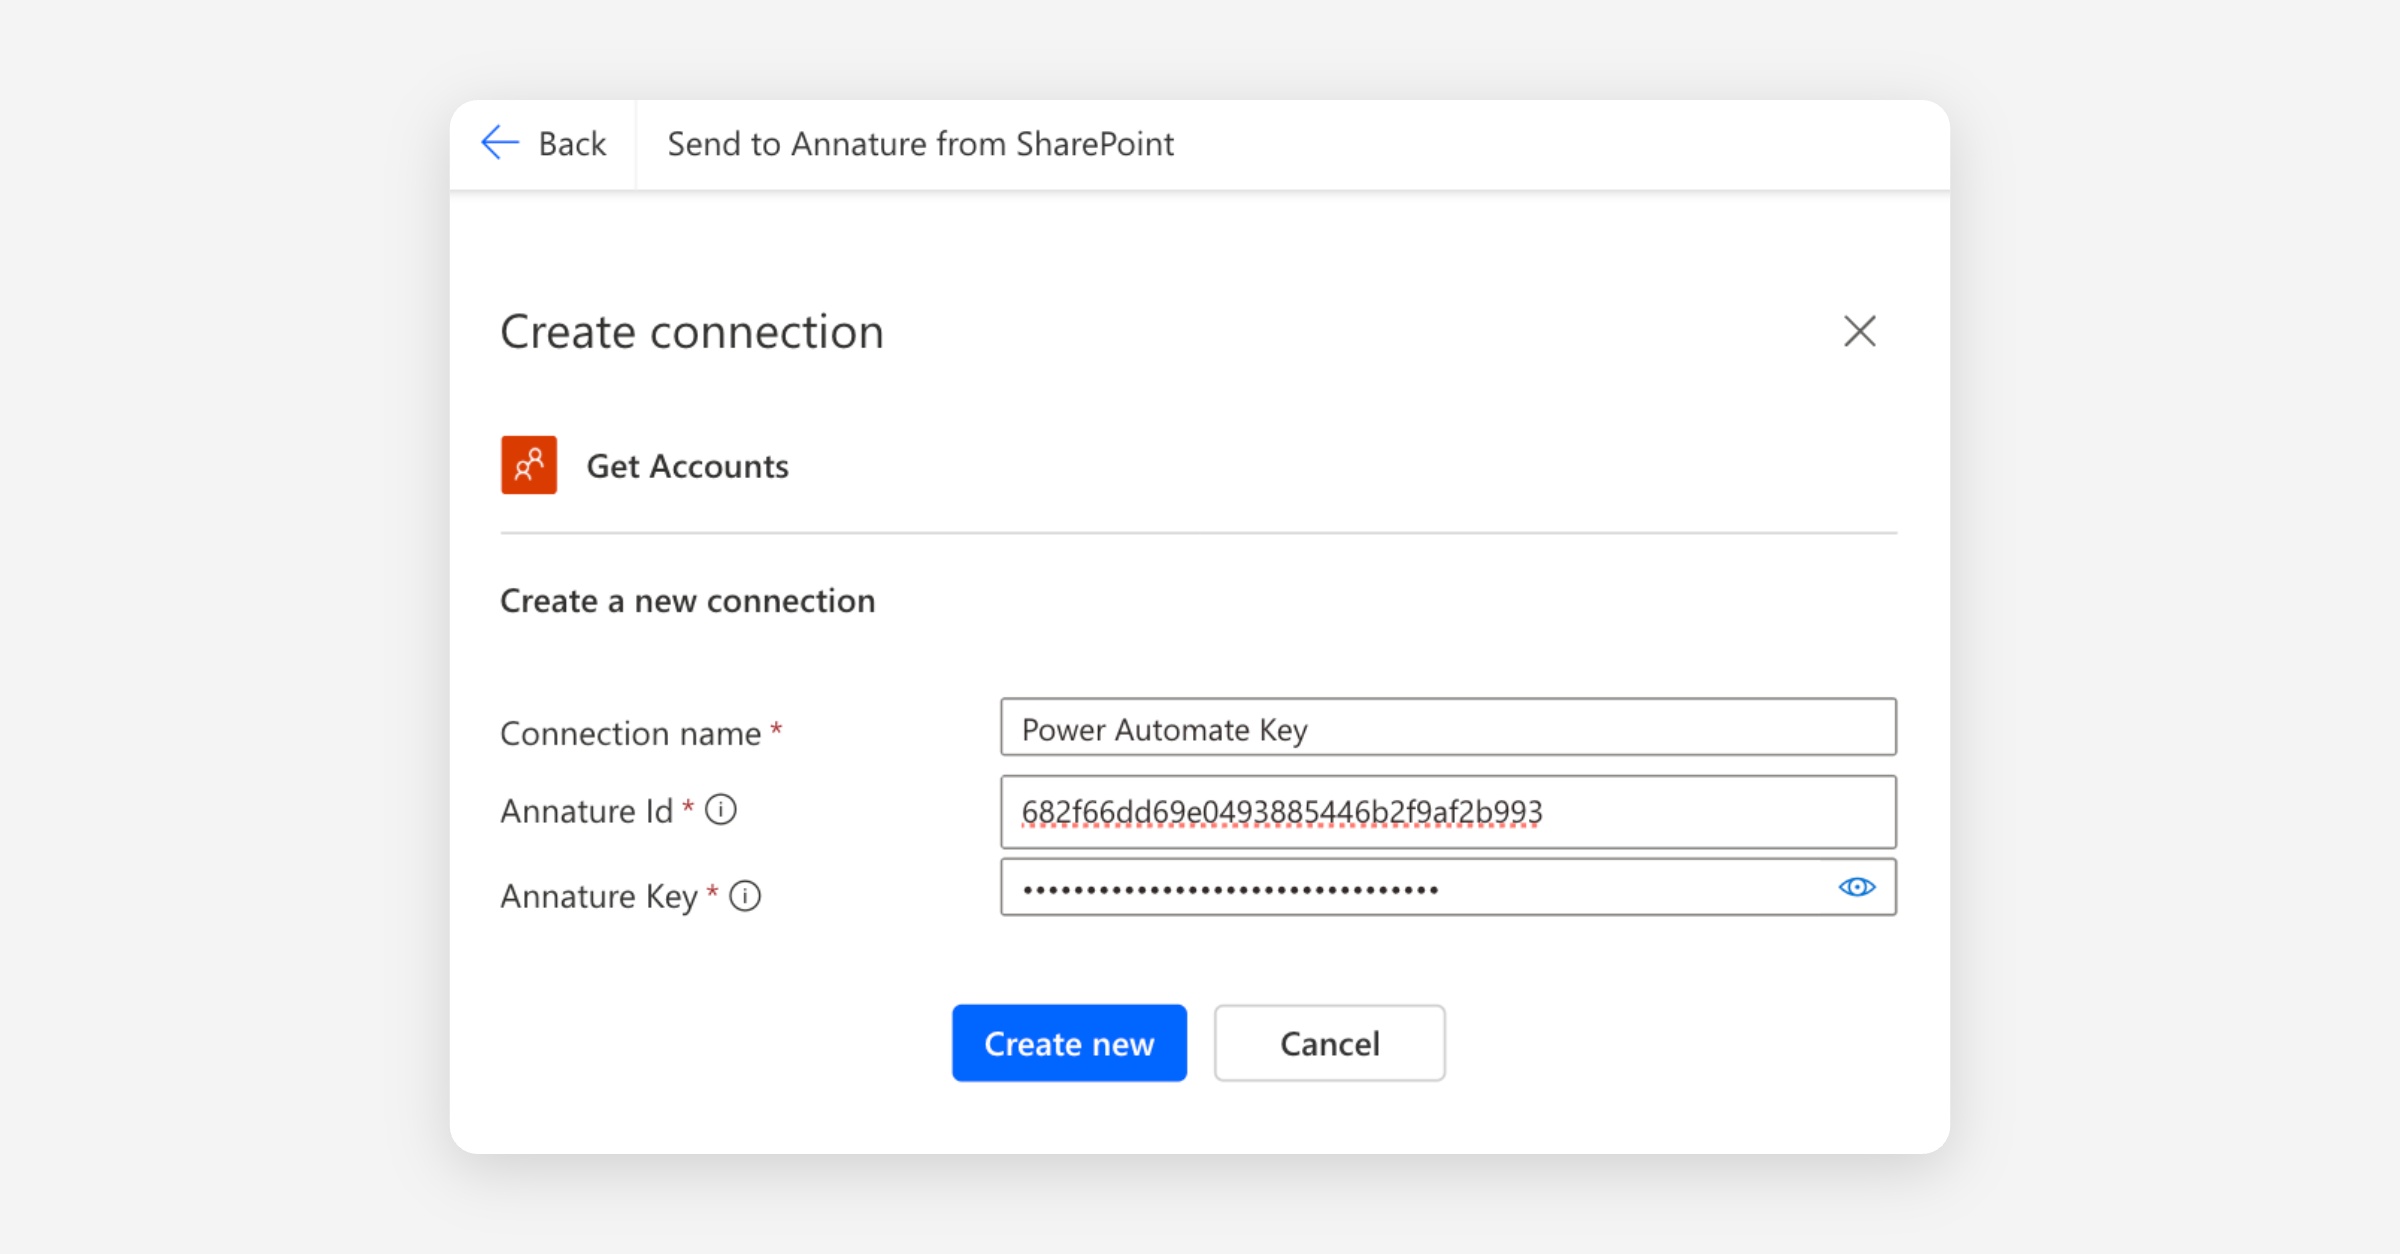
When prompted, enter your Annature API ID and Key (generated earlier), give the connection a name (for example, "Annature"), and click Create.
This returns every account in your Annature organisation. We'll filter it down in the next step.
Add the Filter array action
Click the plus button below Get Accounts.
Search for Filter array and select it.
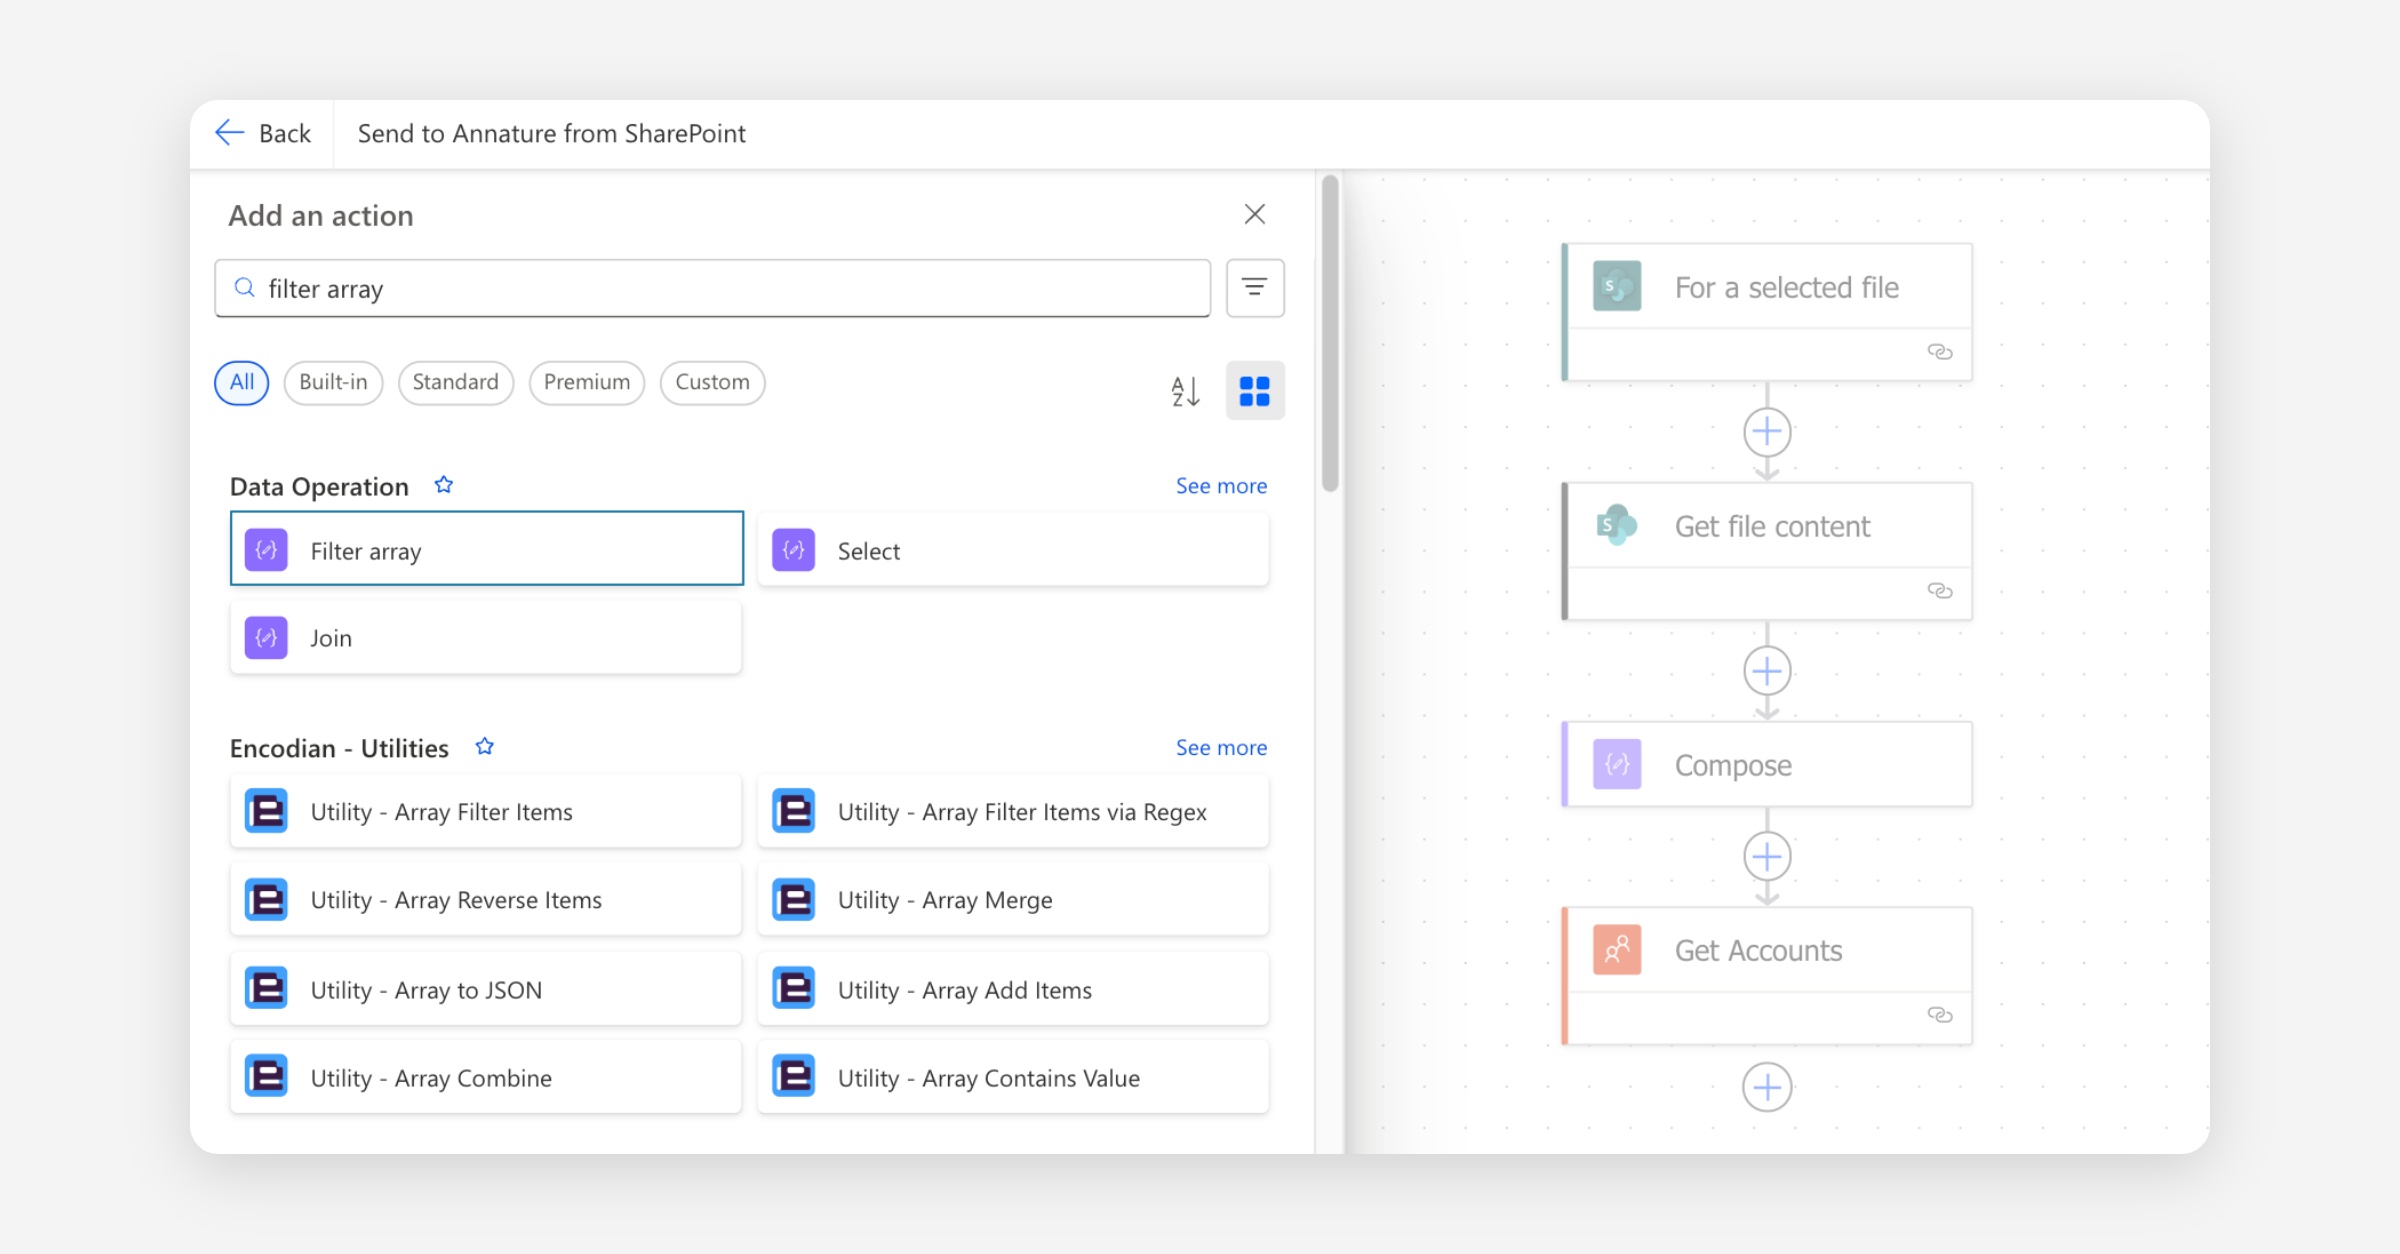
Configure the fields:
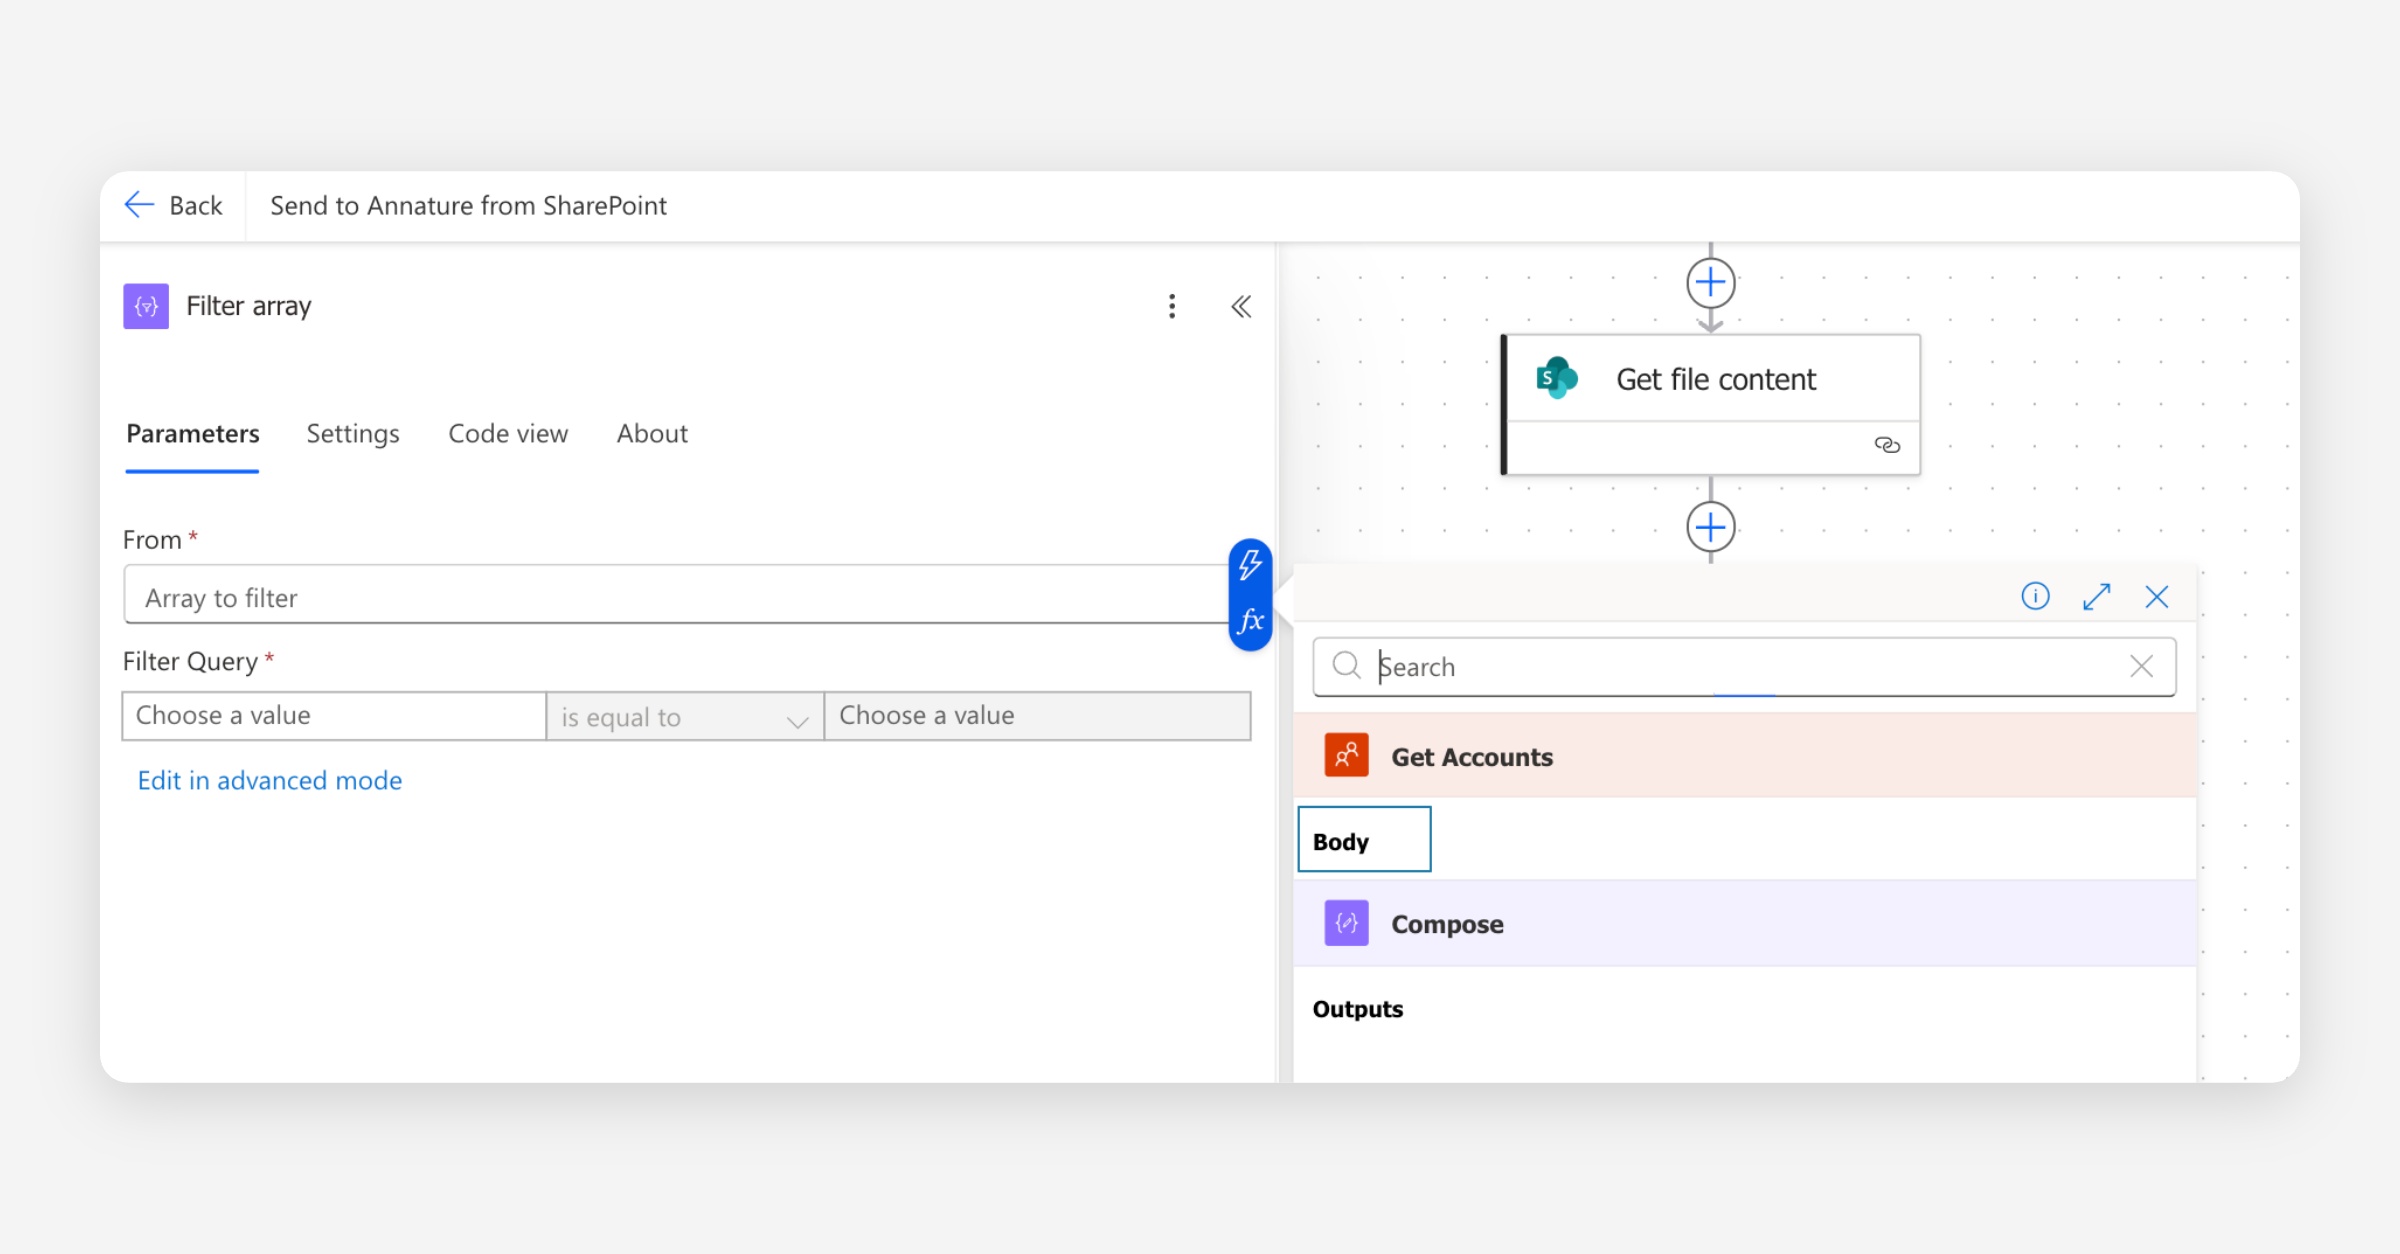
From — click the dynamic content picker (lightning bolt icon in the top right of the text field) and select Body from Get Accounts.
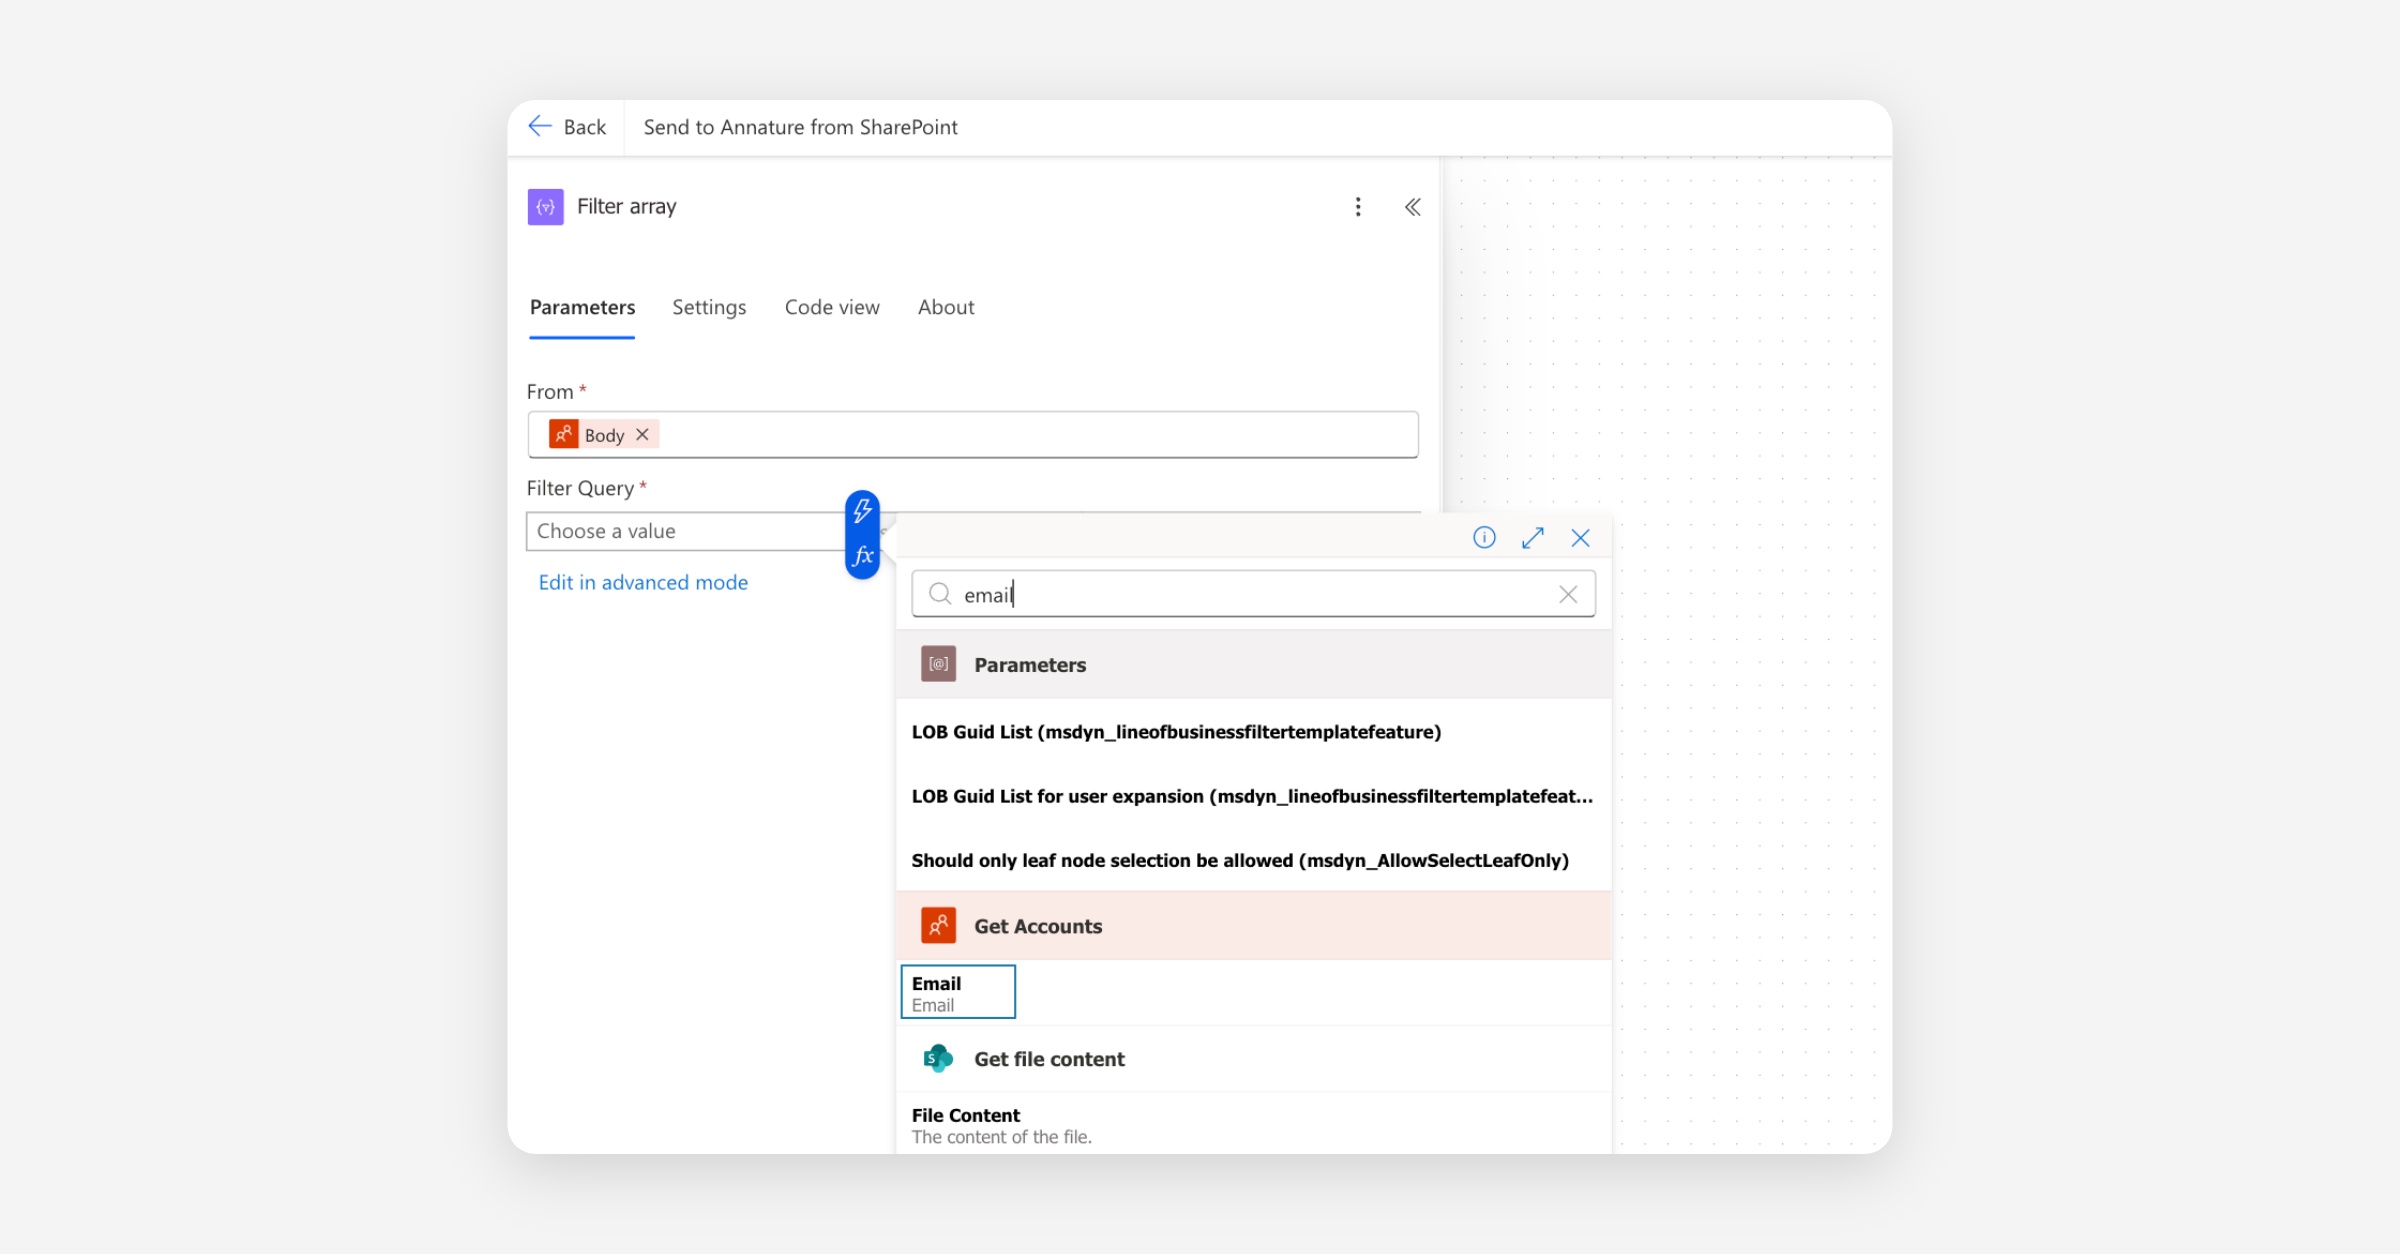
Filter Query — click the left-hand value, use the dynamic content picker (lightning bolt icon in the top right of the text field), and select Email (from the Get Accounts step).
Set the operator to is equal to. For the right-hand value, click the fx icon and paste in:
triggerOutputs()?['headers']?['x-ms-user-email']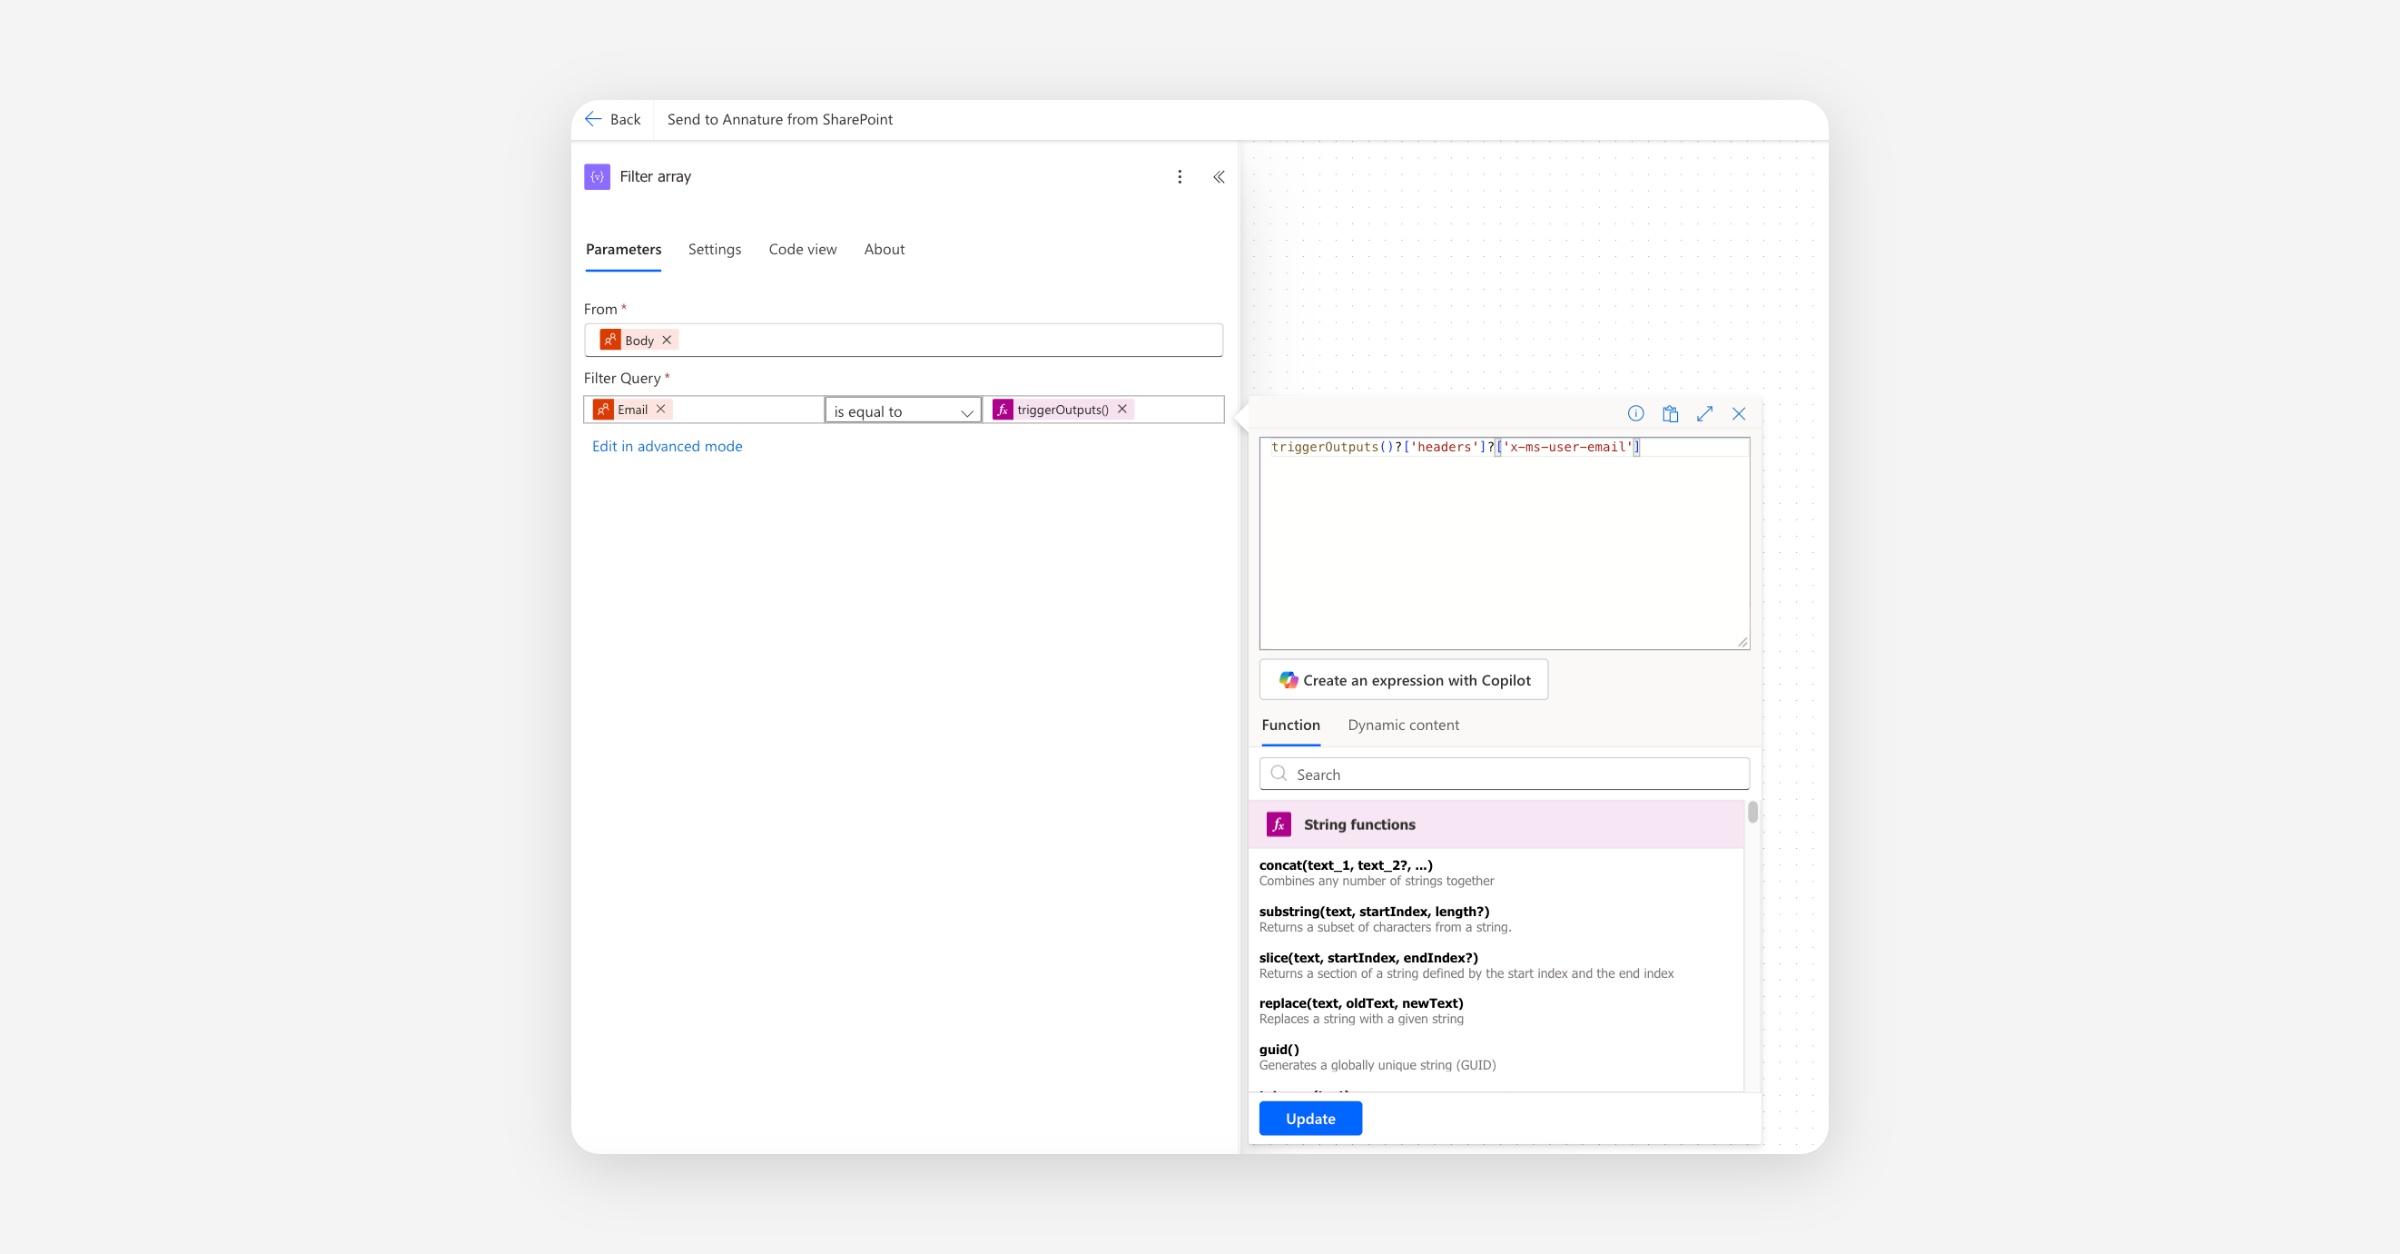
This is the email of the user who triggered the flow from SharePoint.
The Filter array action narrows the list of accounts down to just the one matching the SharePoint user.
Add the Annature Create envelope action
Click the plus button below Filter array.
Search for Annature and select Create envelope.
Configure the action's fields:
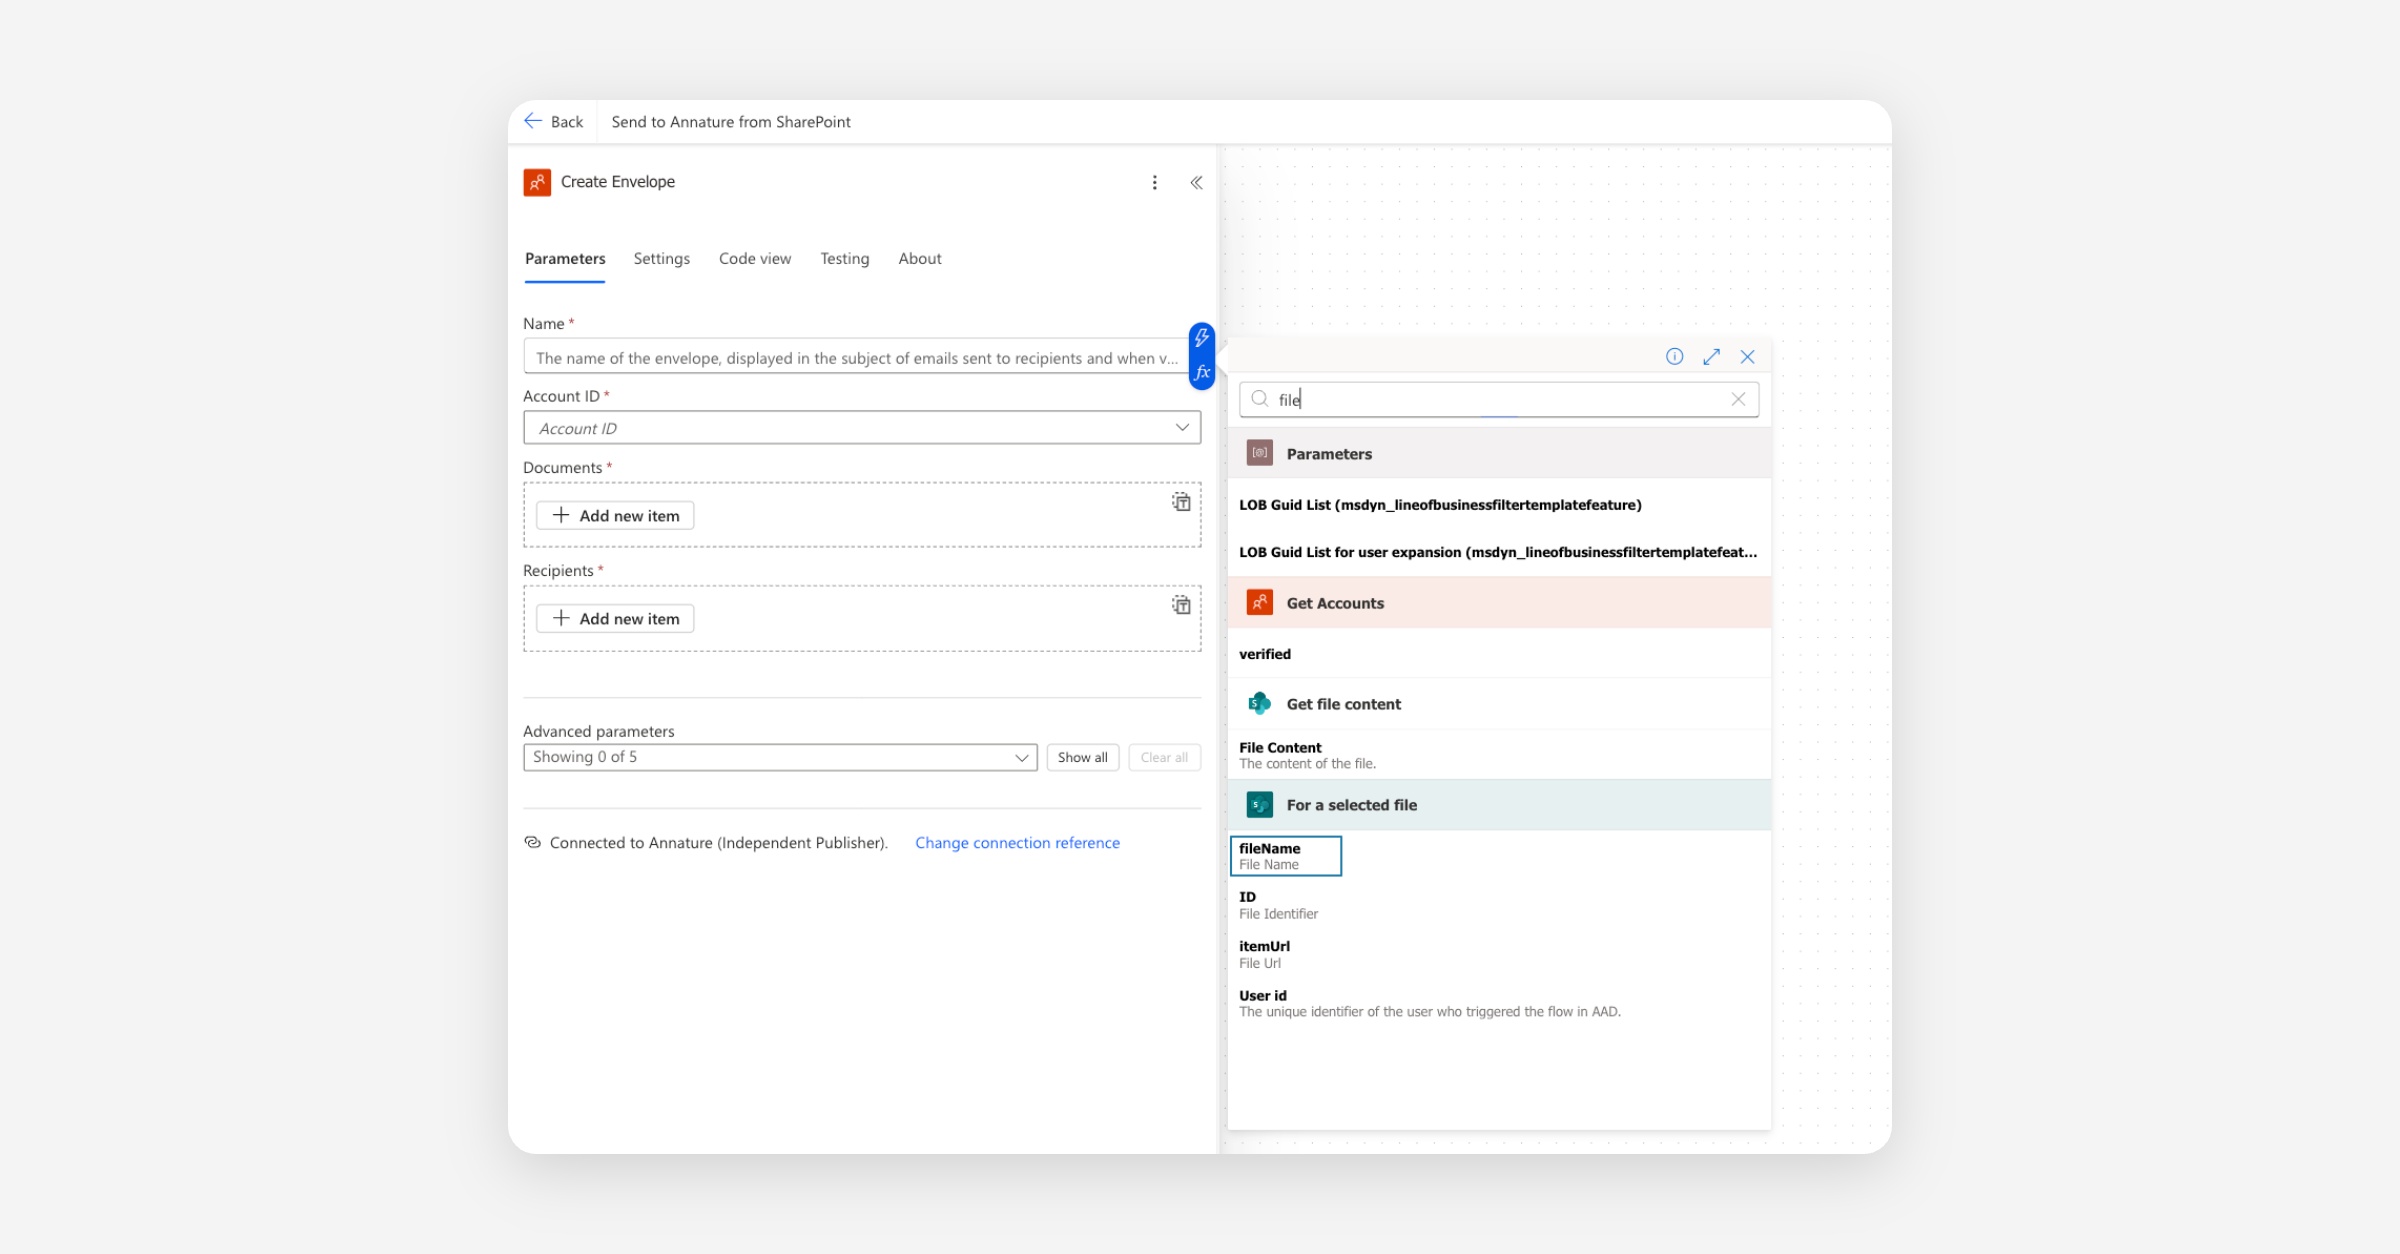
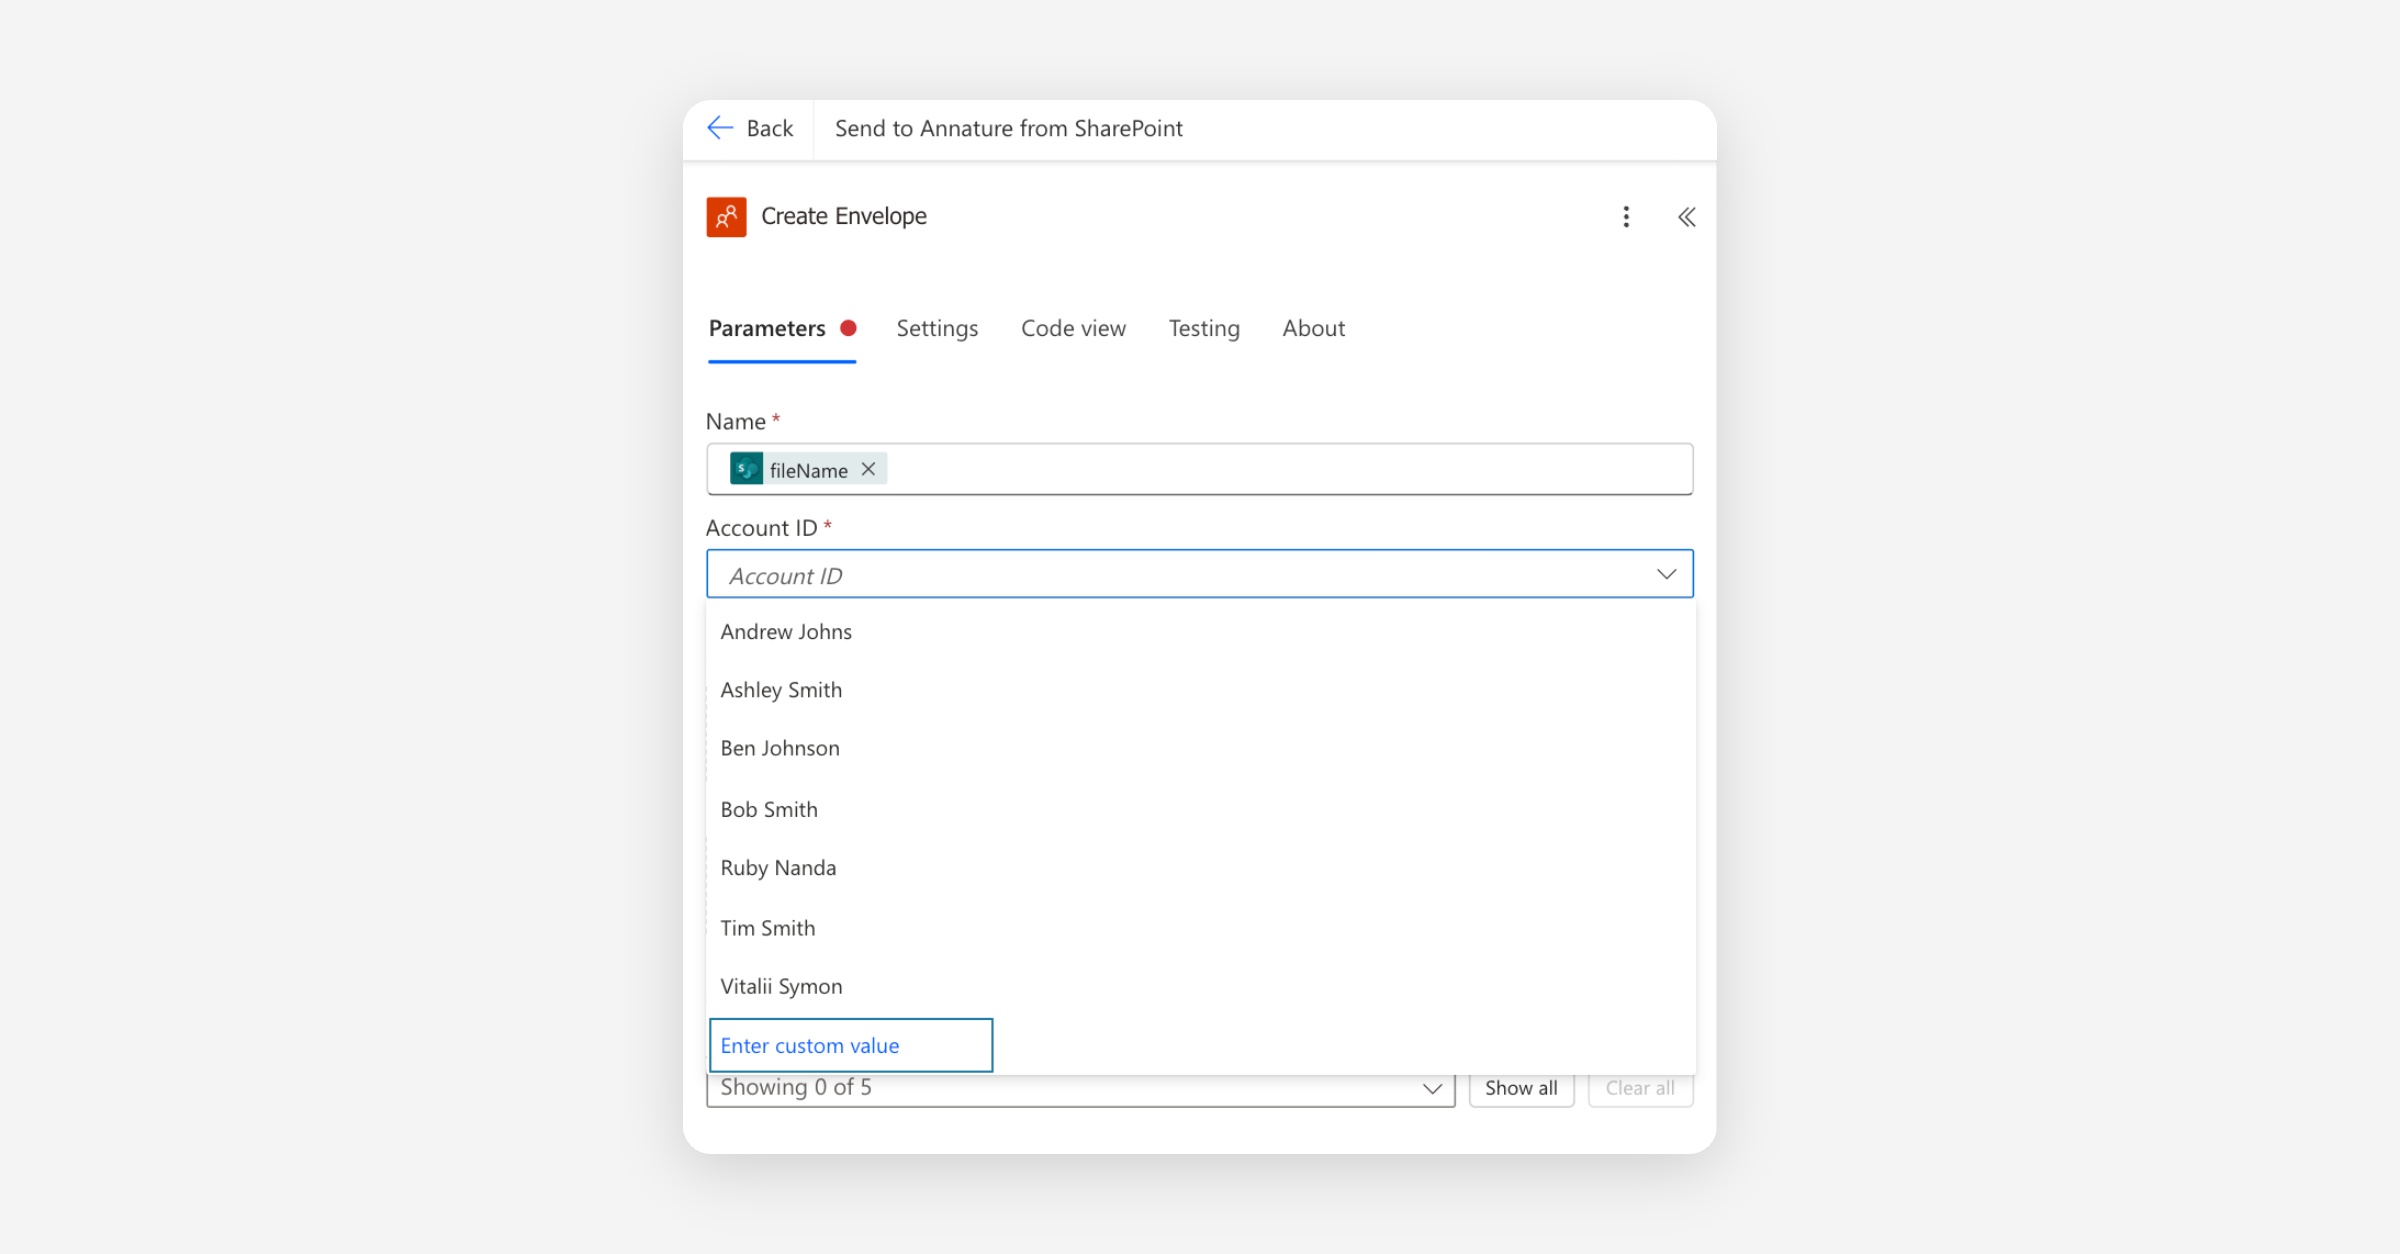
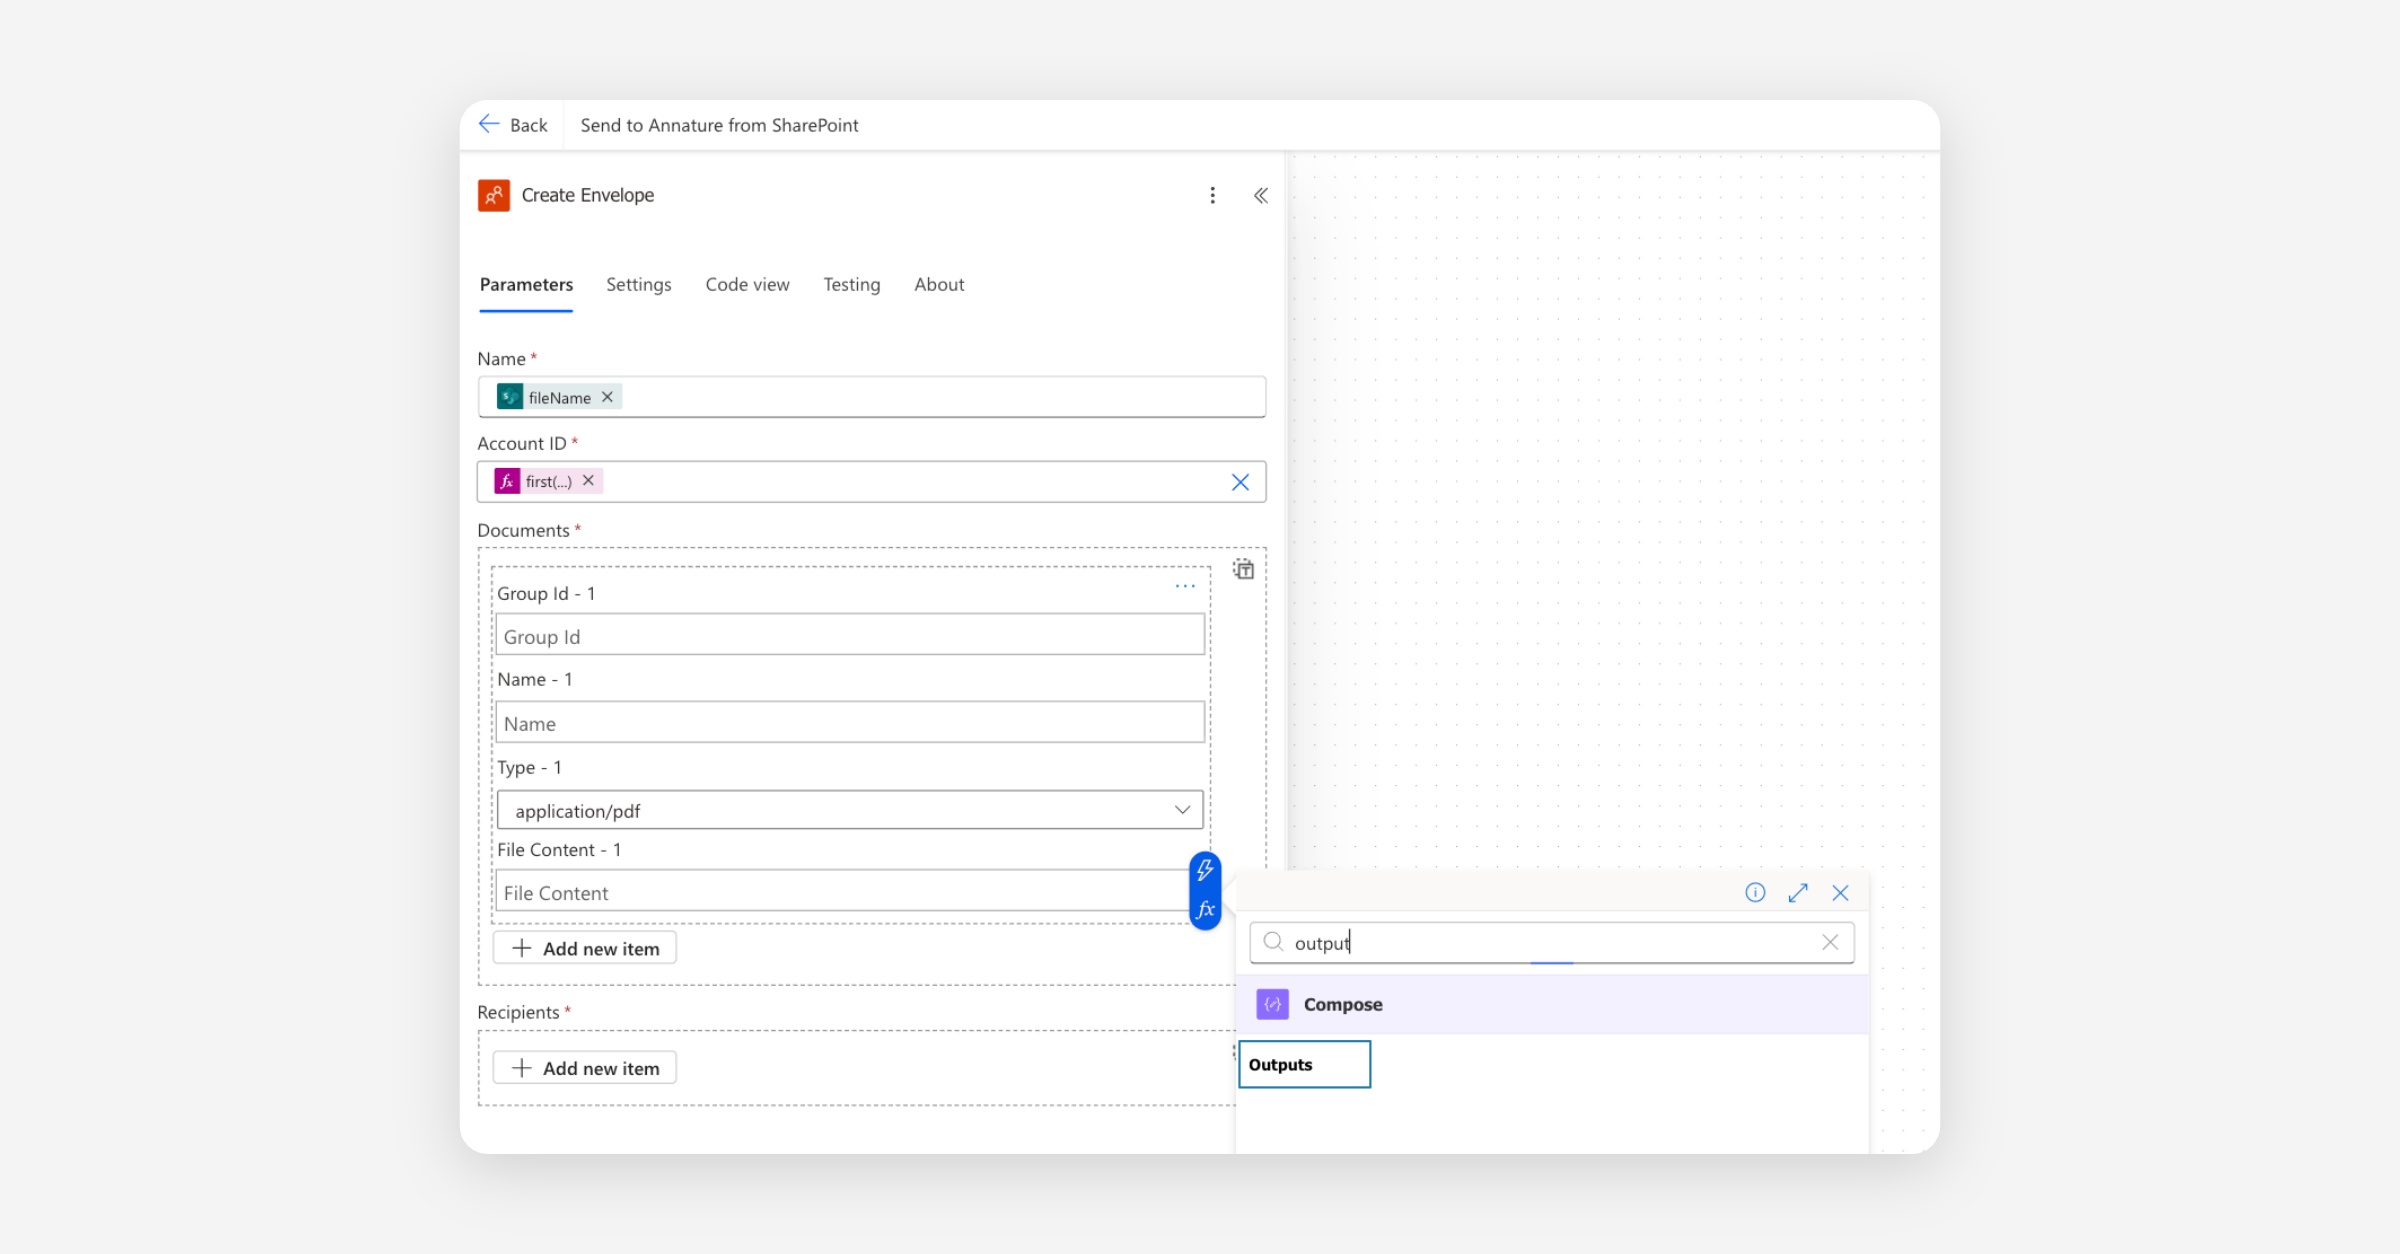
Name — click into the field and use the dynamic content picker (lightning bolt icon in the top right of the text field) to select File name from the manual trigger. This sets the envelope name to the original SharePoint file name.
Account ID — at the bottom of the list, select enter a custom value.
Then, click the fx icon and paste in:
first(body('Filter_array'))?['id']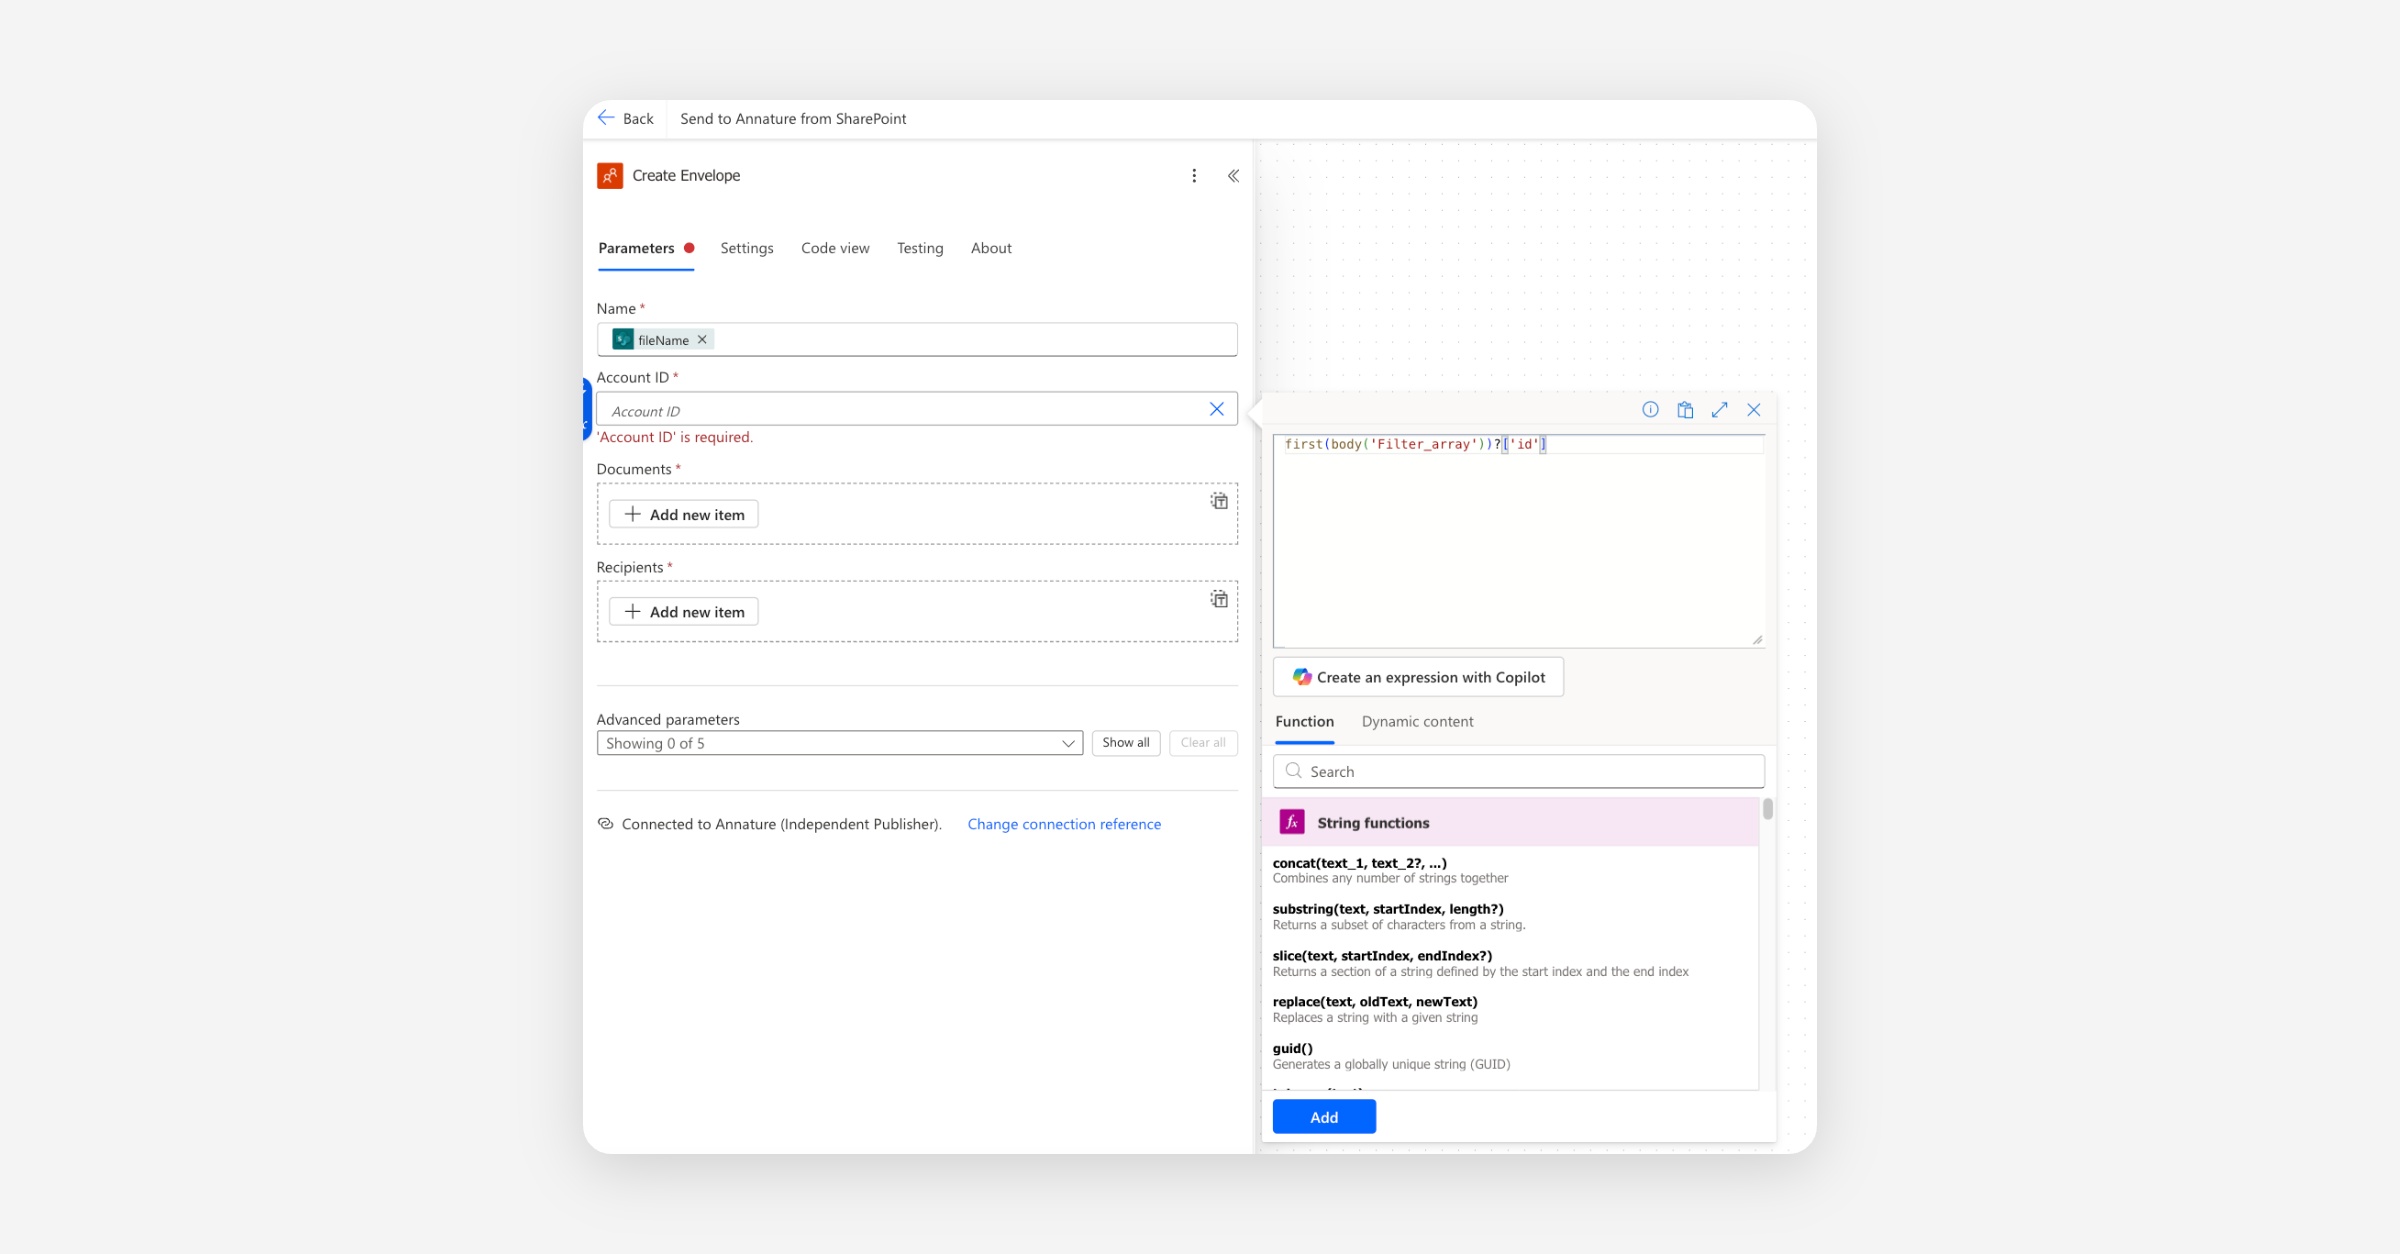
This grabs the ID of the matched Annature account from the Filter array step. The user who triggered the flow in SharePoint becomes the sender of the envelope.
Documents — click Add new item:
Type:
application/pdfFile content: click into the field, use the dynamic content picker (lightning bolt), and select Outputs from the Compose step.
Recipients — click Add new item and add a placeholder:
Name: Placeholder
Email: [email protected]
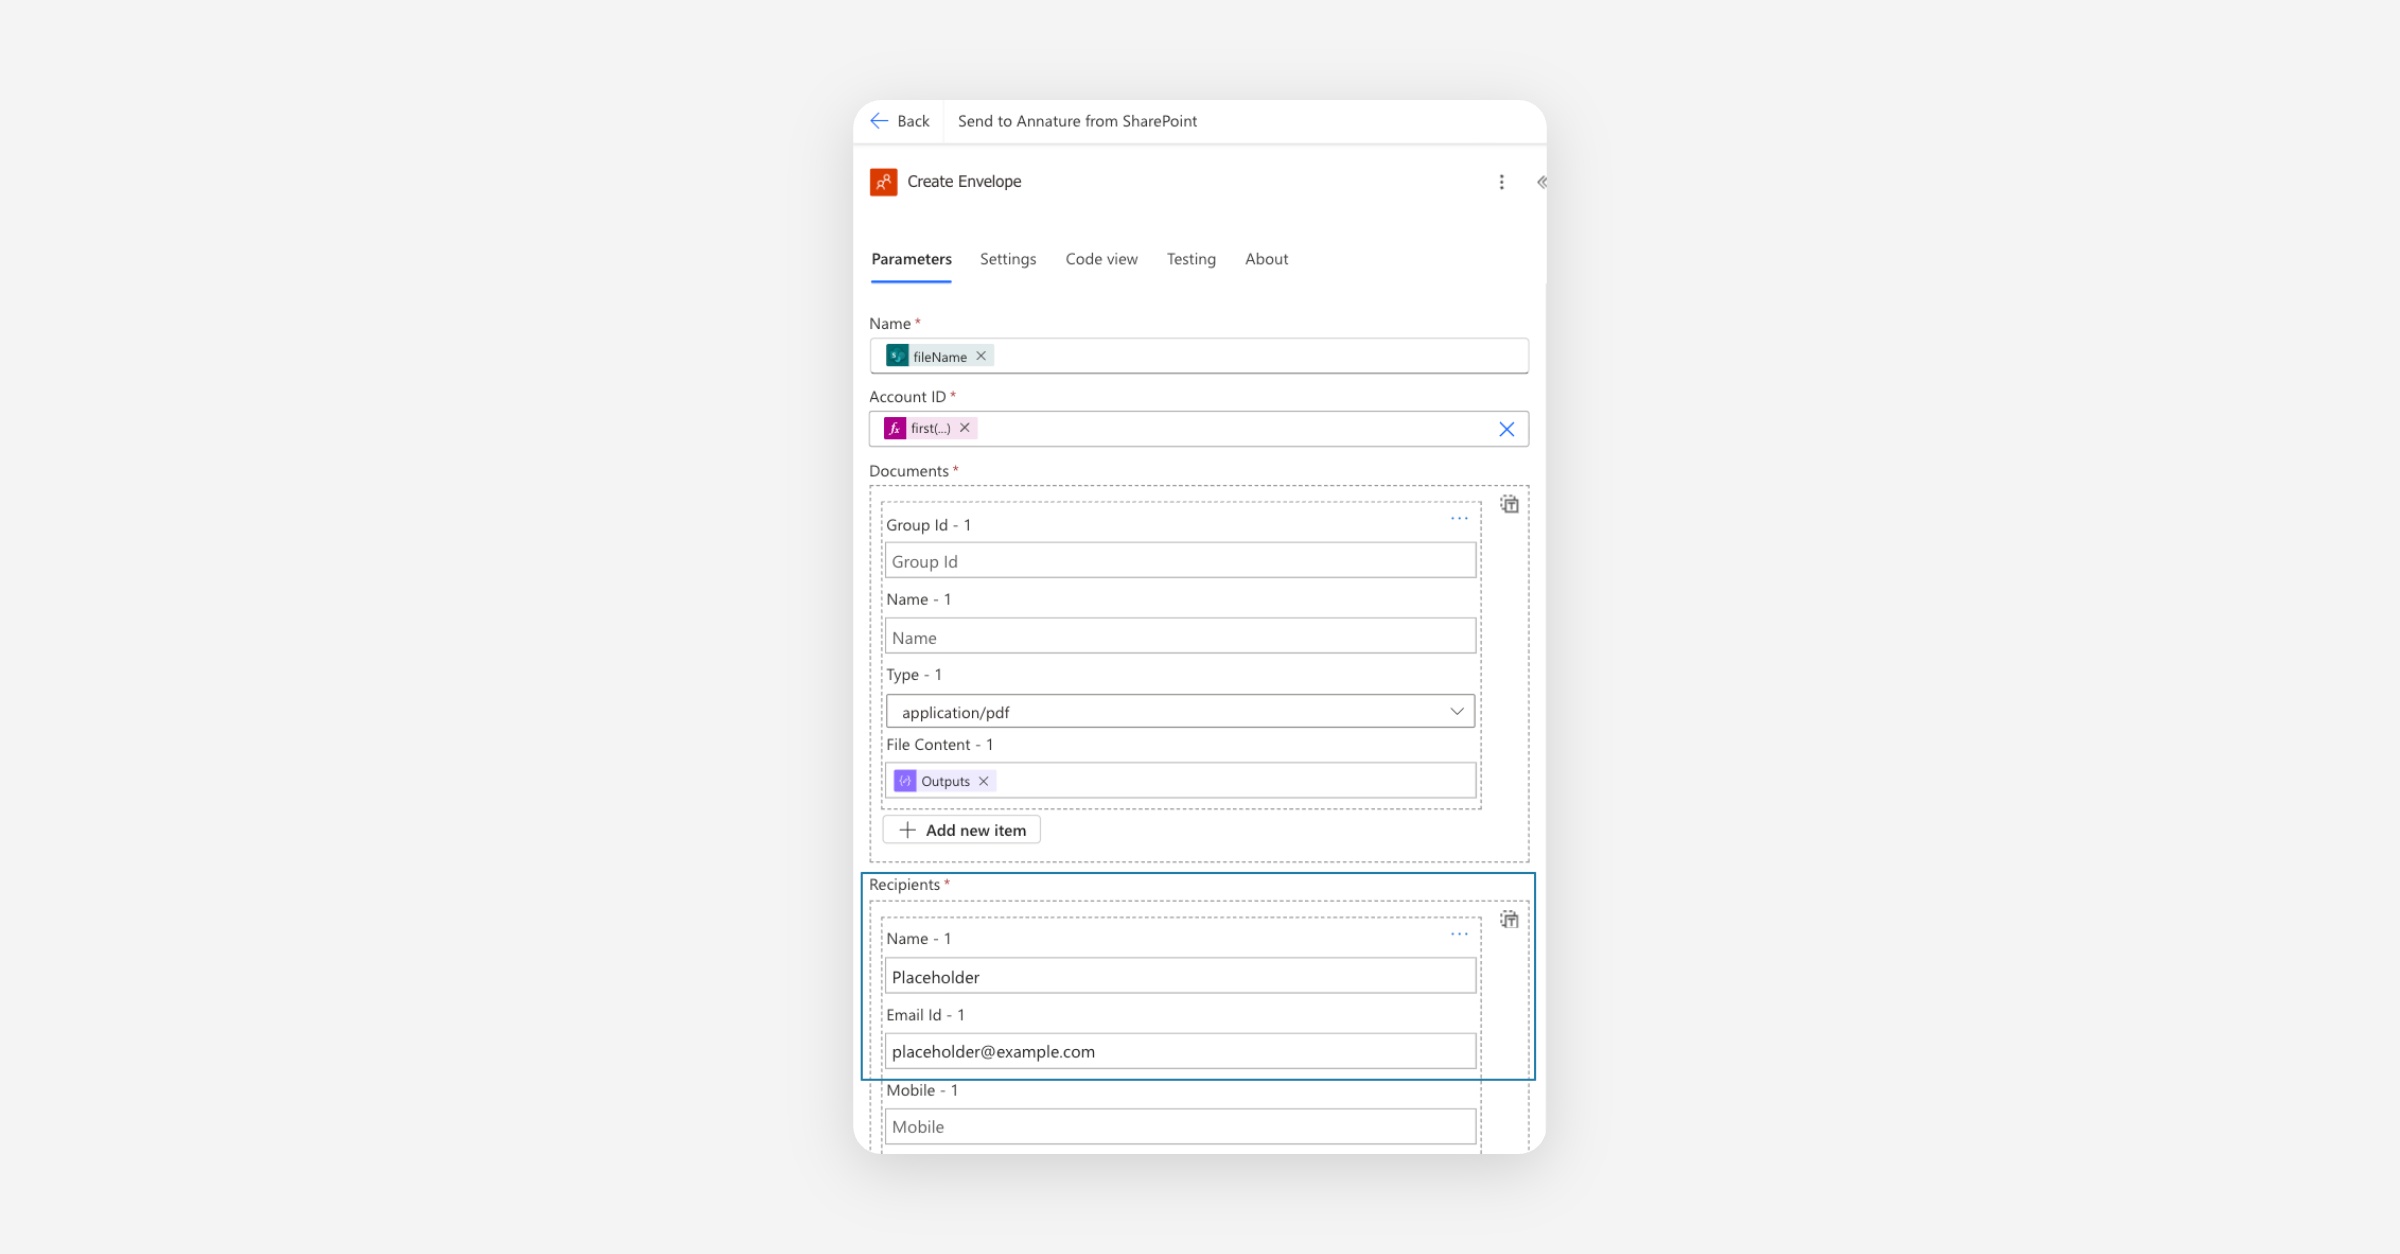
The placeholder is replaced with the real recipient when the sender opens the draft envelope in Annature.
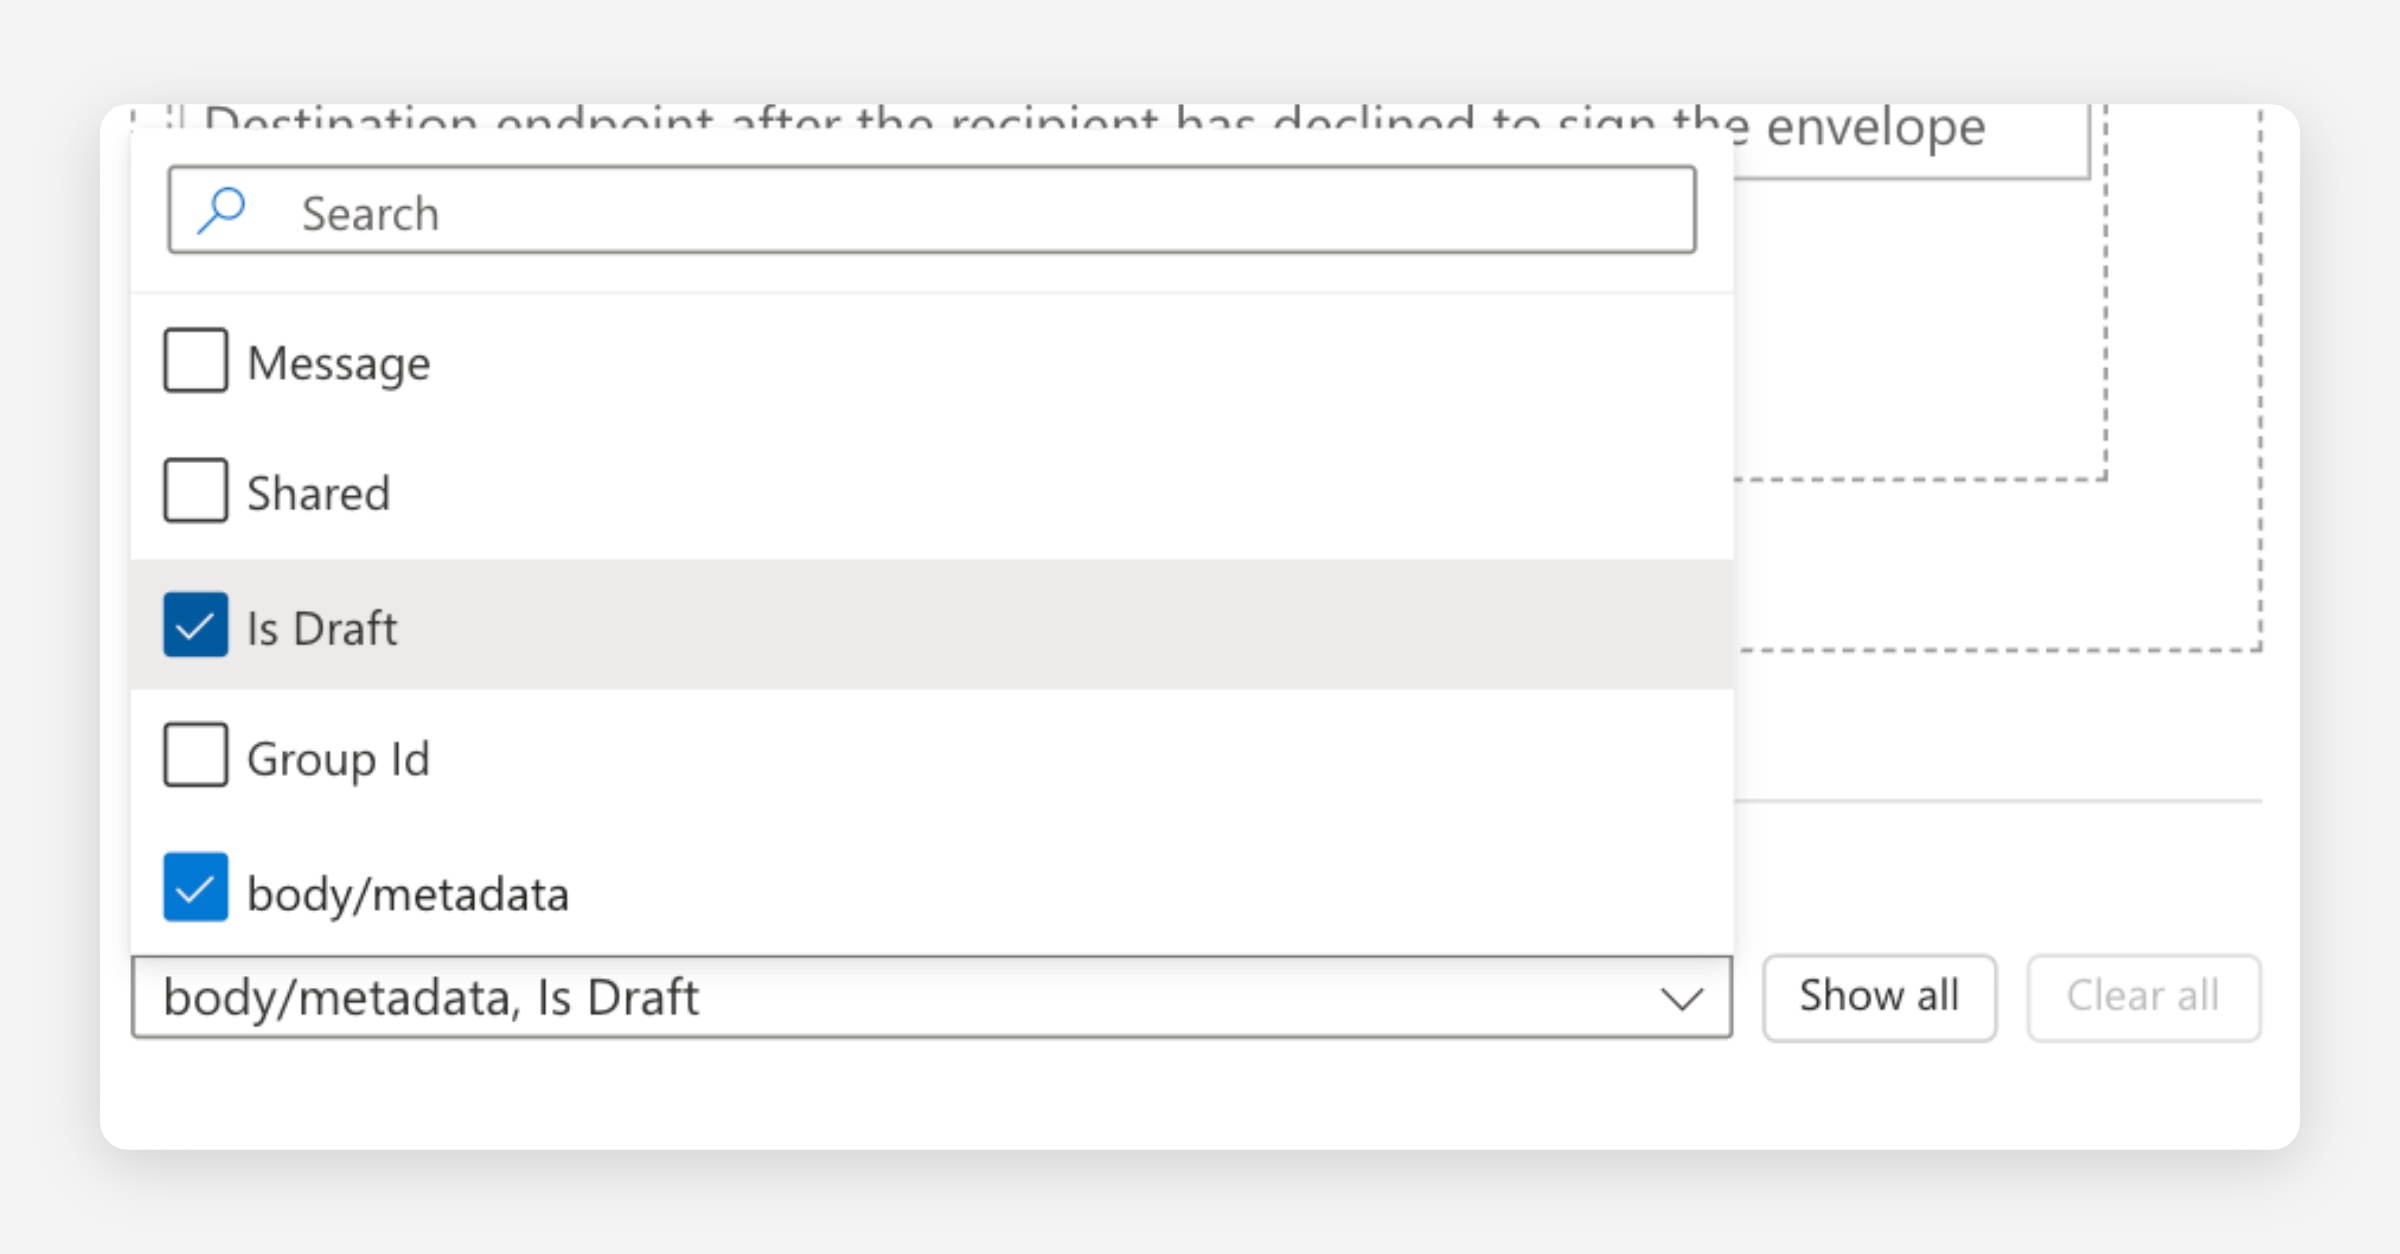
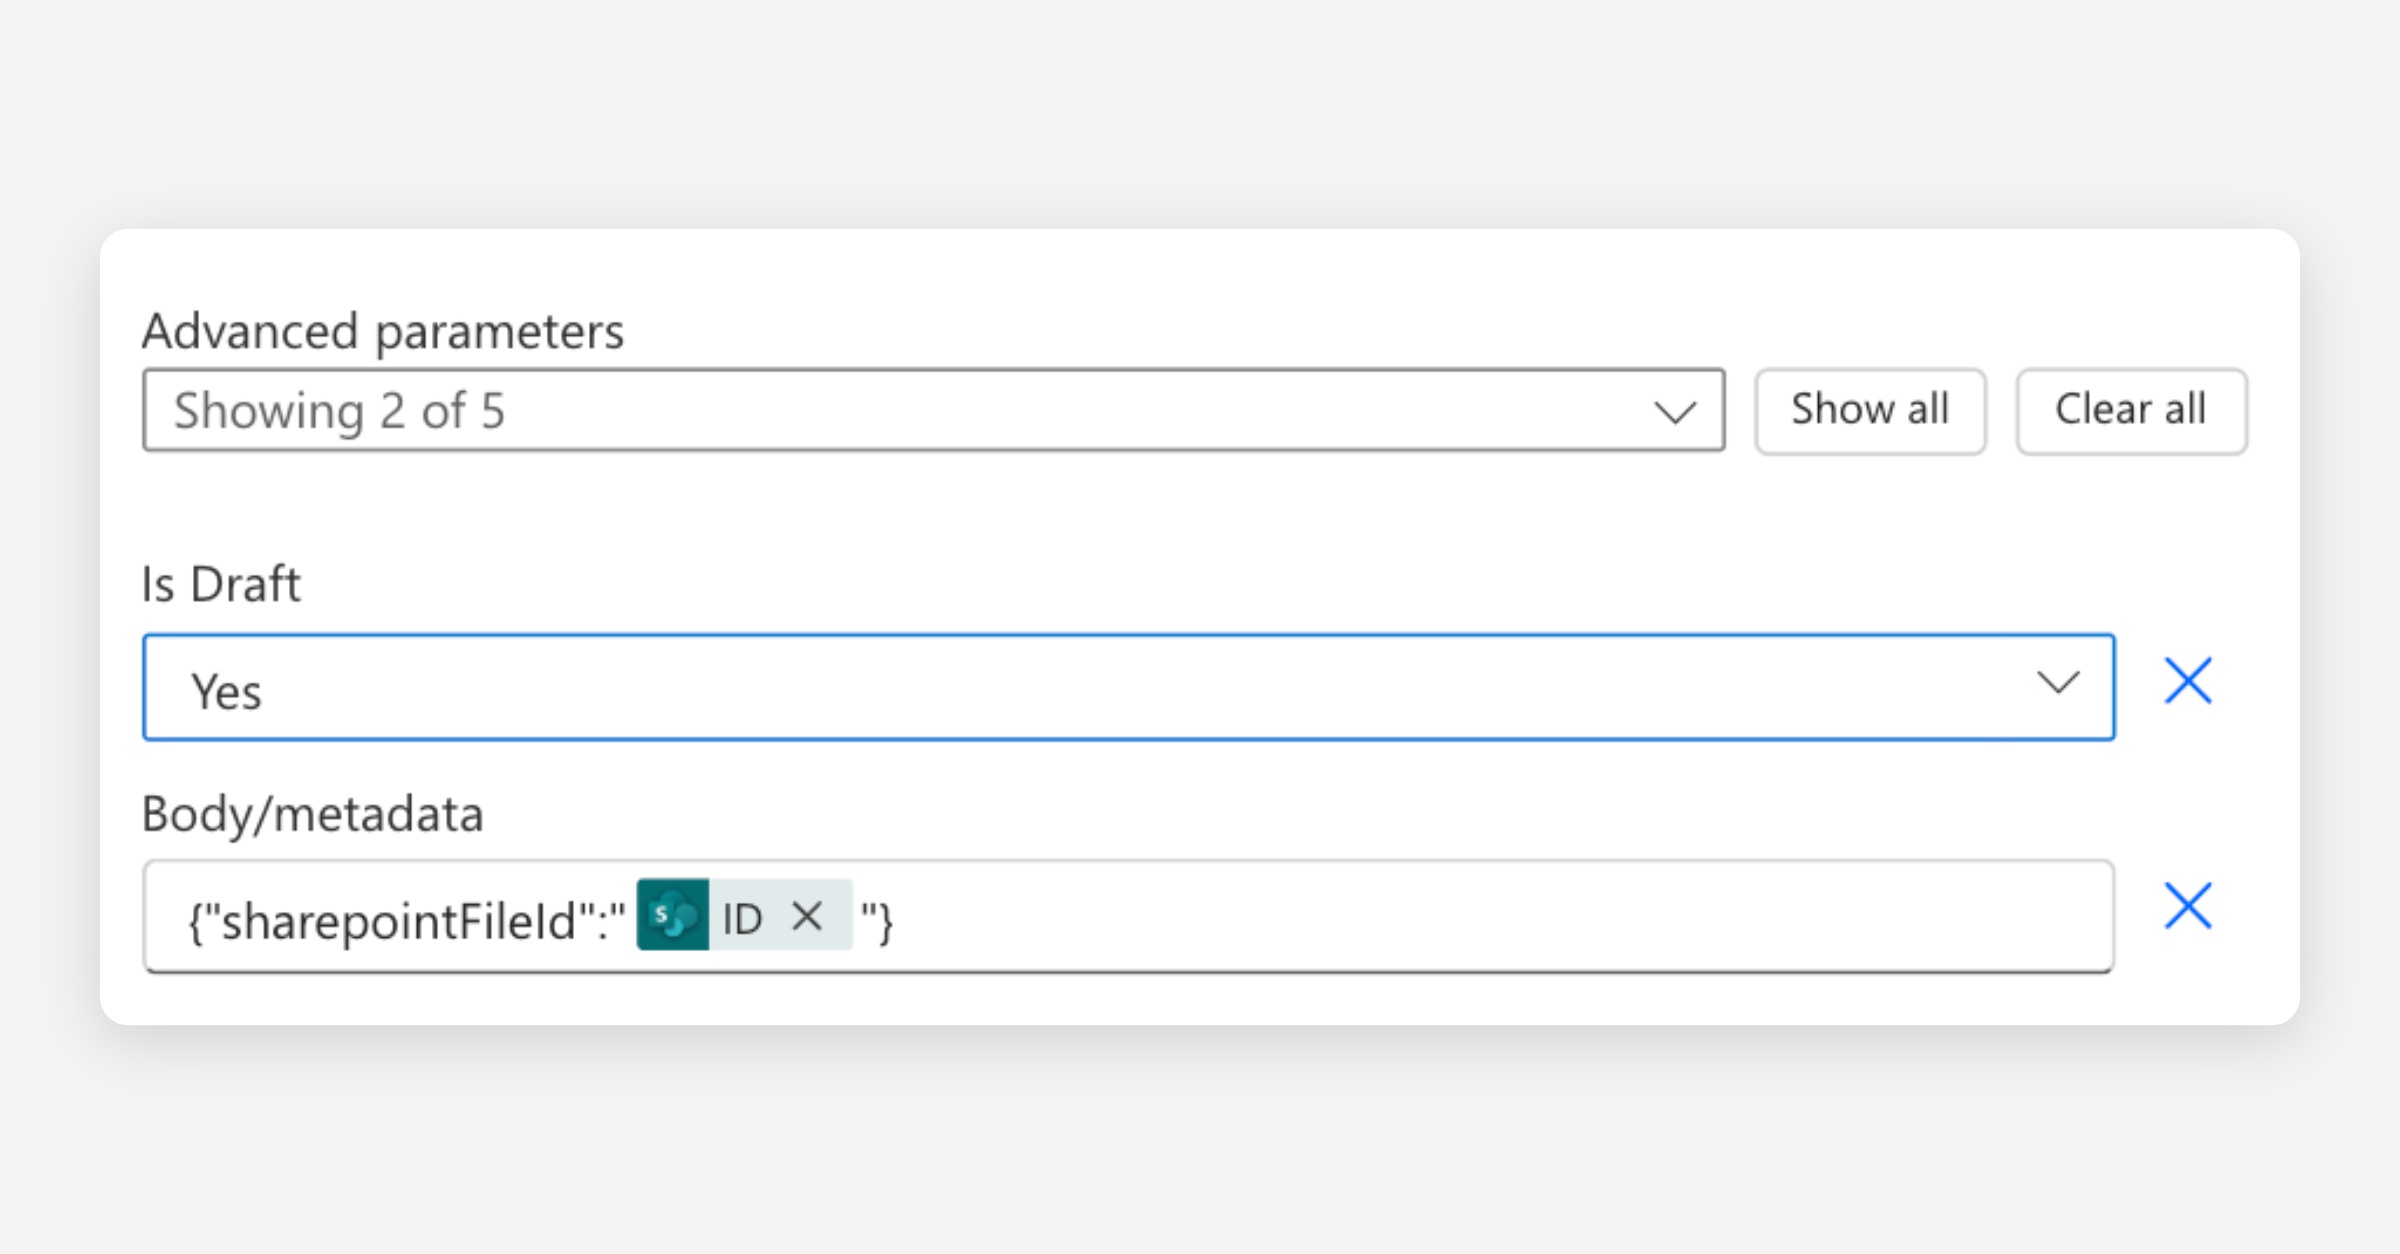
Scroll to the bottom and expand Advanced parameters select Is Draft and Body/metadata.
Body/metadata — we're going to store the SharePoint file ID here so Flow 2 can look up the original document later. Click into the field and:
Type the literal text
{"sharepointFileId":"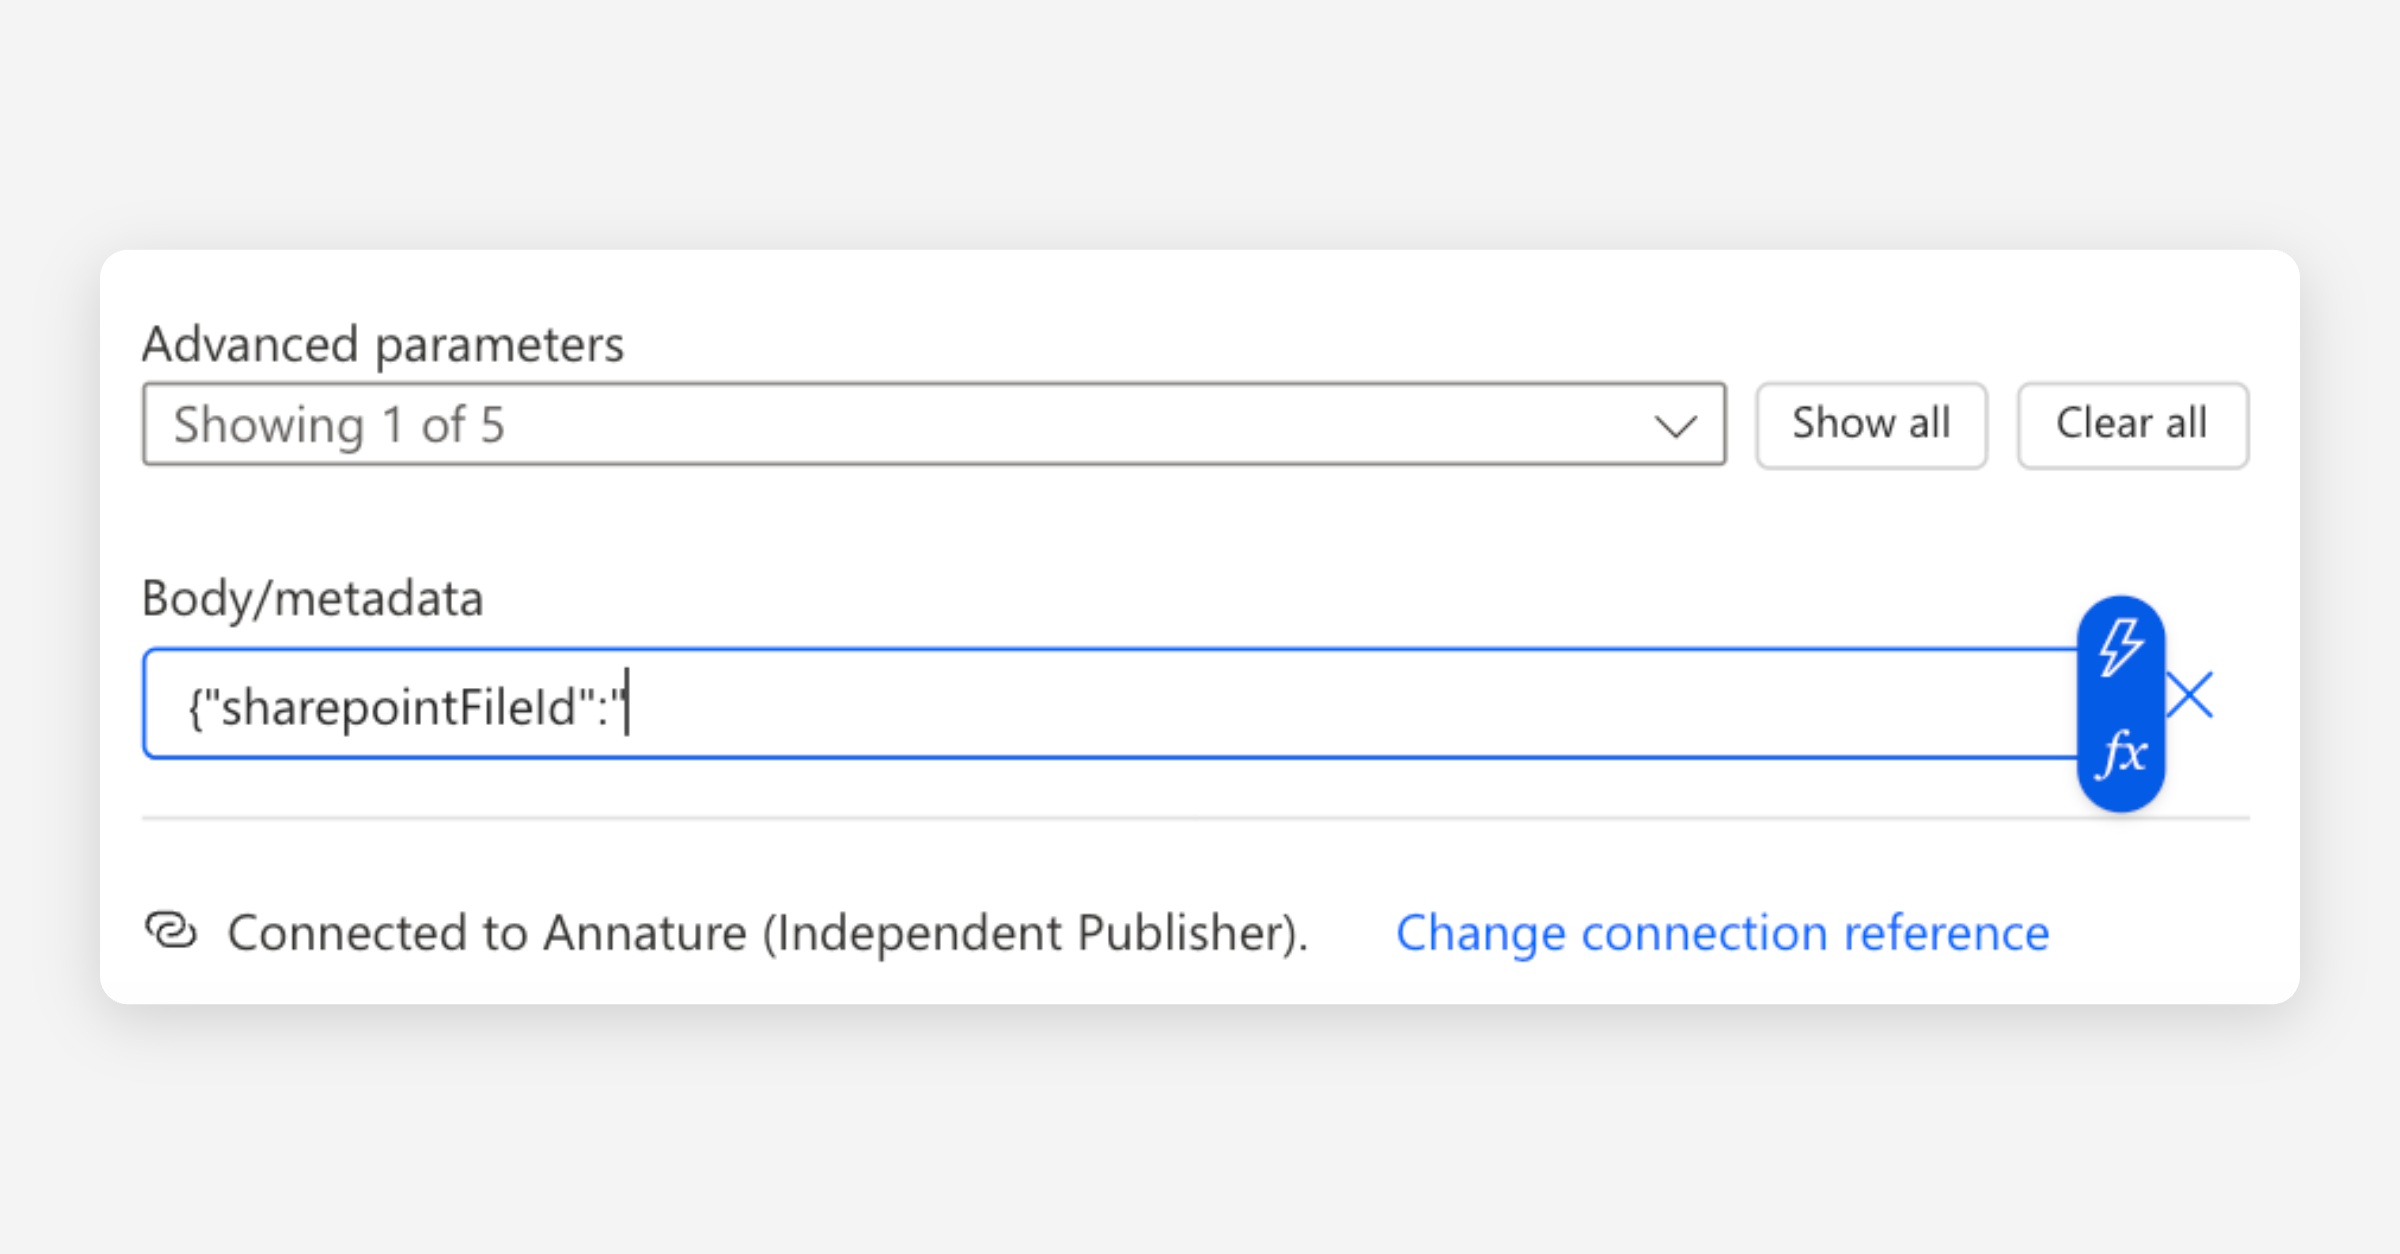
Open the dynamic content picker and select ID from the manual trigger. This inserts a coloured pill into the field (not text).

After the pill, type
"}to close the JSON.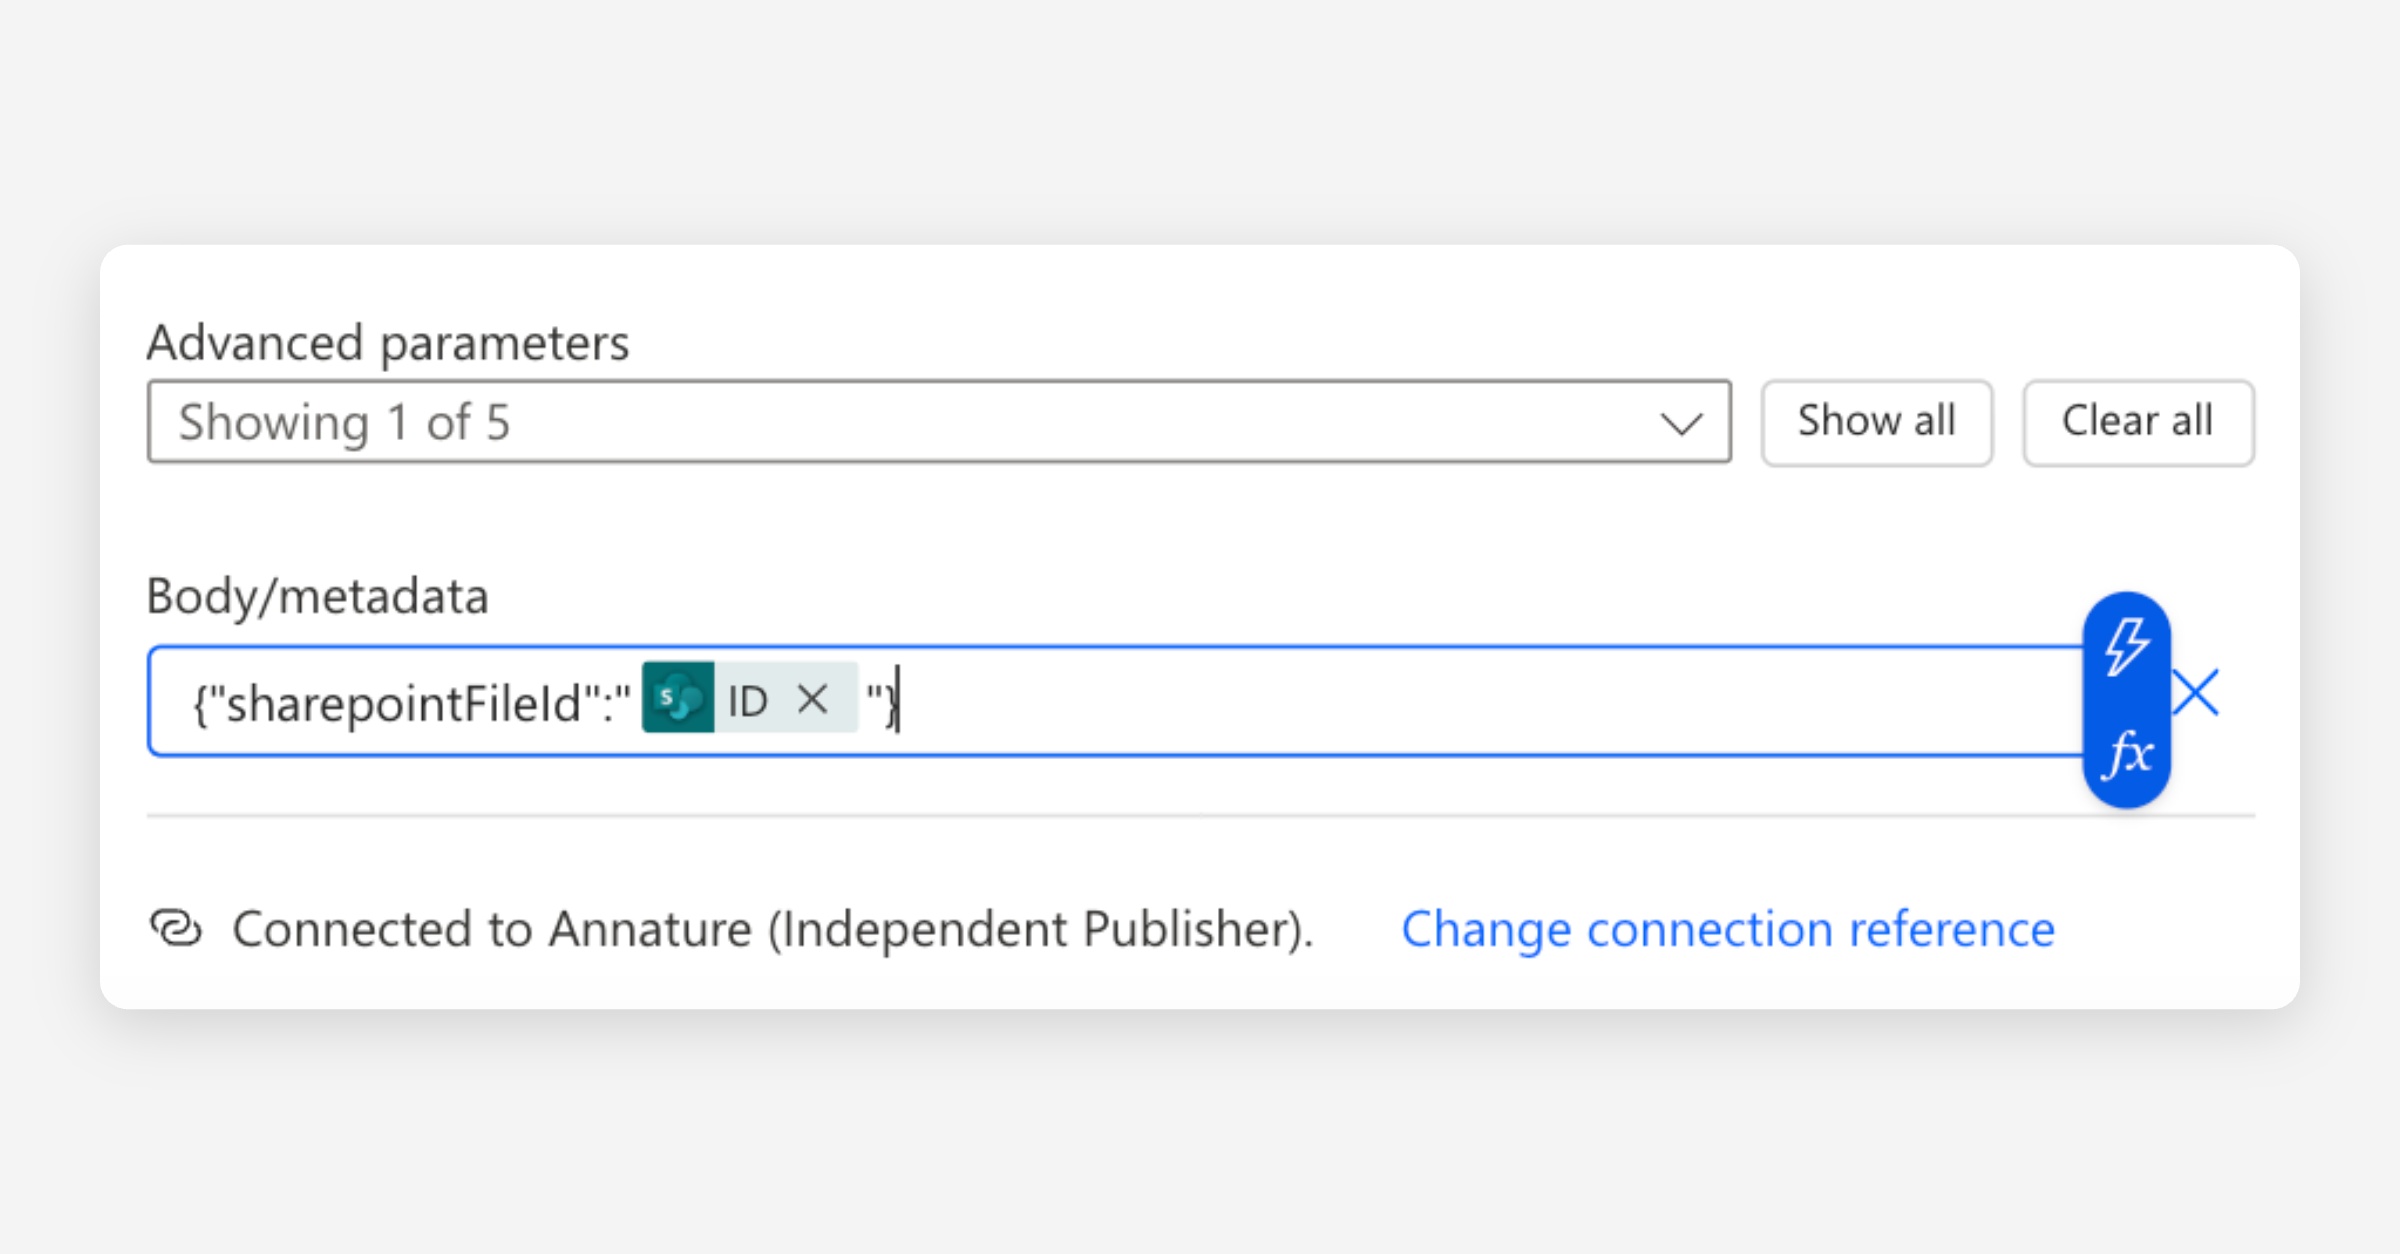
The field should look like this:
{"sharepointFileId":" [ID] "}…where
[ID]is a coloured pill, not text. At runtime, this gets stored on the envelope as a JSON object with the file's SharePoint list item ID as the value (something like"81").Notes: Using a JSON literal with a dynamic content pill is more reliable than building a JSON string with
concat()expressions. Power Automate handles the substitution automatically, and you can debug it visually in run history. We're storing the file's ID rather than its URL because Flow 2 can use the ID with SharePoint's Get file properties action to reliably resolve the folder path — even if the file is moved within the site after Flow 1 runs.
Set Is draft and set it to Yes.
Click Save in the top-right.
Flow 1 is now live. To test it, go to your SharePoint document library, select a file, click the three dots, and look for your flow under the Automate menu. Running the flow creates a draft envelope in Annature with the document attached.
Flow 2 — Completed envelope back to SharePoint
This flow listens for envelope events from Annature, fetches the full envelope, and once it confirms the envelope was completed and originated from SharePoint, saves the signed PDF back into the original folder.
Create the flow
Back in Power Automate, click Create and choose Automated cloud flow.
Give the flow a name, for example "Save completed envelope to SharePoint".
Search for Annature and select the Event Trigger - Envelope and Recipient trigger.
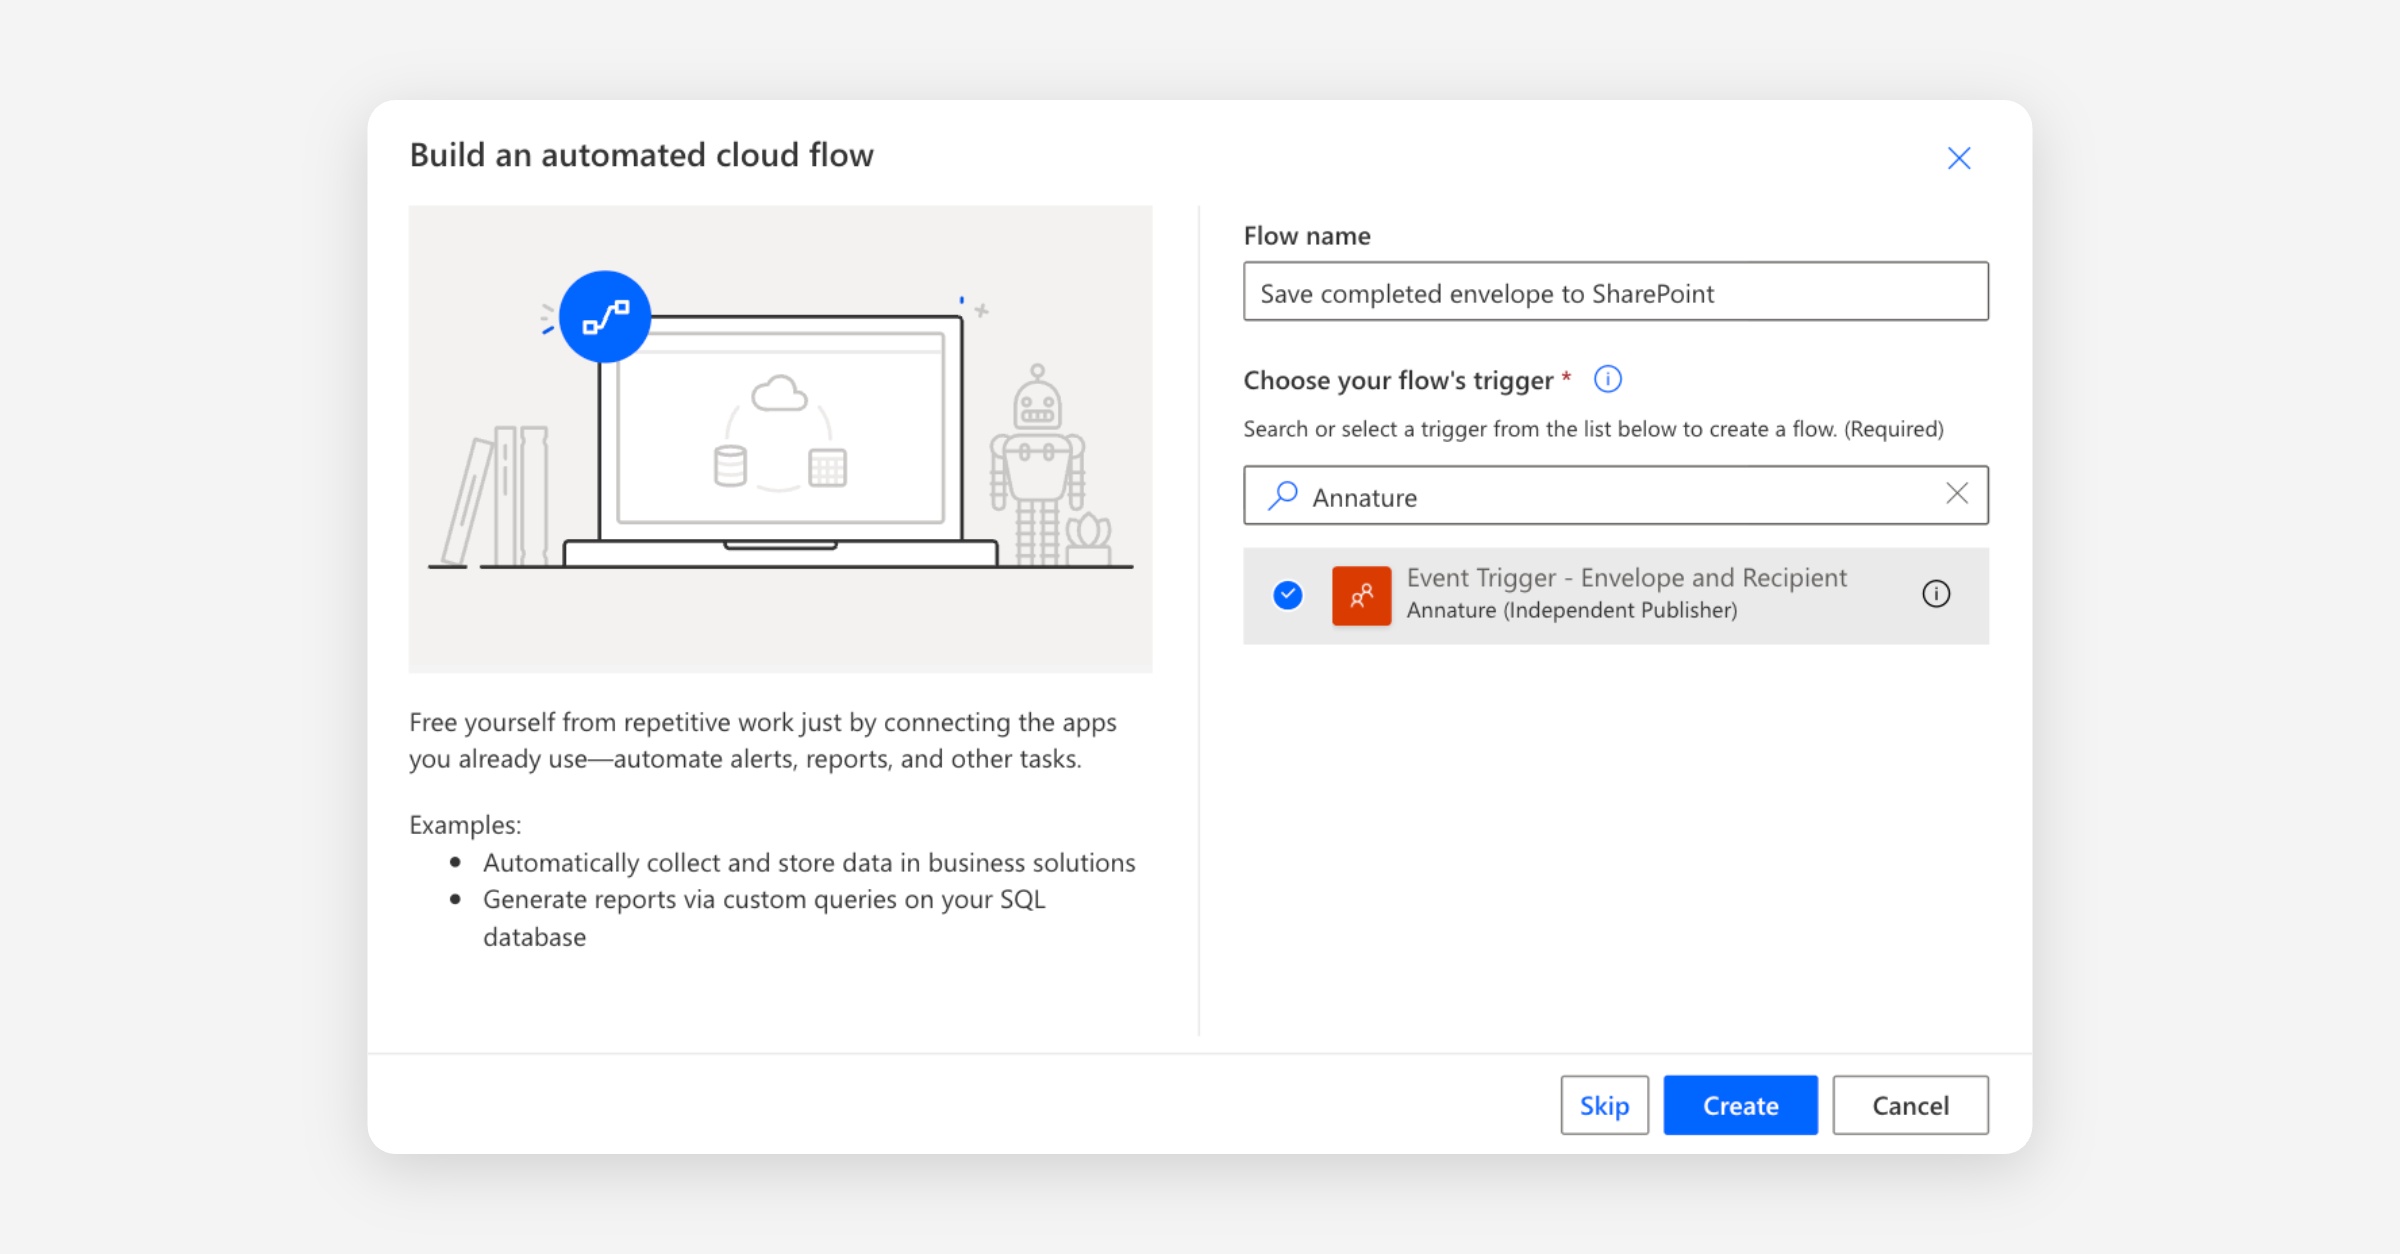
Click Create.
Get the envelope details
The trigger fires on any envelope event and only gives us the envelope ID. We need the full envelope to access the metadata, signed PDF, and other details — so this is the first action we add.
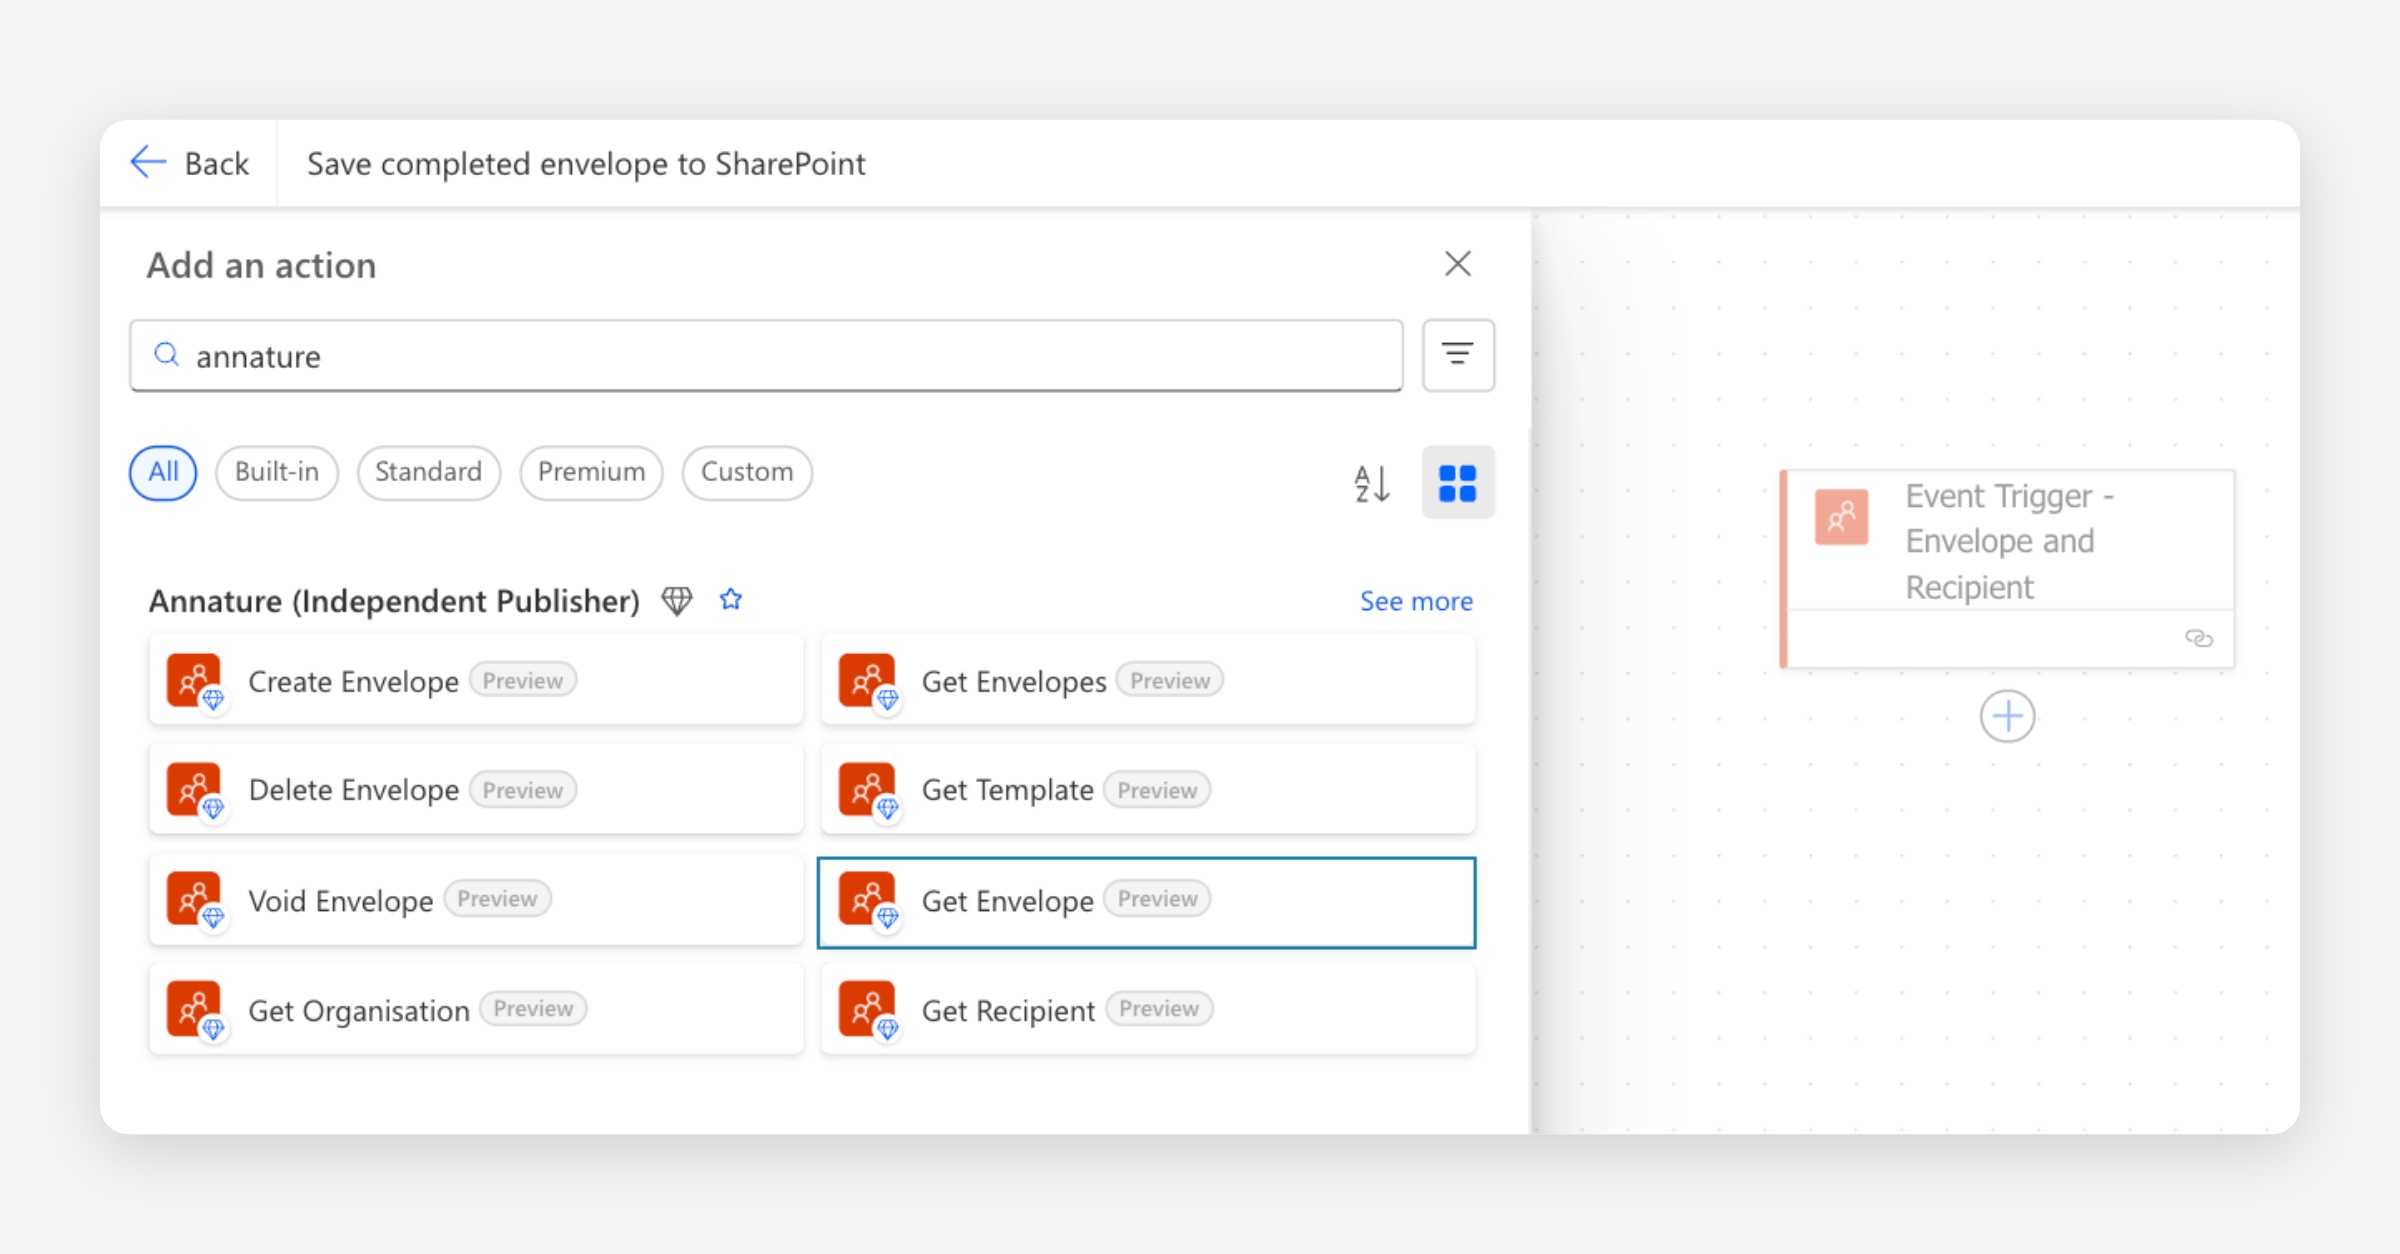
Click the plus button below the trigger and add an action.
Search for Annature and select Get Envelope. Noting there’s a difference between Get Envelope and Get Get Envelope’s.
When prompted, connect with your existing Annature connection.
For Envelope ID, use the dynamic content picker and select envelope_id from the trigger. You will need to select ‘Enter custom value’, which may be at the bottom of a large list, depending on how many envelopes you’ve sent.
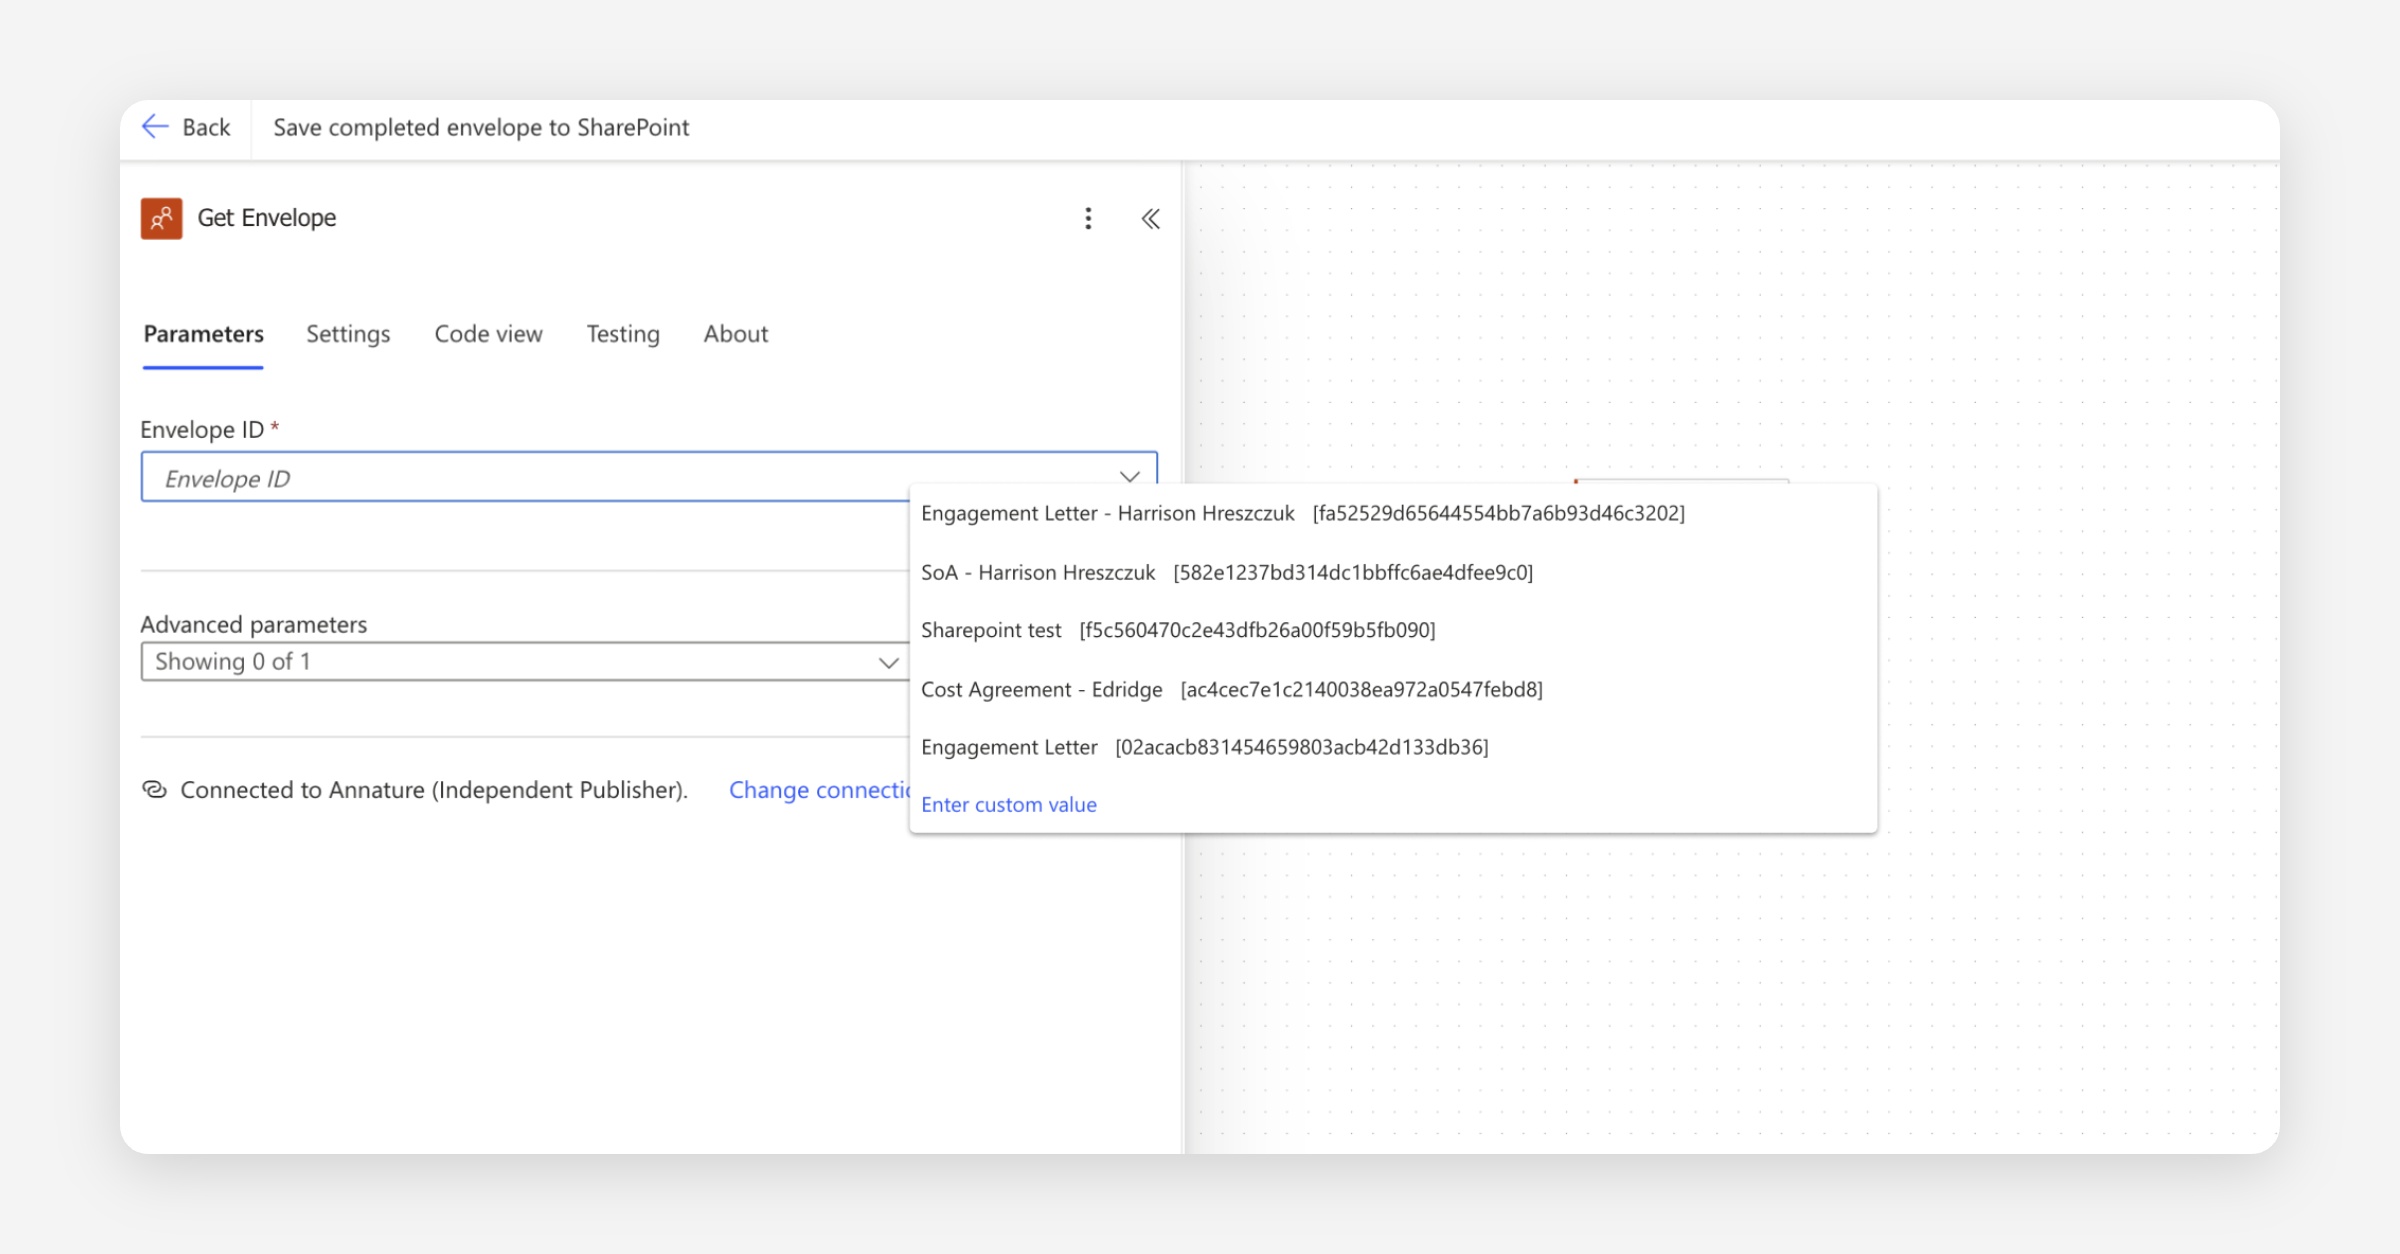
Select the dynamic content picker (lightning bolt), and select the envelope_id.
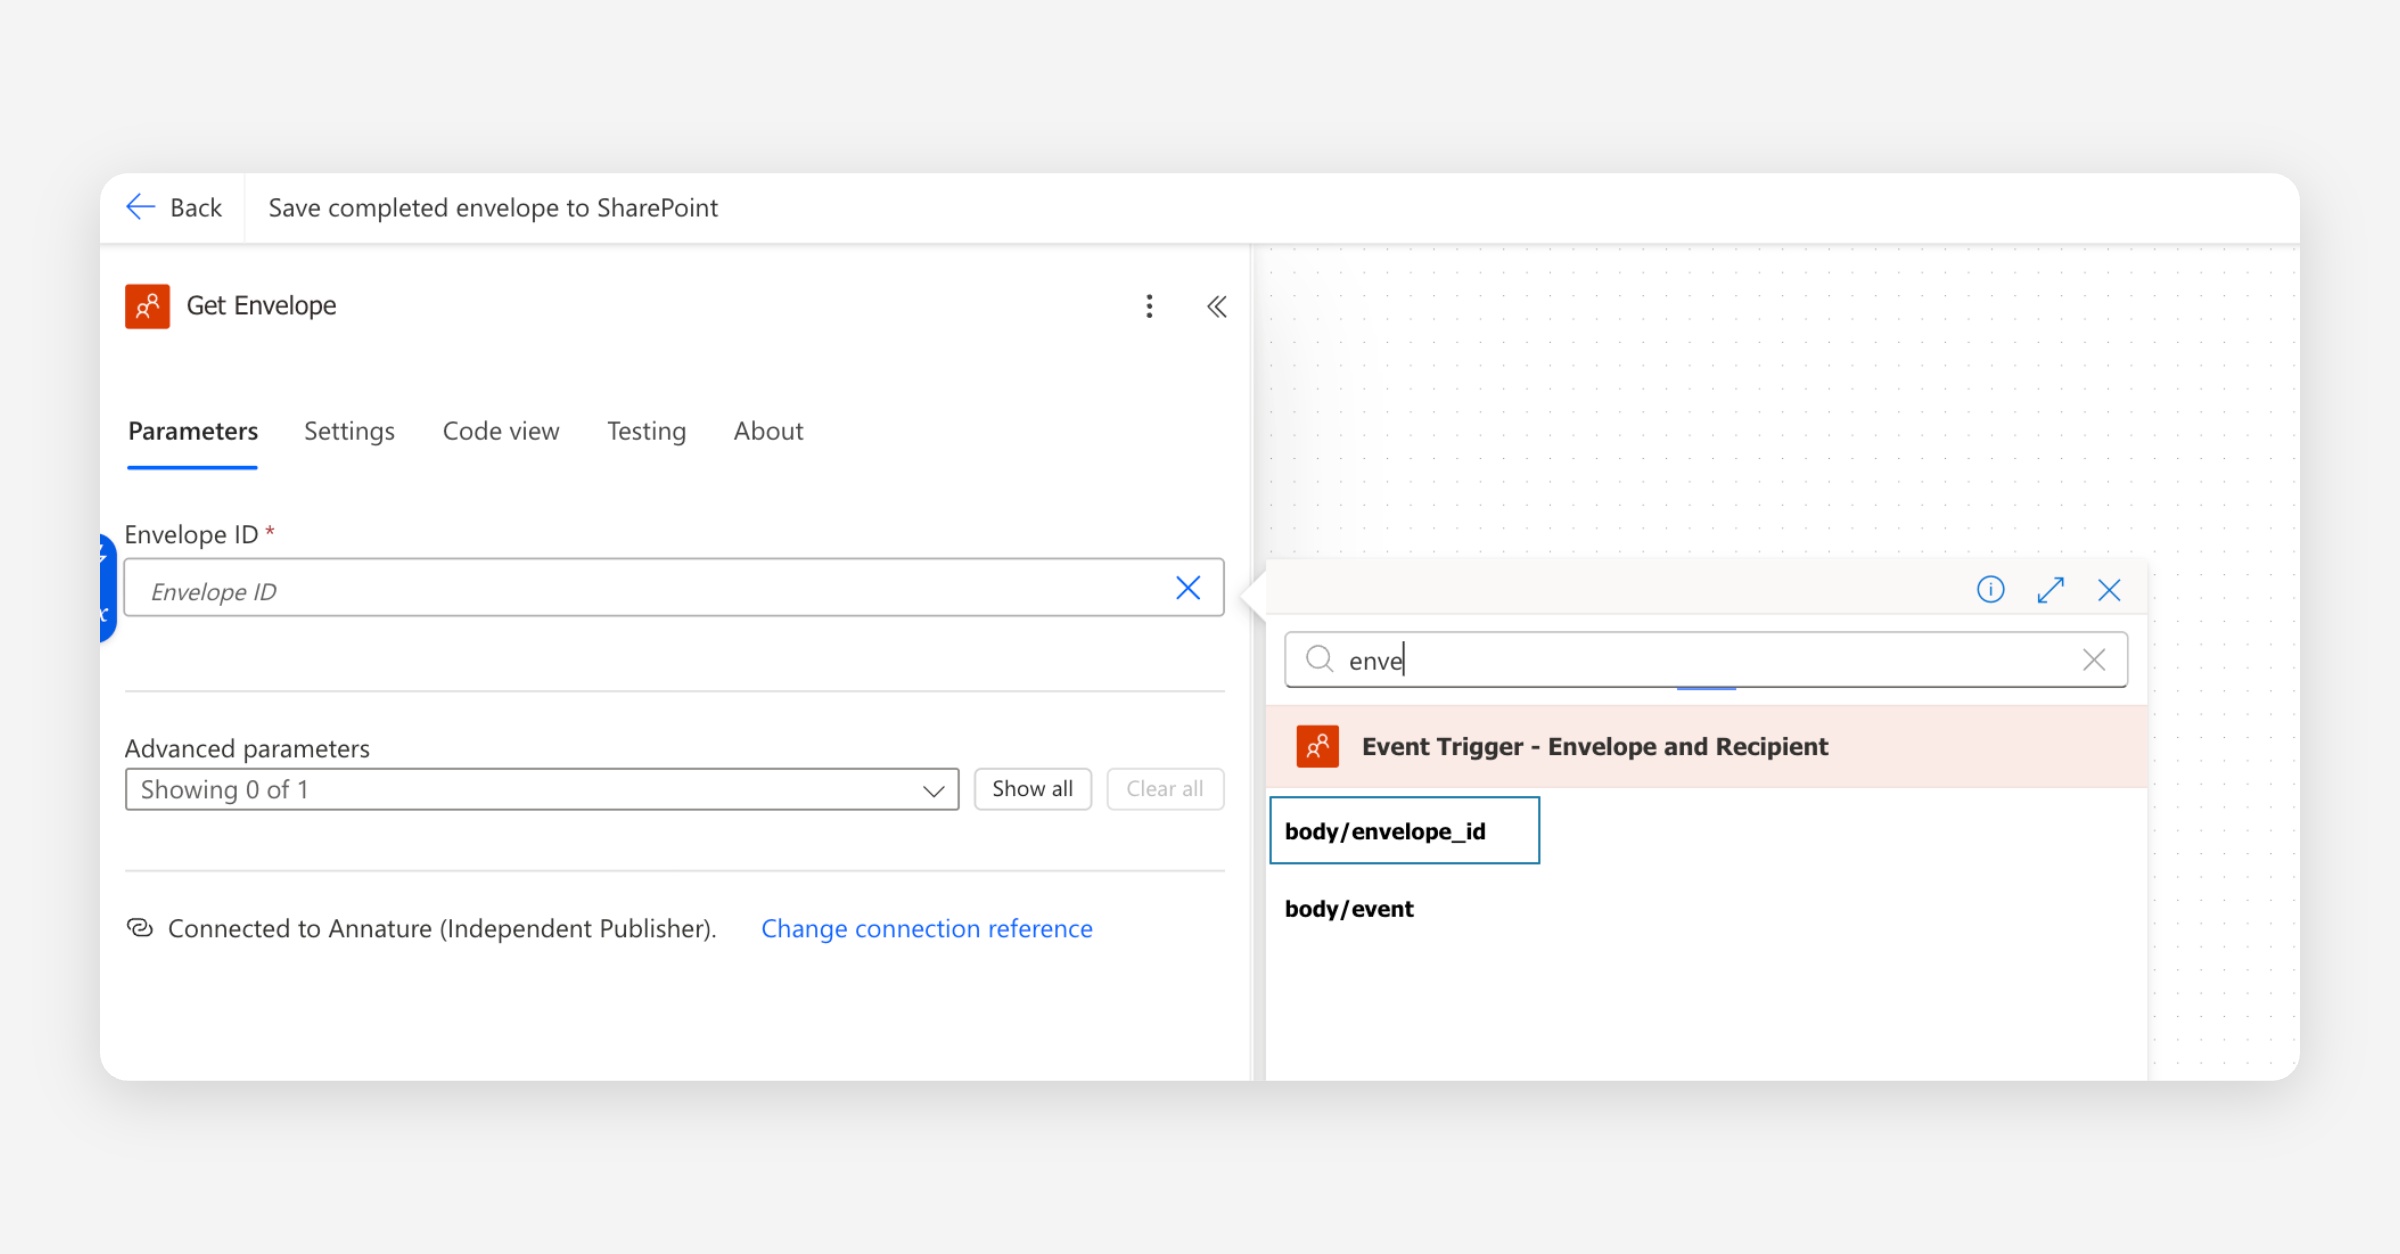
The Get Envelope action returns the full envelope record, including the metadata we stamped in Flow 1 and a combined property — a temporary URL that points to a single PDF containing all signed documents and the certificate of completion bundled together.
Filter for completed SharePoint envelopes
We need this flow's SharePoint actions to run only when two things are true — the envelope has been completed, and it was originally sent from SharePoint. Without the second check, any envelope completed in your account (including ones sent directly from Annature or from another integration) would try to save back to SharePoint and fail.
Click the plus button below Get Envelope and add a Condition action.
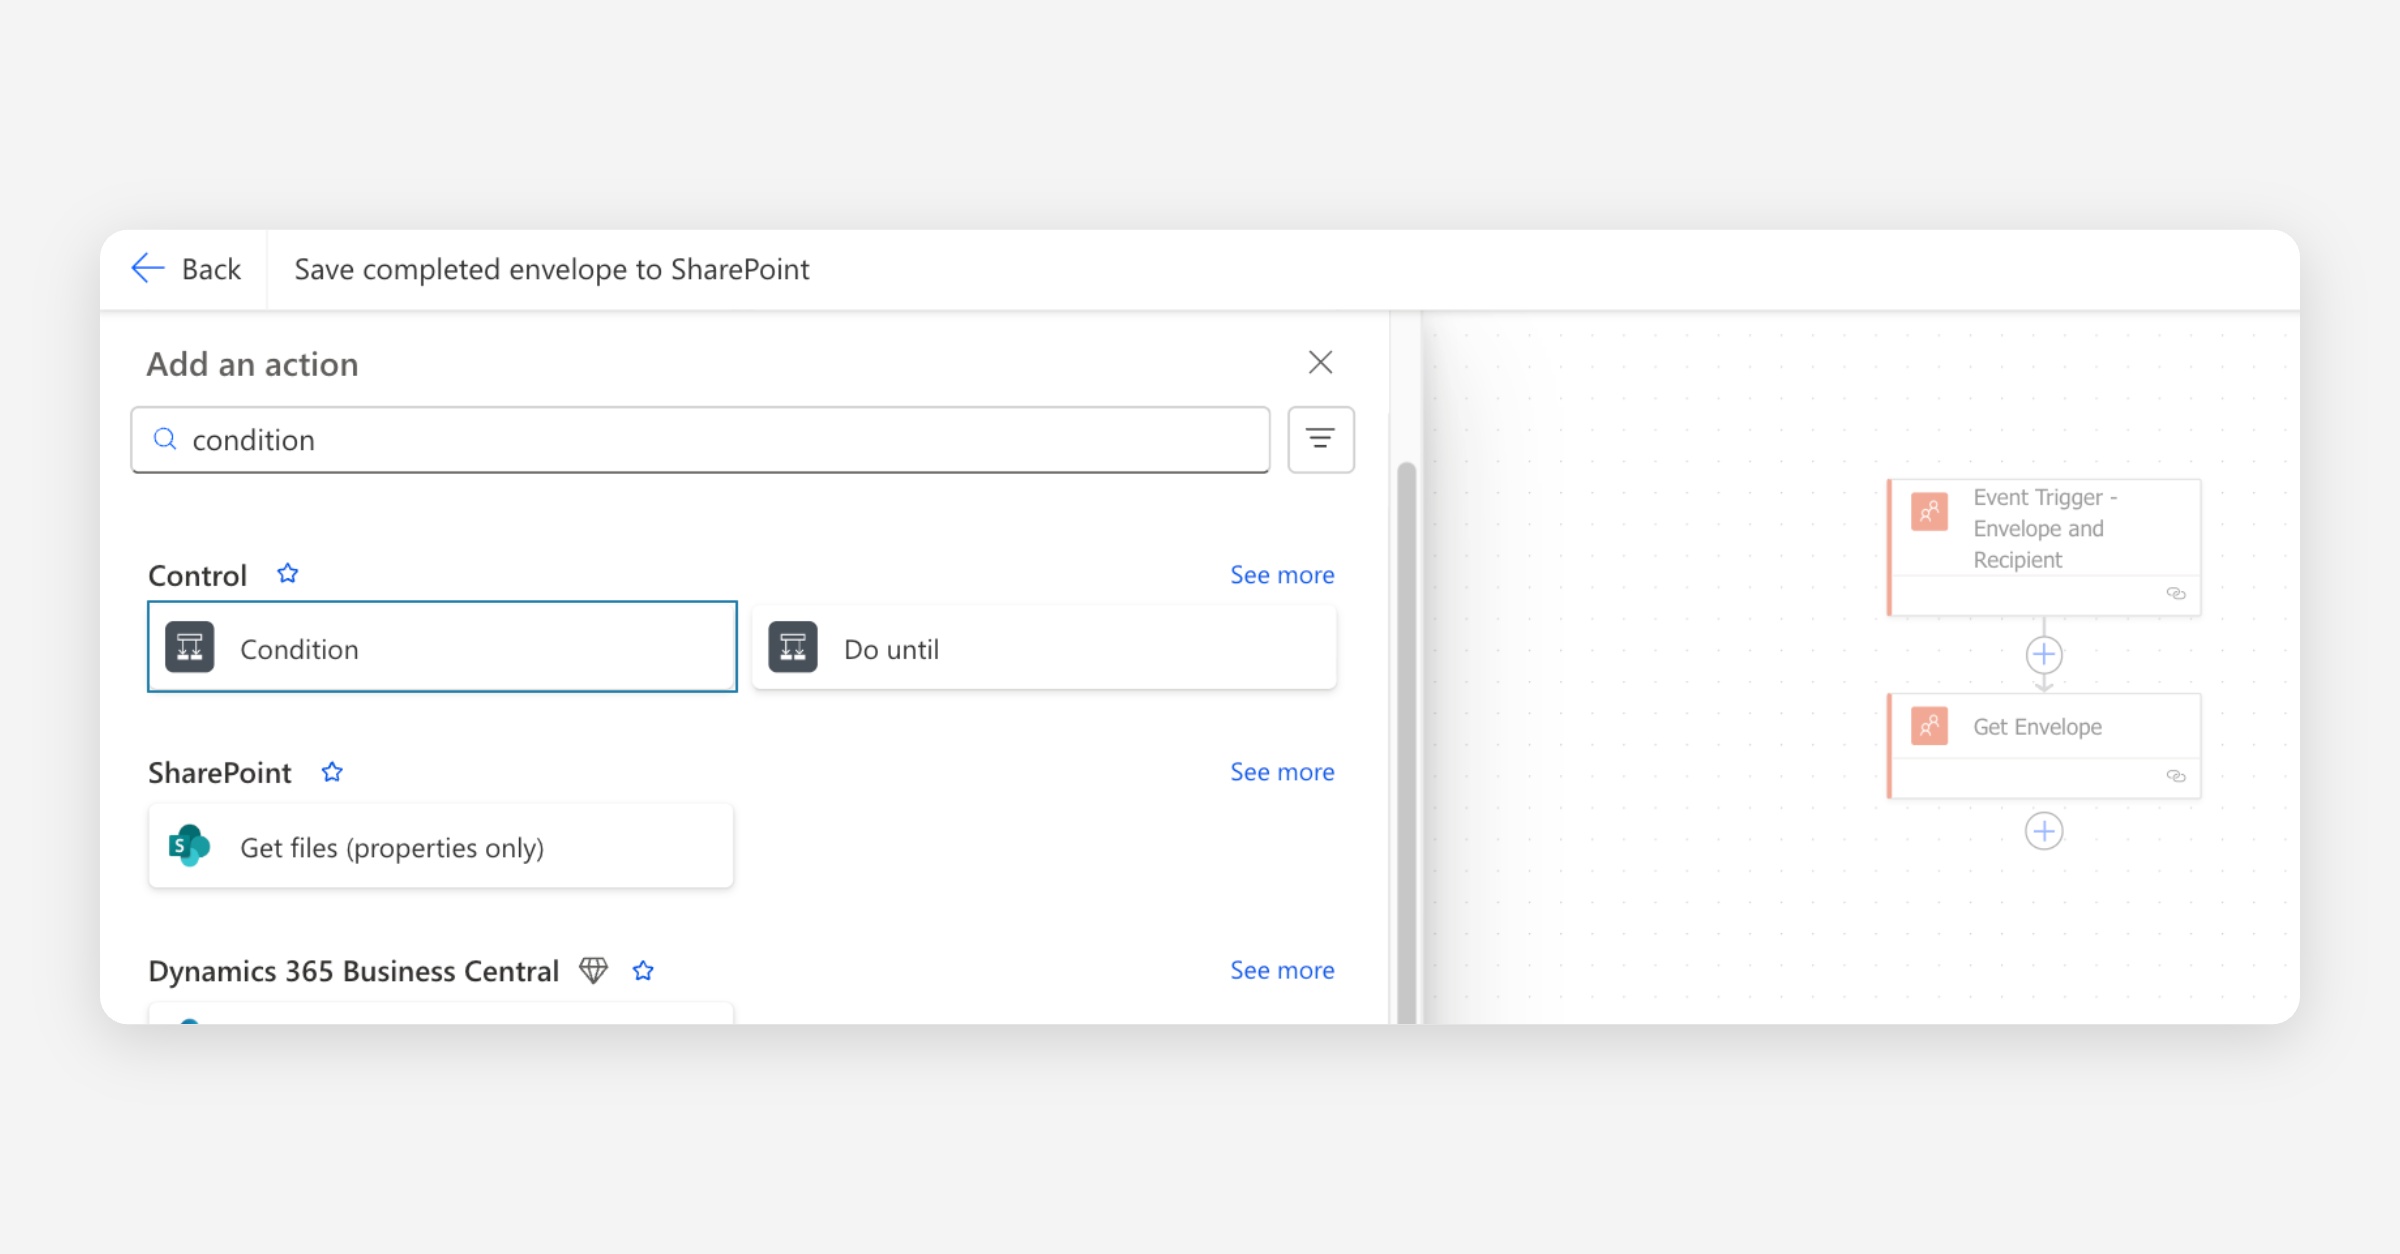
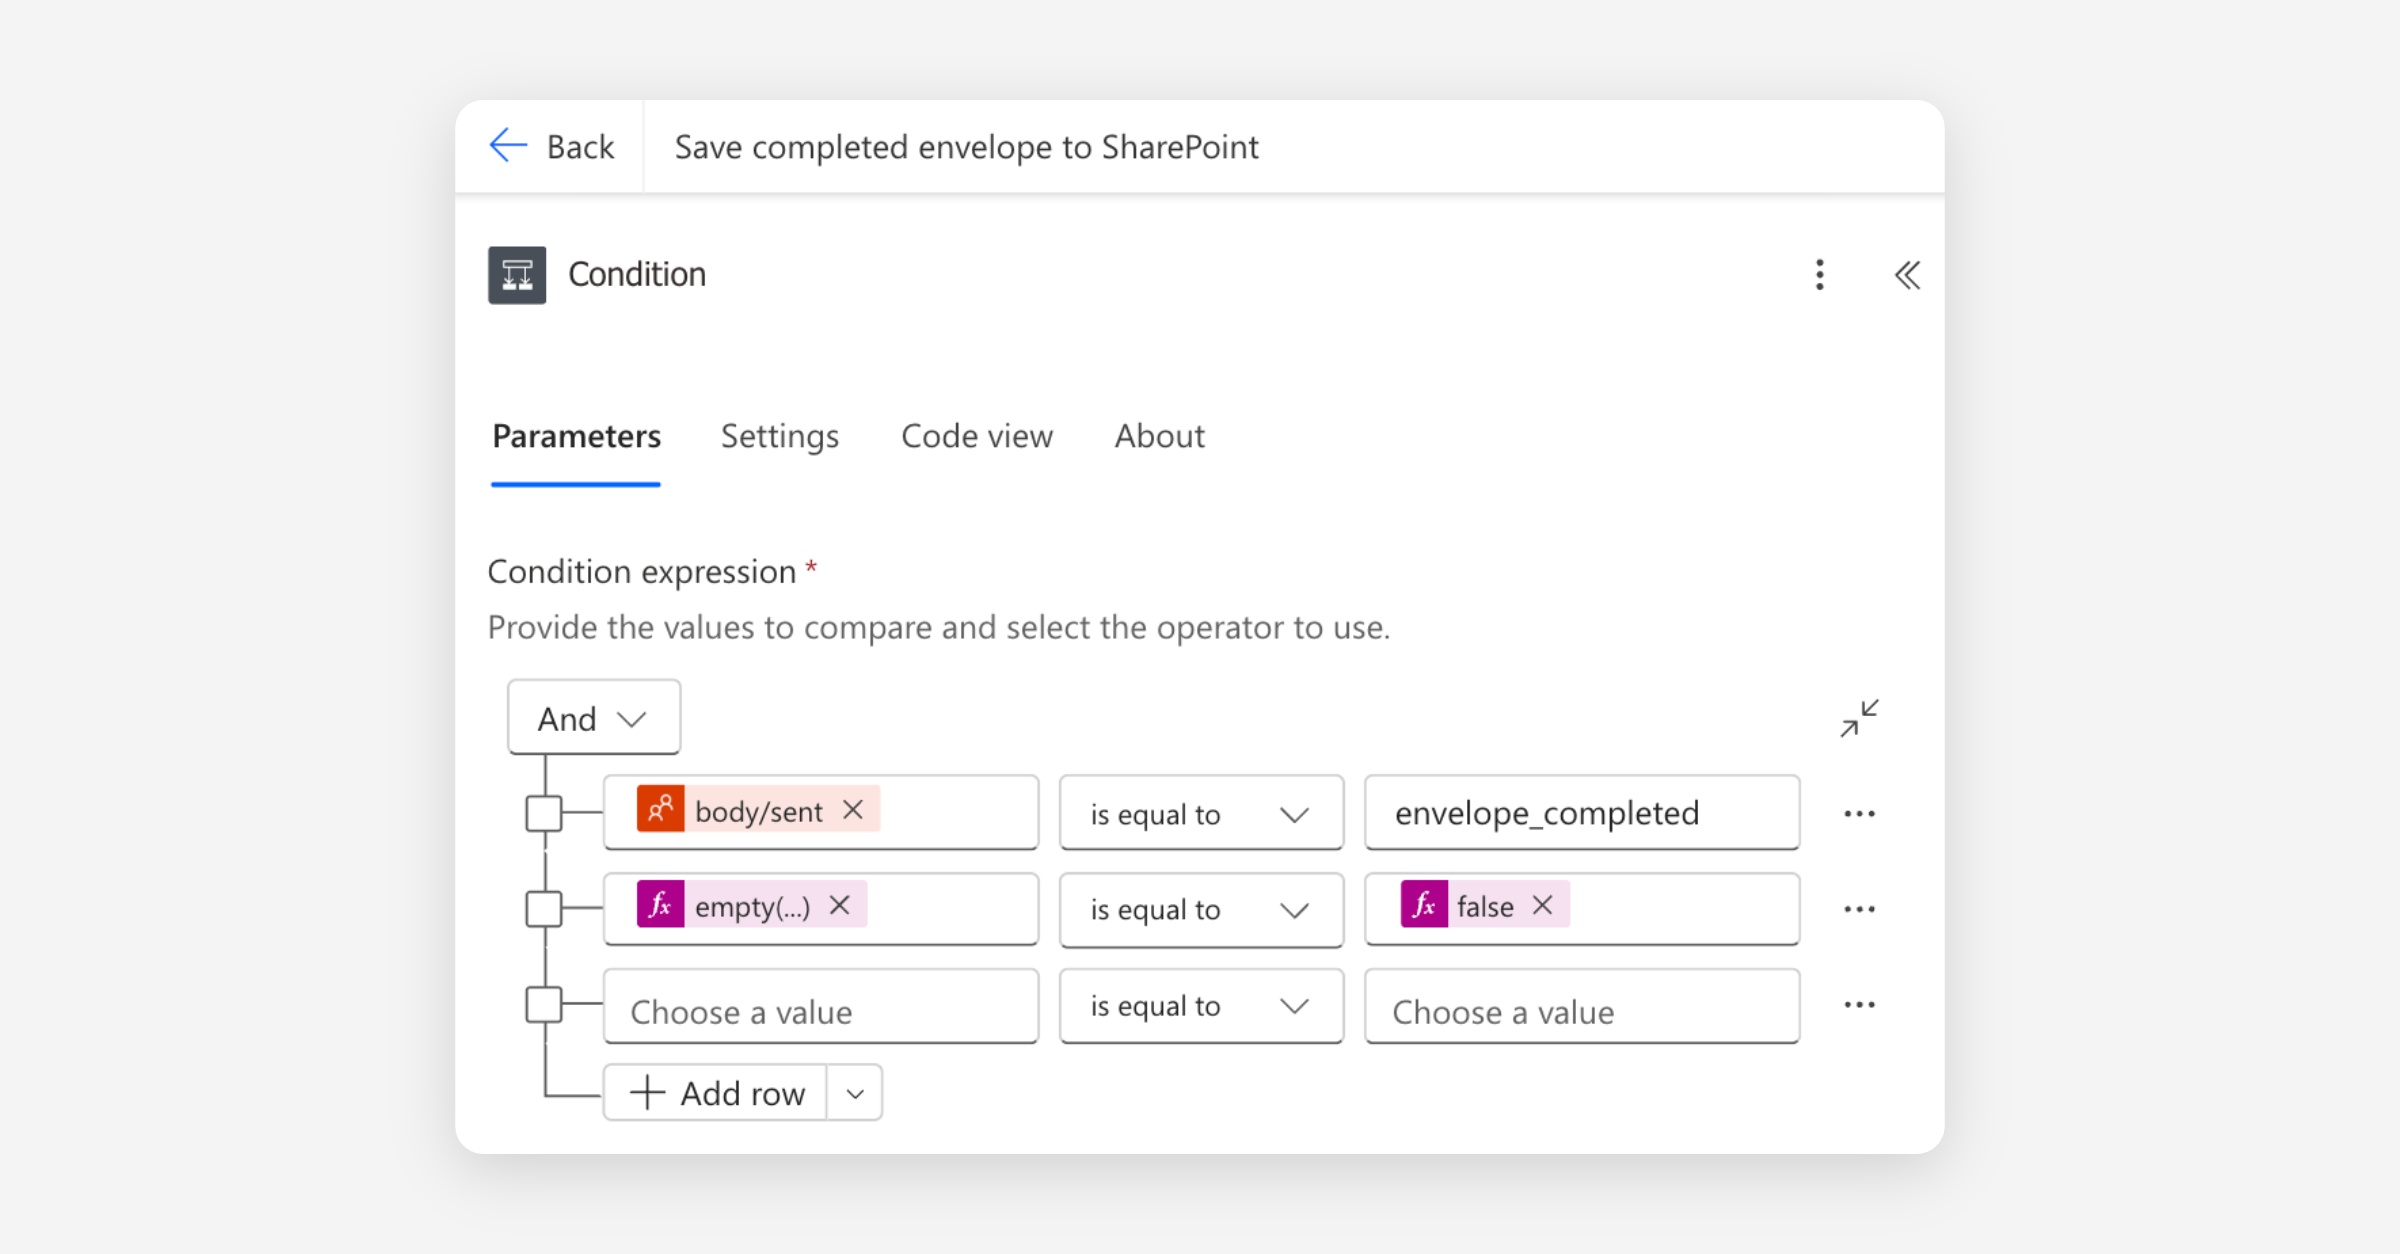
Set the condition to check both of the following, joined with the And operator:
Event type — Click into the left-hand value, use the dynamic content picker (lightning blot) to insert event from the trigger.
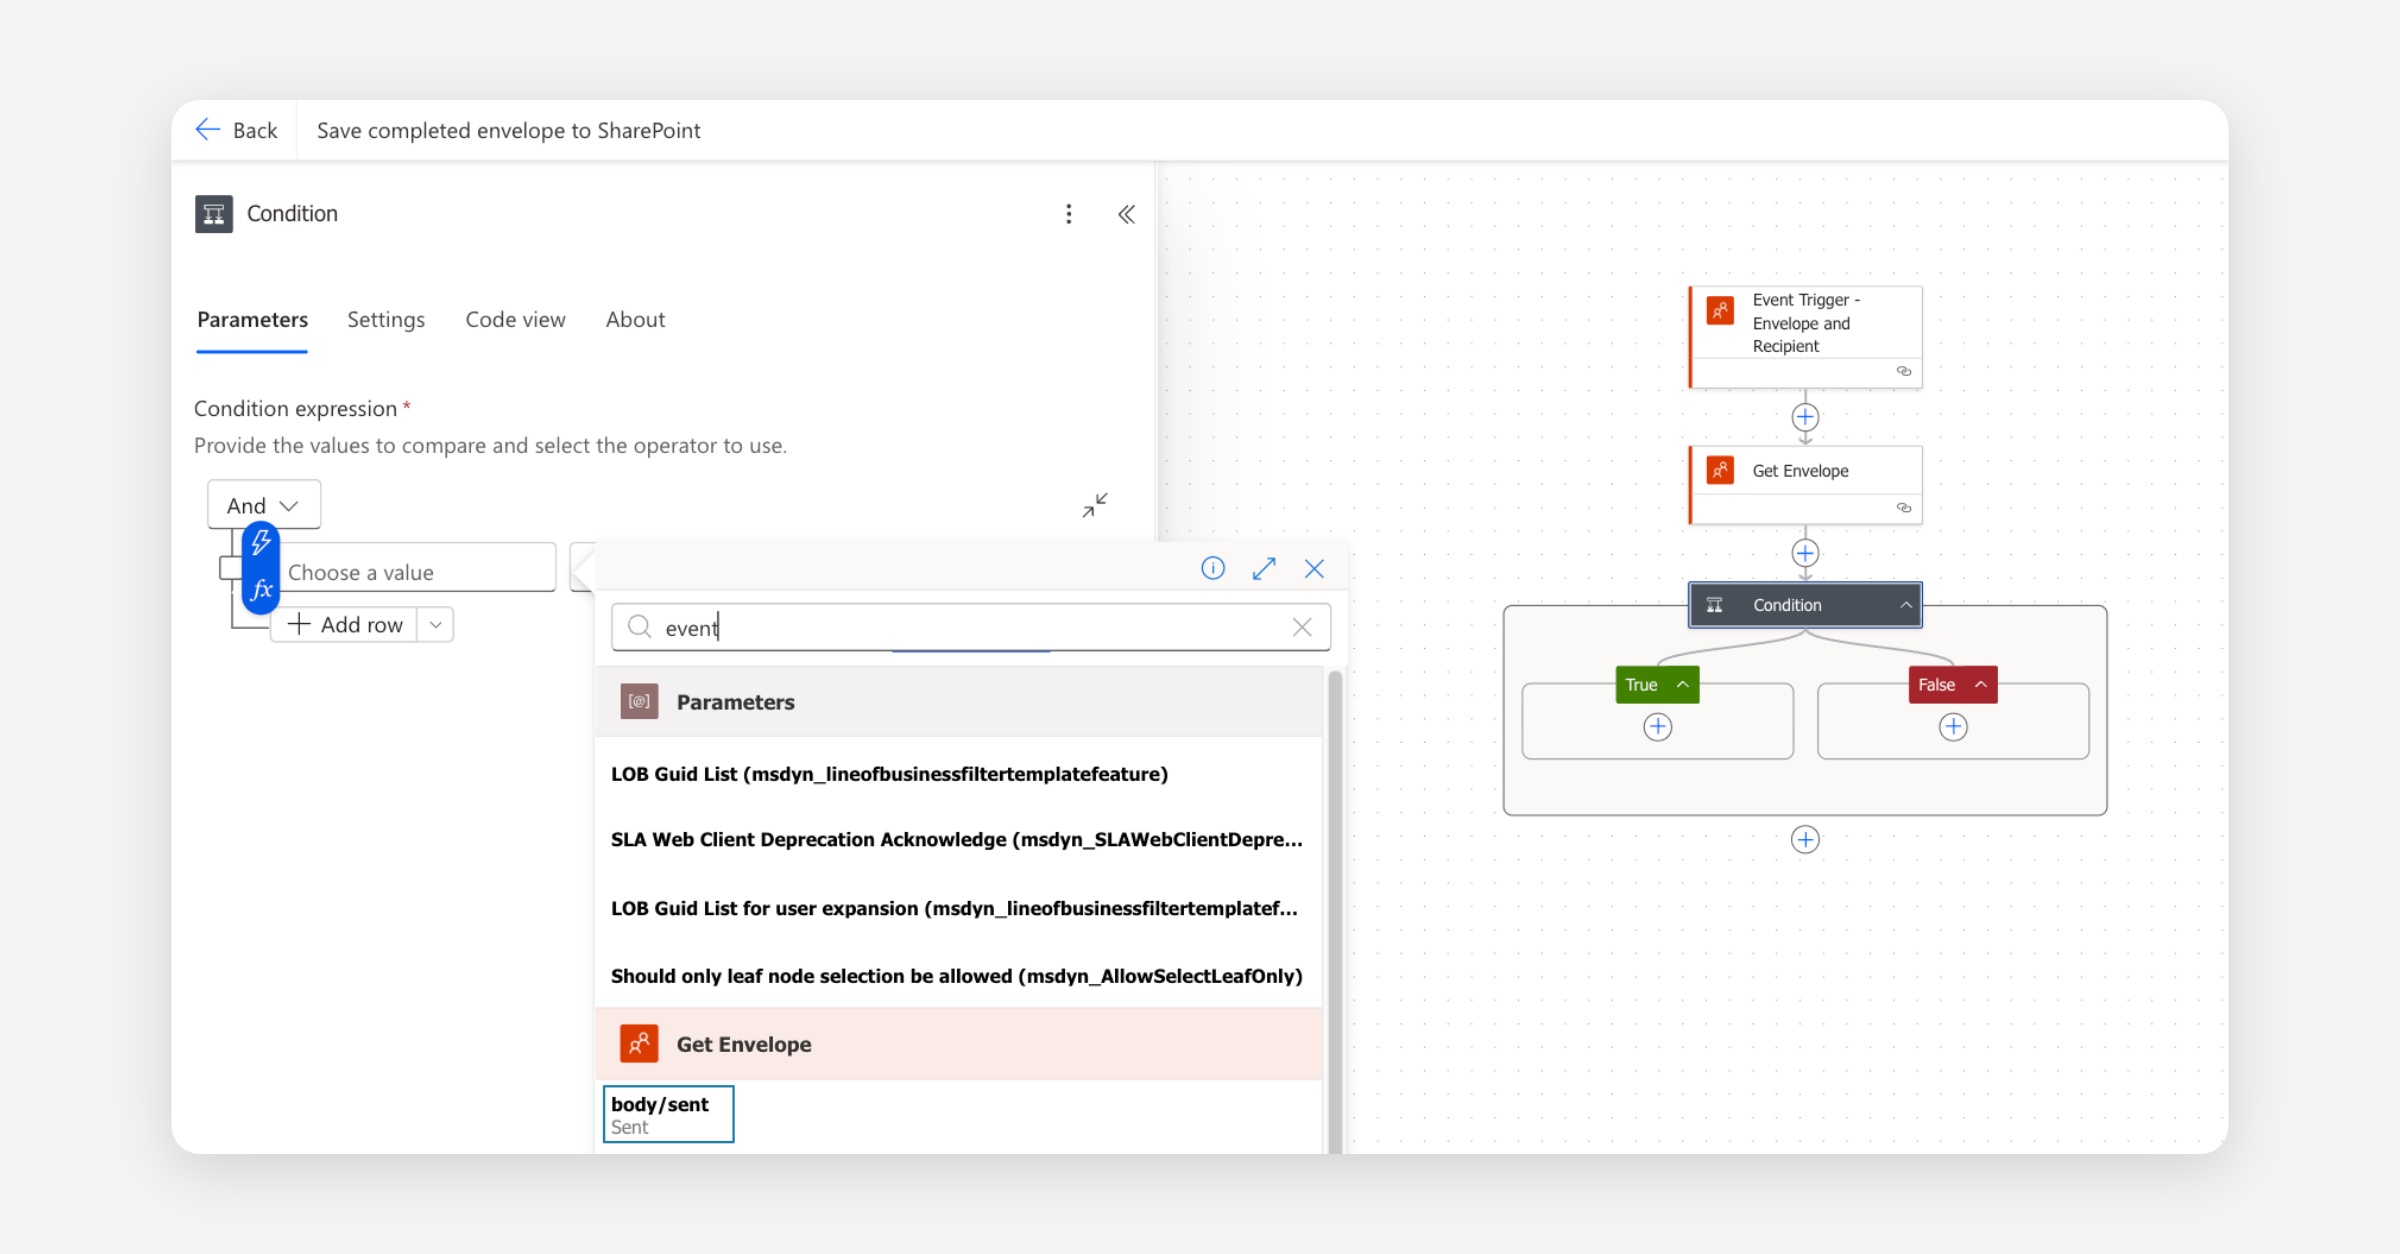
Set the operator to is equal to and the right-hand value to
envelope_completed.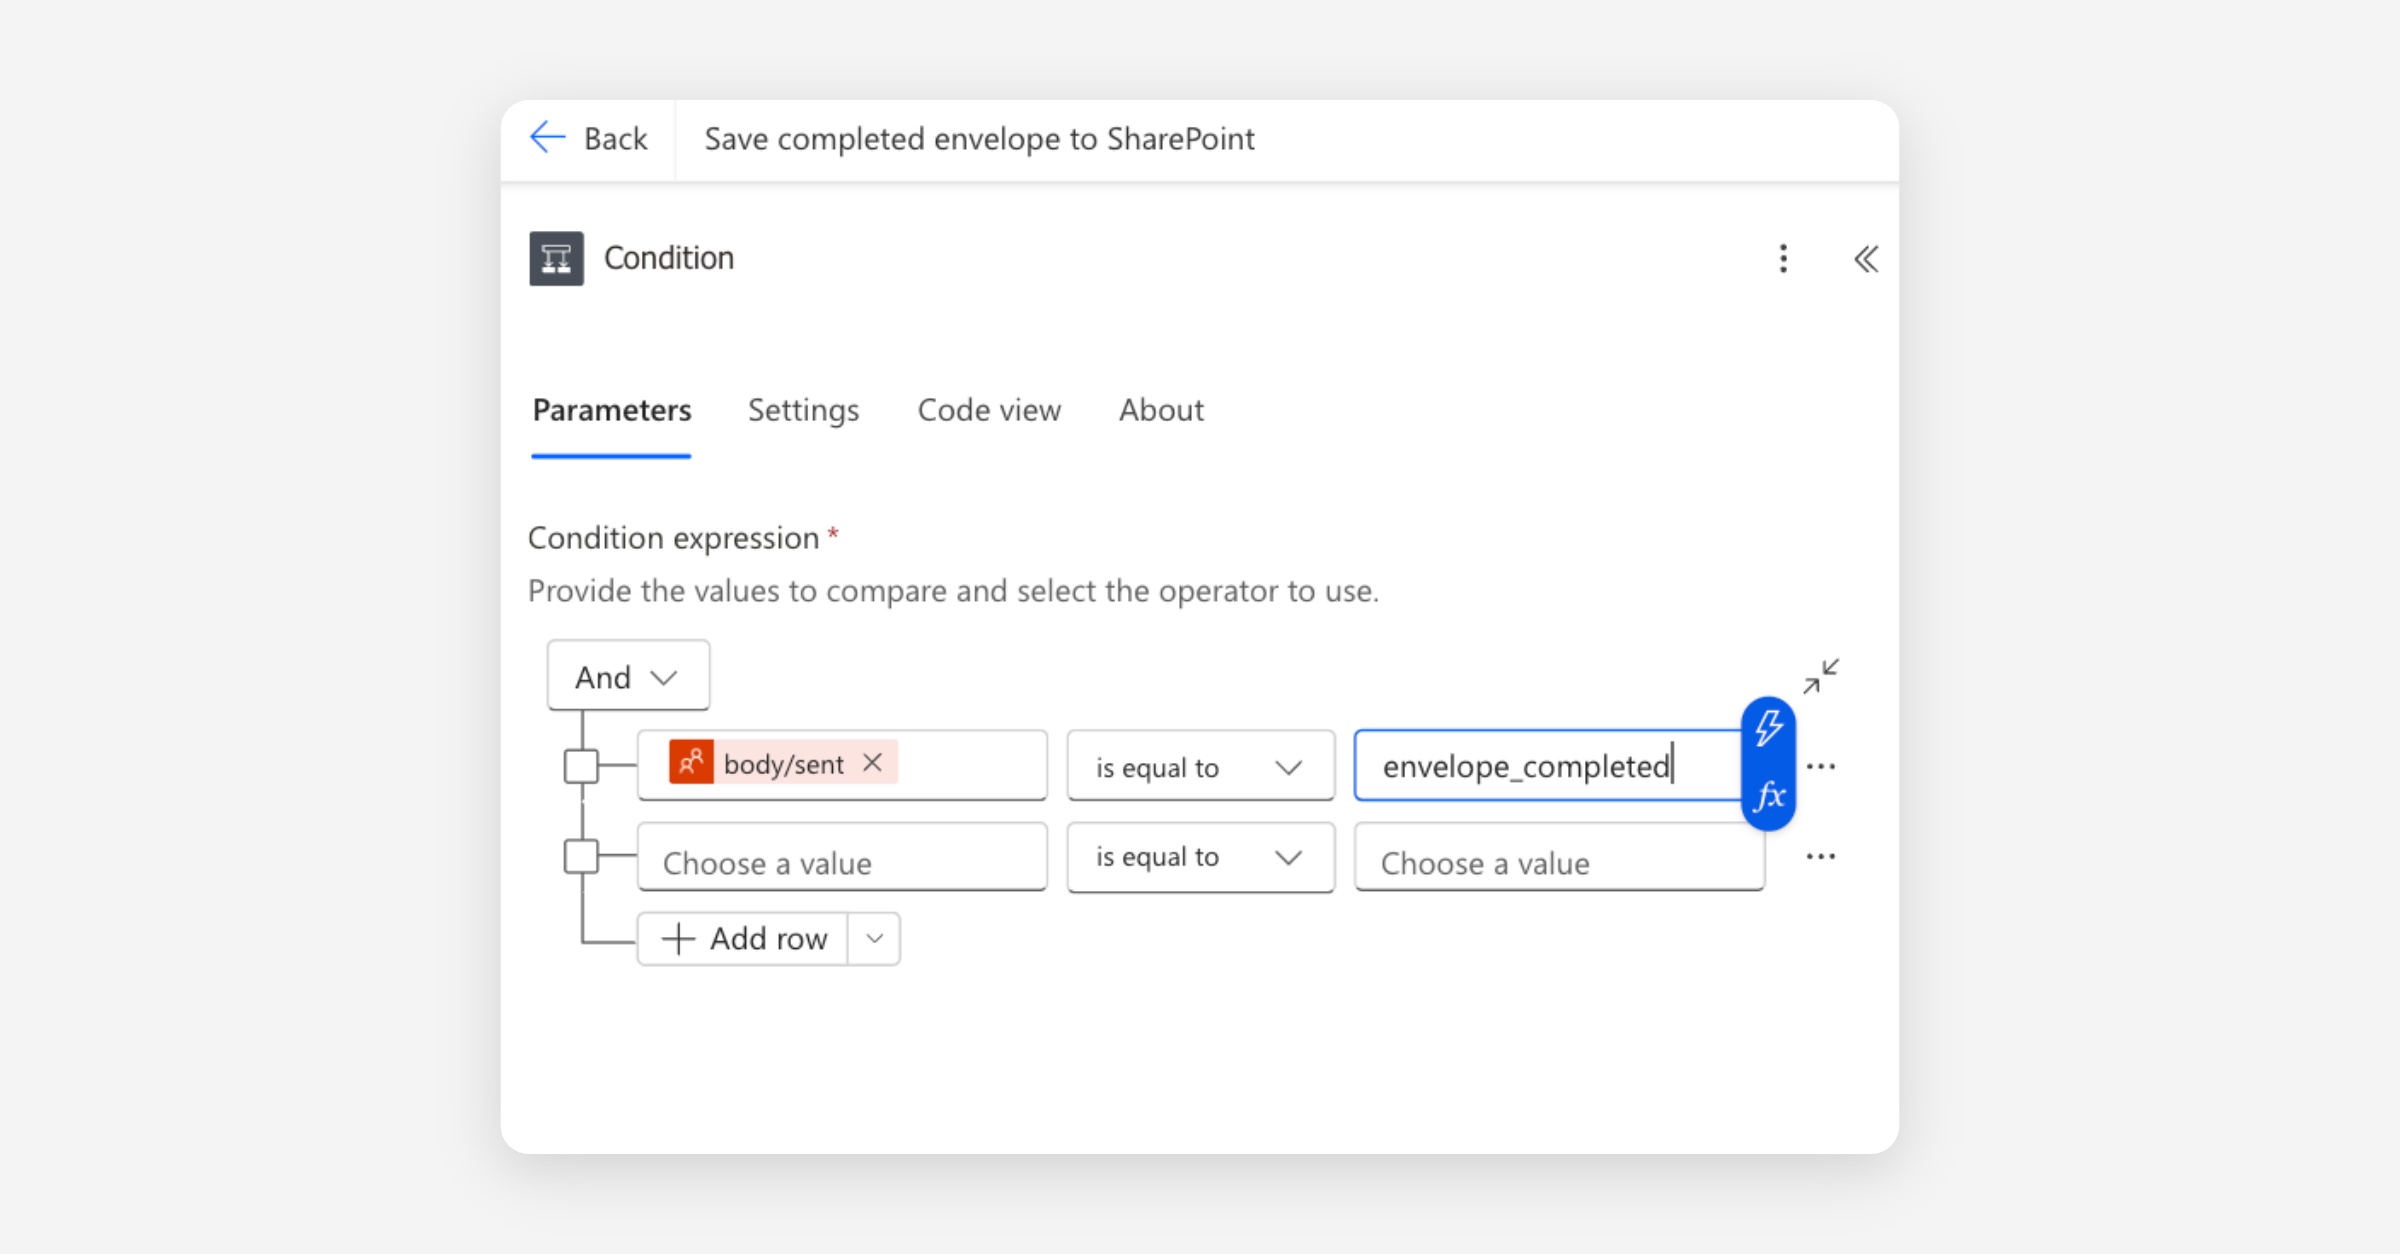
Originated from SharePoint — Click the fx icon for the left-hand value and paste in:
empty(body('Get_Envelope')?['metadata']?['sharepointFileId'])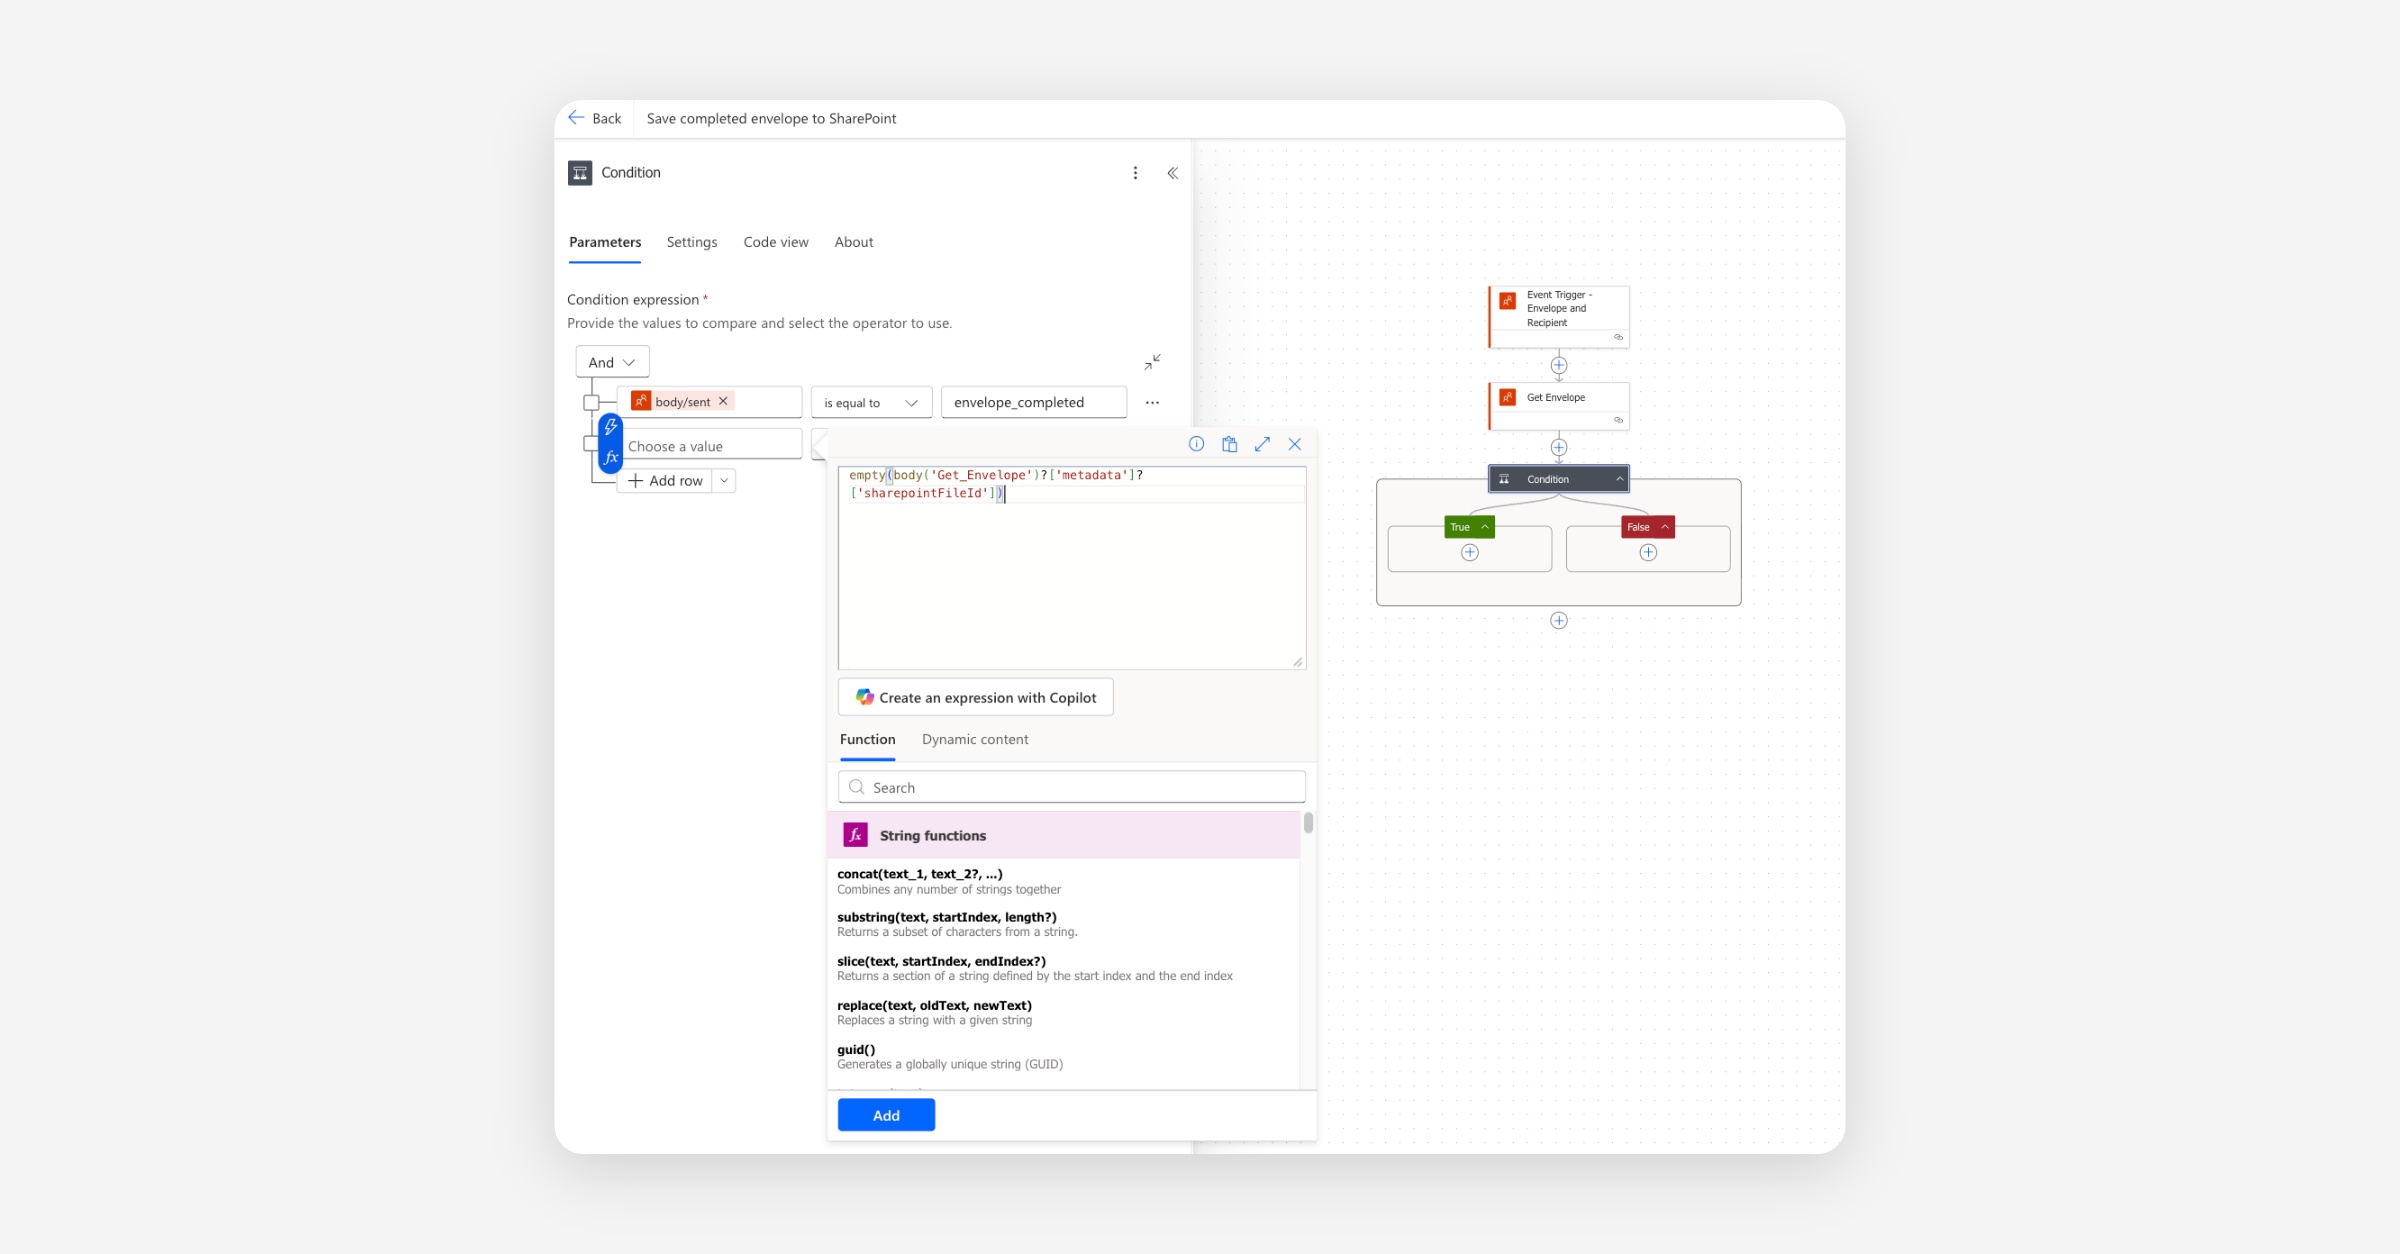
Set the operator to is equal to. For the right-hand value, click the fx icon and enter
falseas an expression. The right-hand value must be a colouredfalsepill, not the text "false" typed into the value field.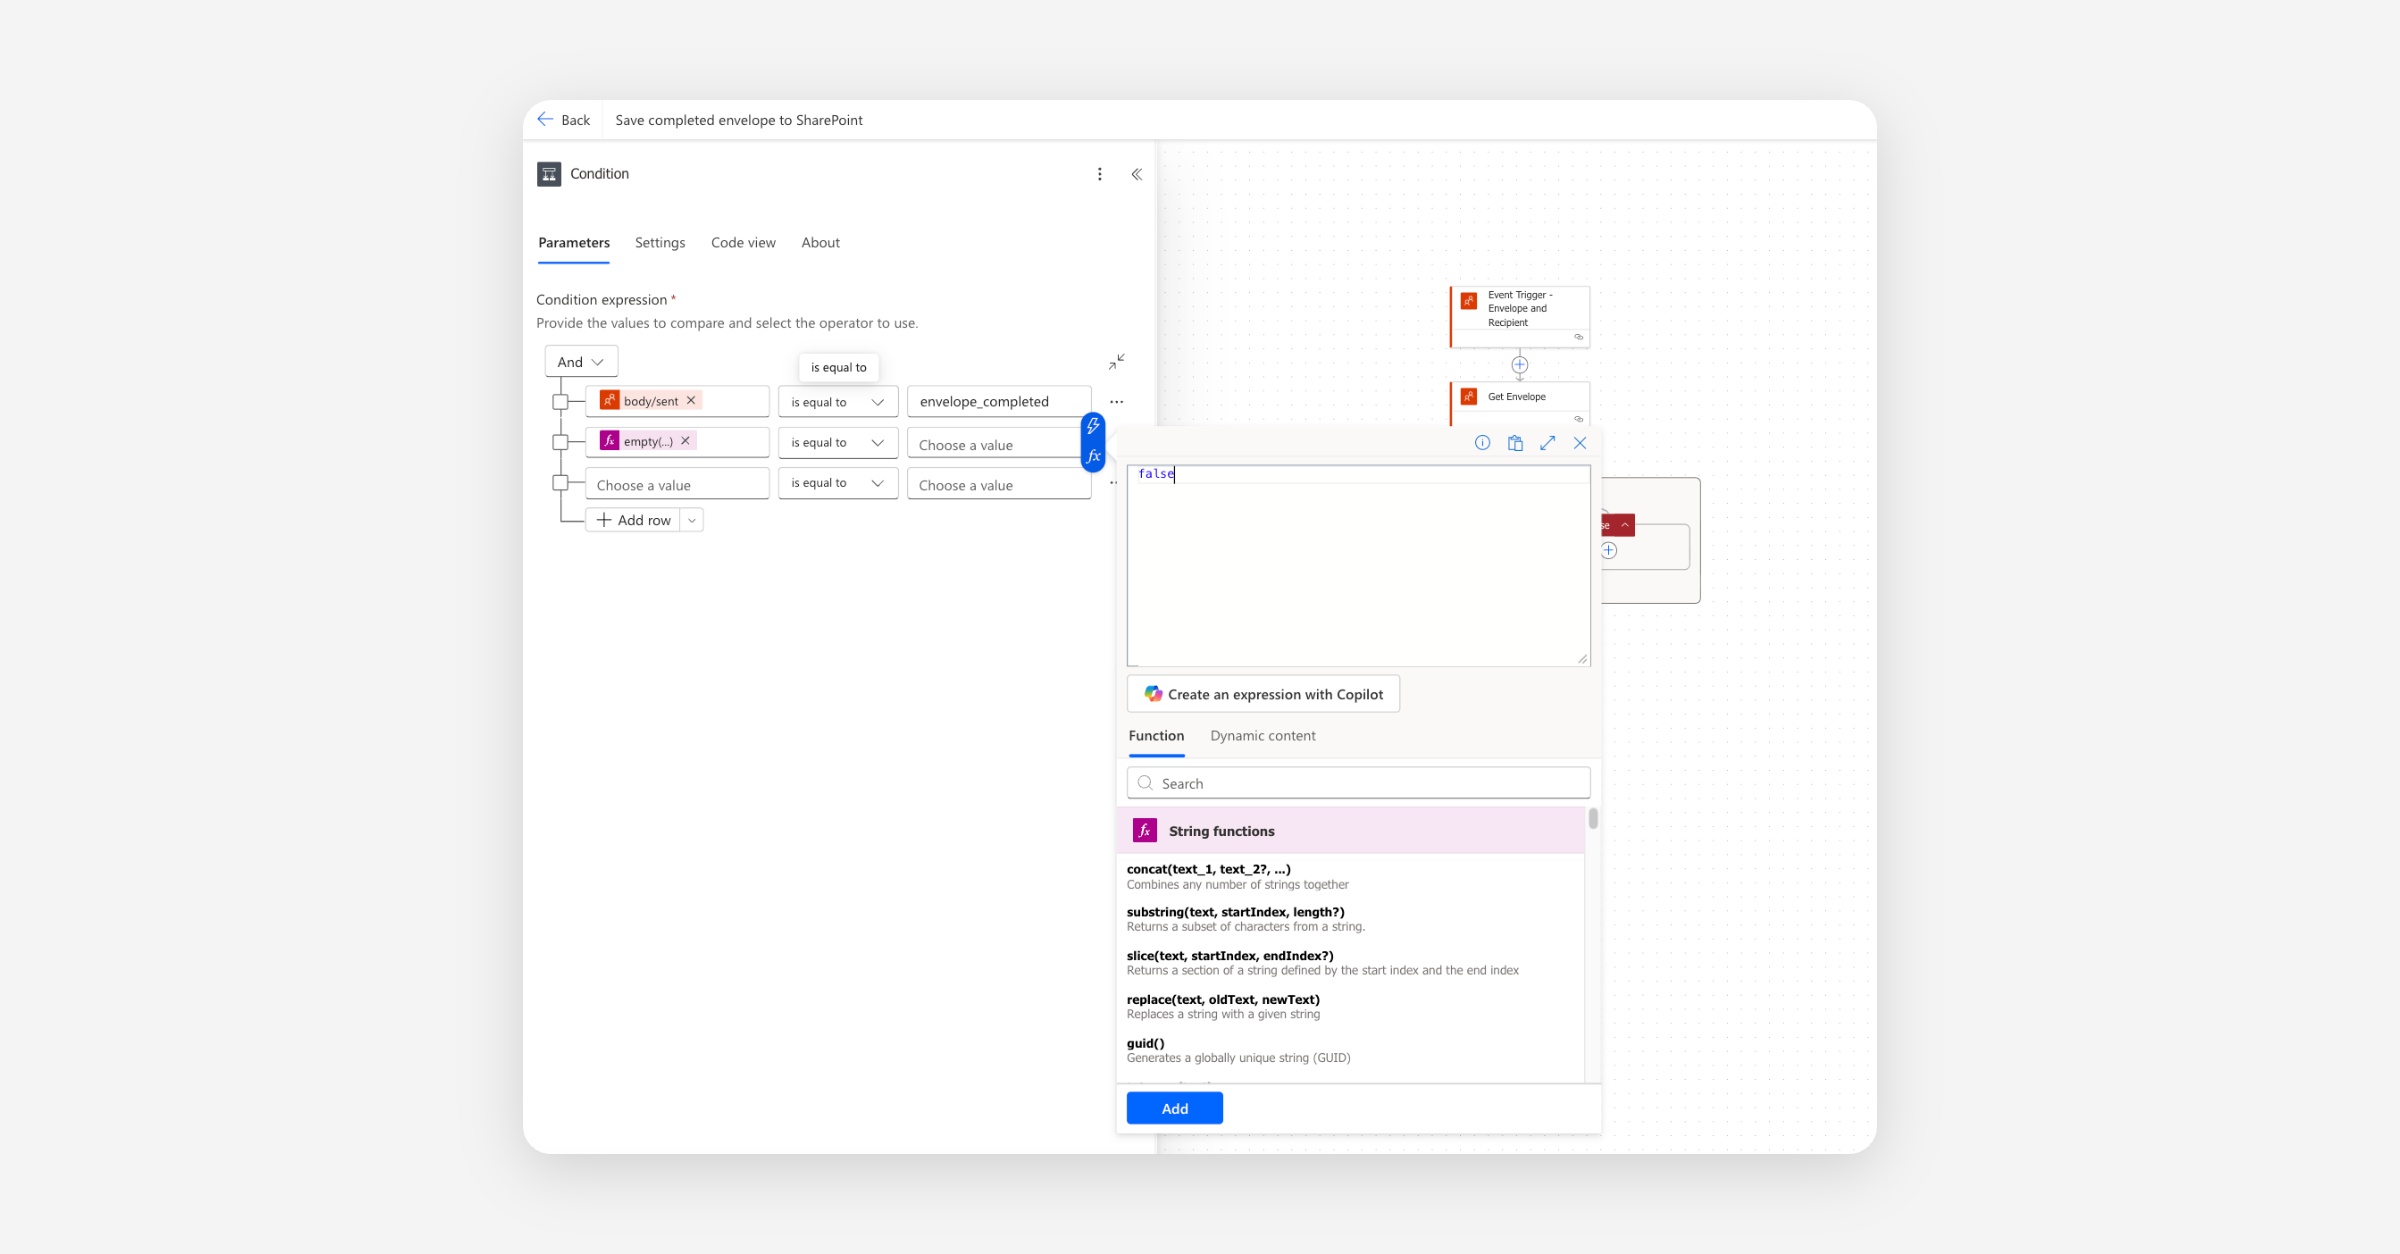
This is what the full condition settings should look like.
The empty() function returns true when the metadata is missing, null, or an empty string — so empty(...) is equal to false reads as "the metadata exists and has a value." This pattern is more reliable than comparing the raw expression to a blank value, which Power Automate doesn't handle well when the underlying value is null.
Anything inside the True branch will now only run when an envelope has been fully signed and has the sharepointFileId metadata stamped by Flow 1.
Download the combined PDF
Inside the True branch, click the plus button and add an HTTP action (search for "HTTP" — it's the built-in HTTP request action). Be sure to select the action that says only ‘HTTP’.

Configure the fields:
URI: click into the field, use the dynamic content picker (lightning bolt), and select combined from the Get Envelope step.
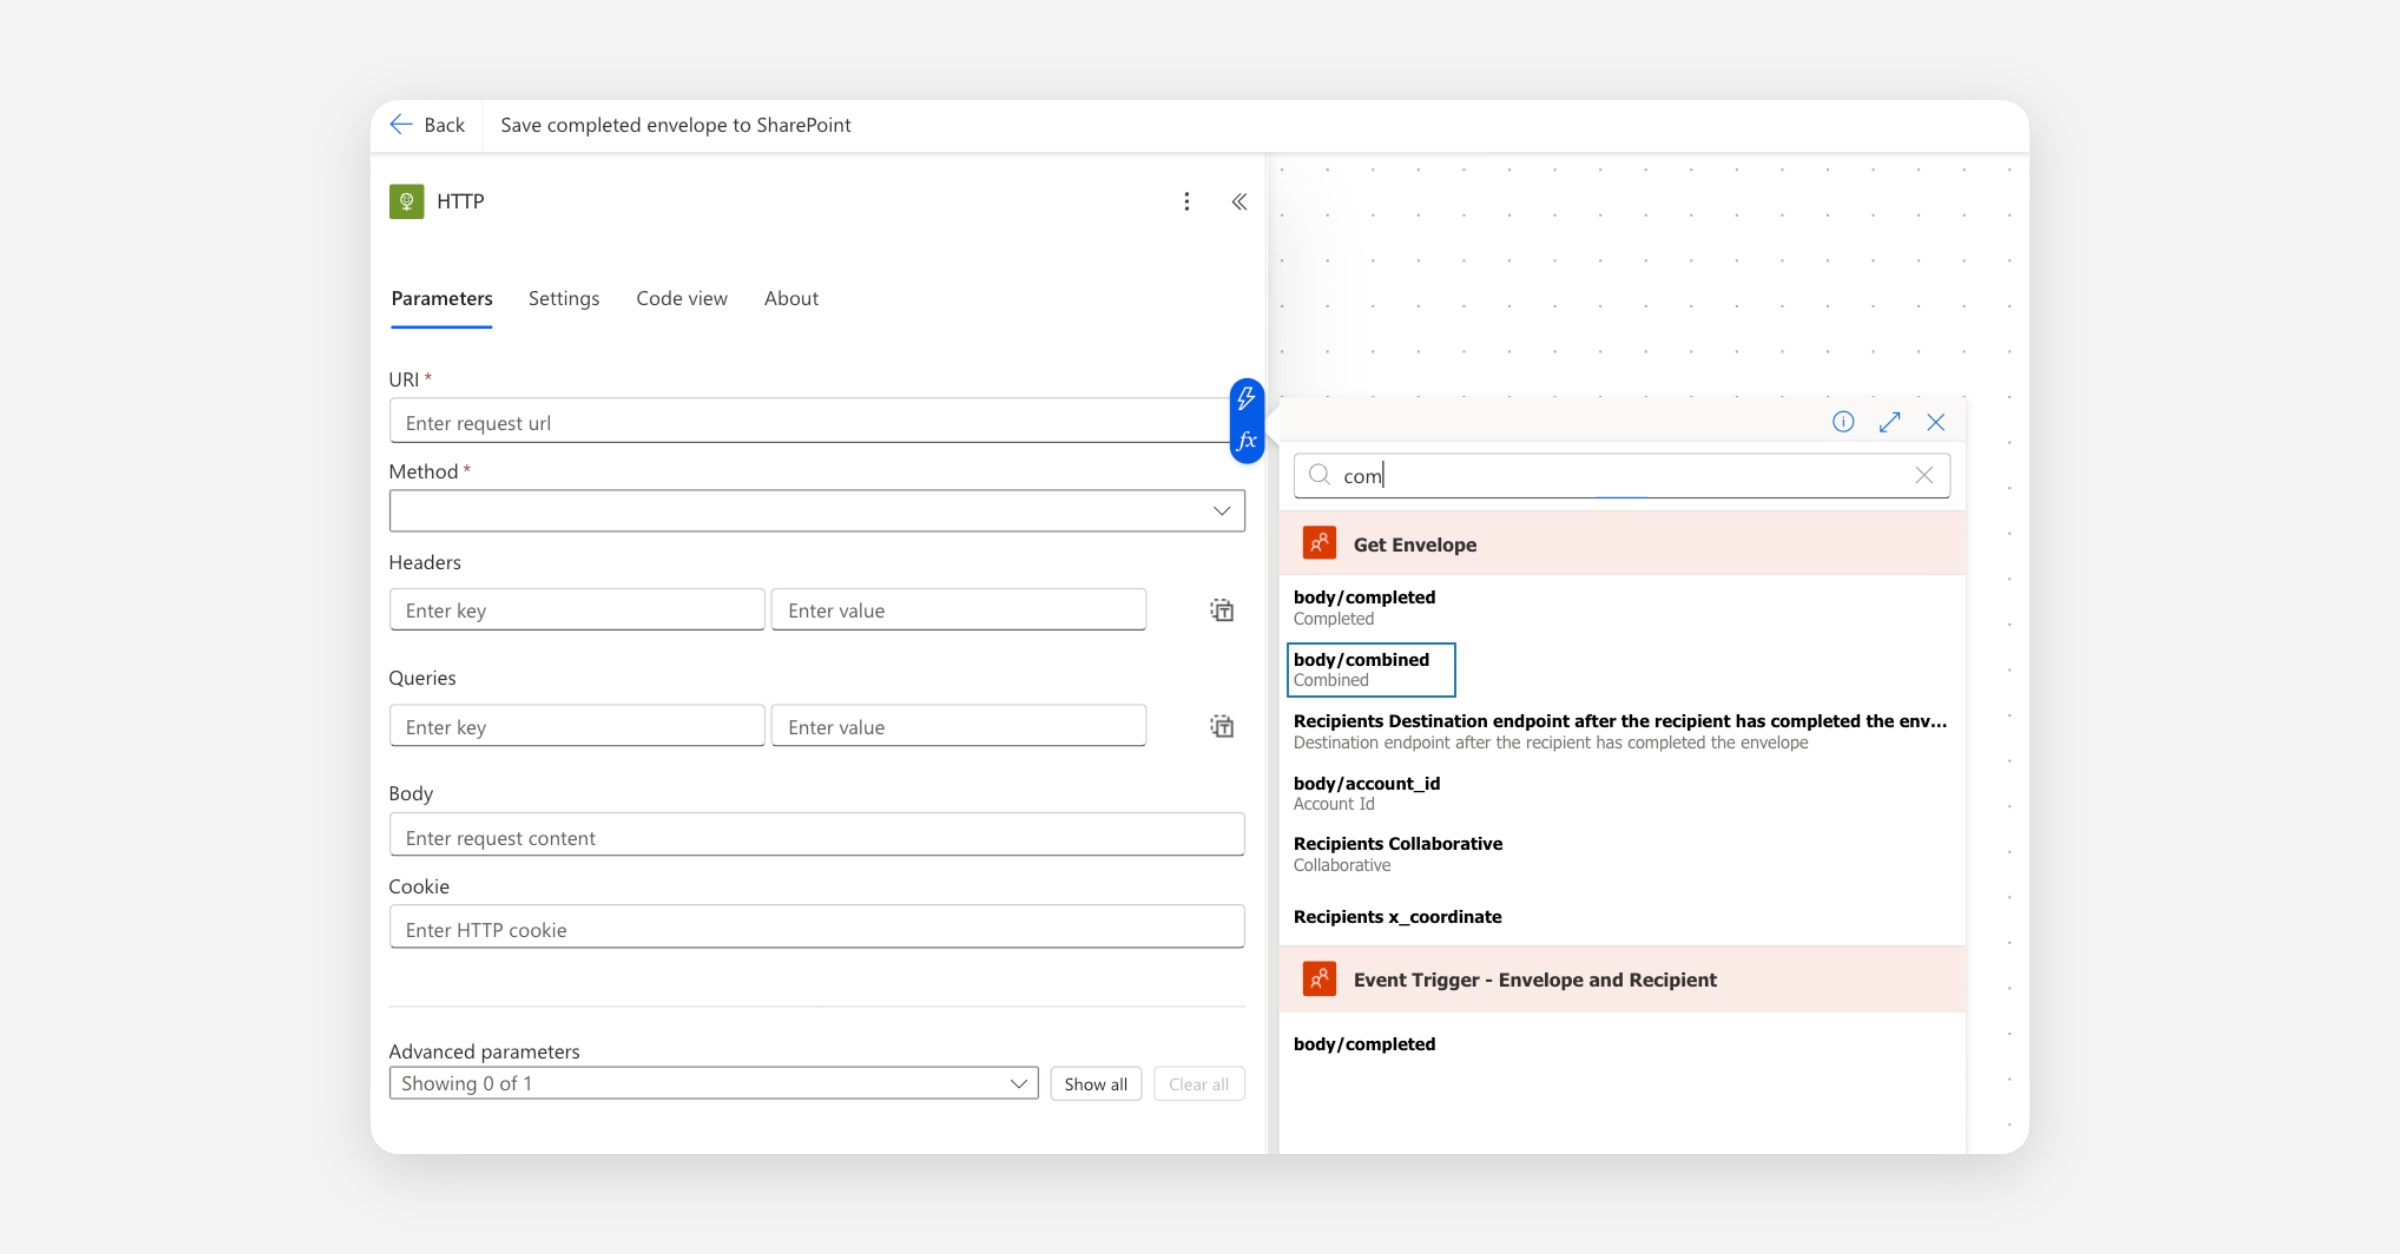
Method:
GET
Leave the other fields (headers, queries, body) blank.
When this action runs, it downloads the combined PDF and exposes it as the Body of the HTTP response, which we'll use as the file content in the Create file step.
Look up the original SharePoint file
We stored the SharePoint file's ID on the envelope in Flow 1. Now we use that ID to look up the file's properties — including its current folder — so we can save the signed PDF in the same place.
Below the HTTP action, click the plus button and add a SharePoint Get file properties action.
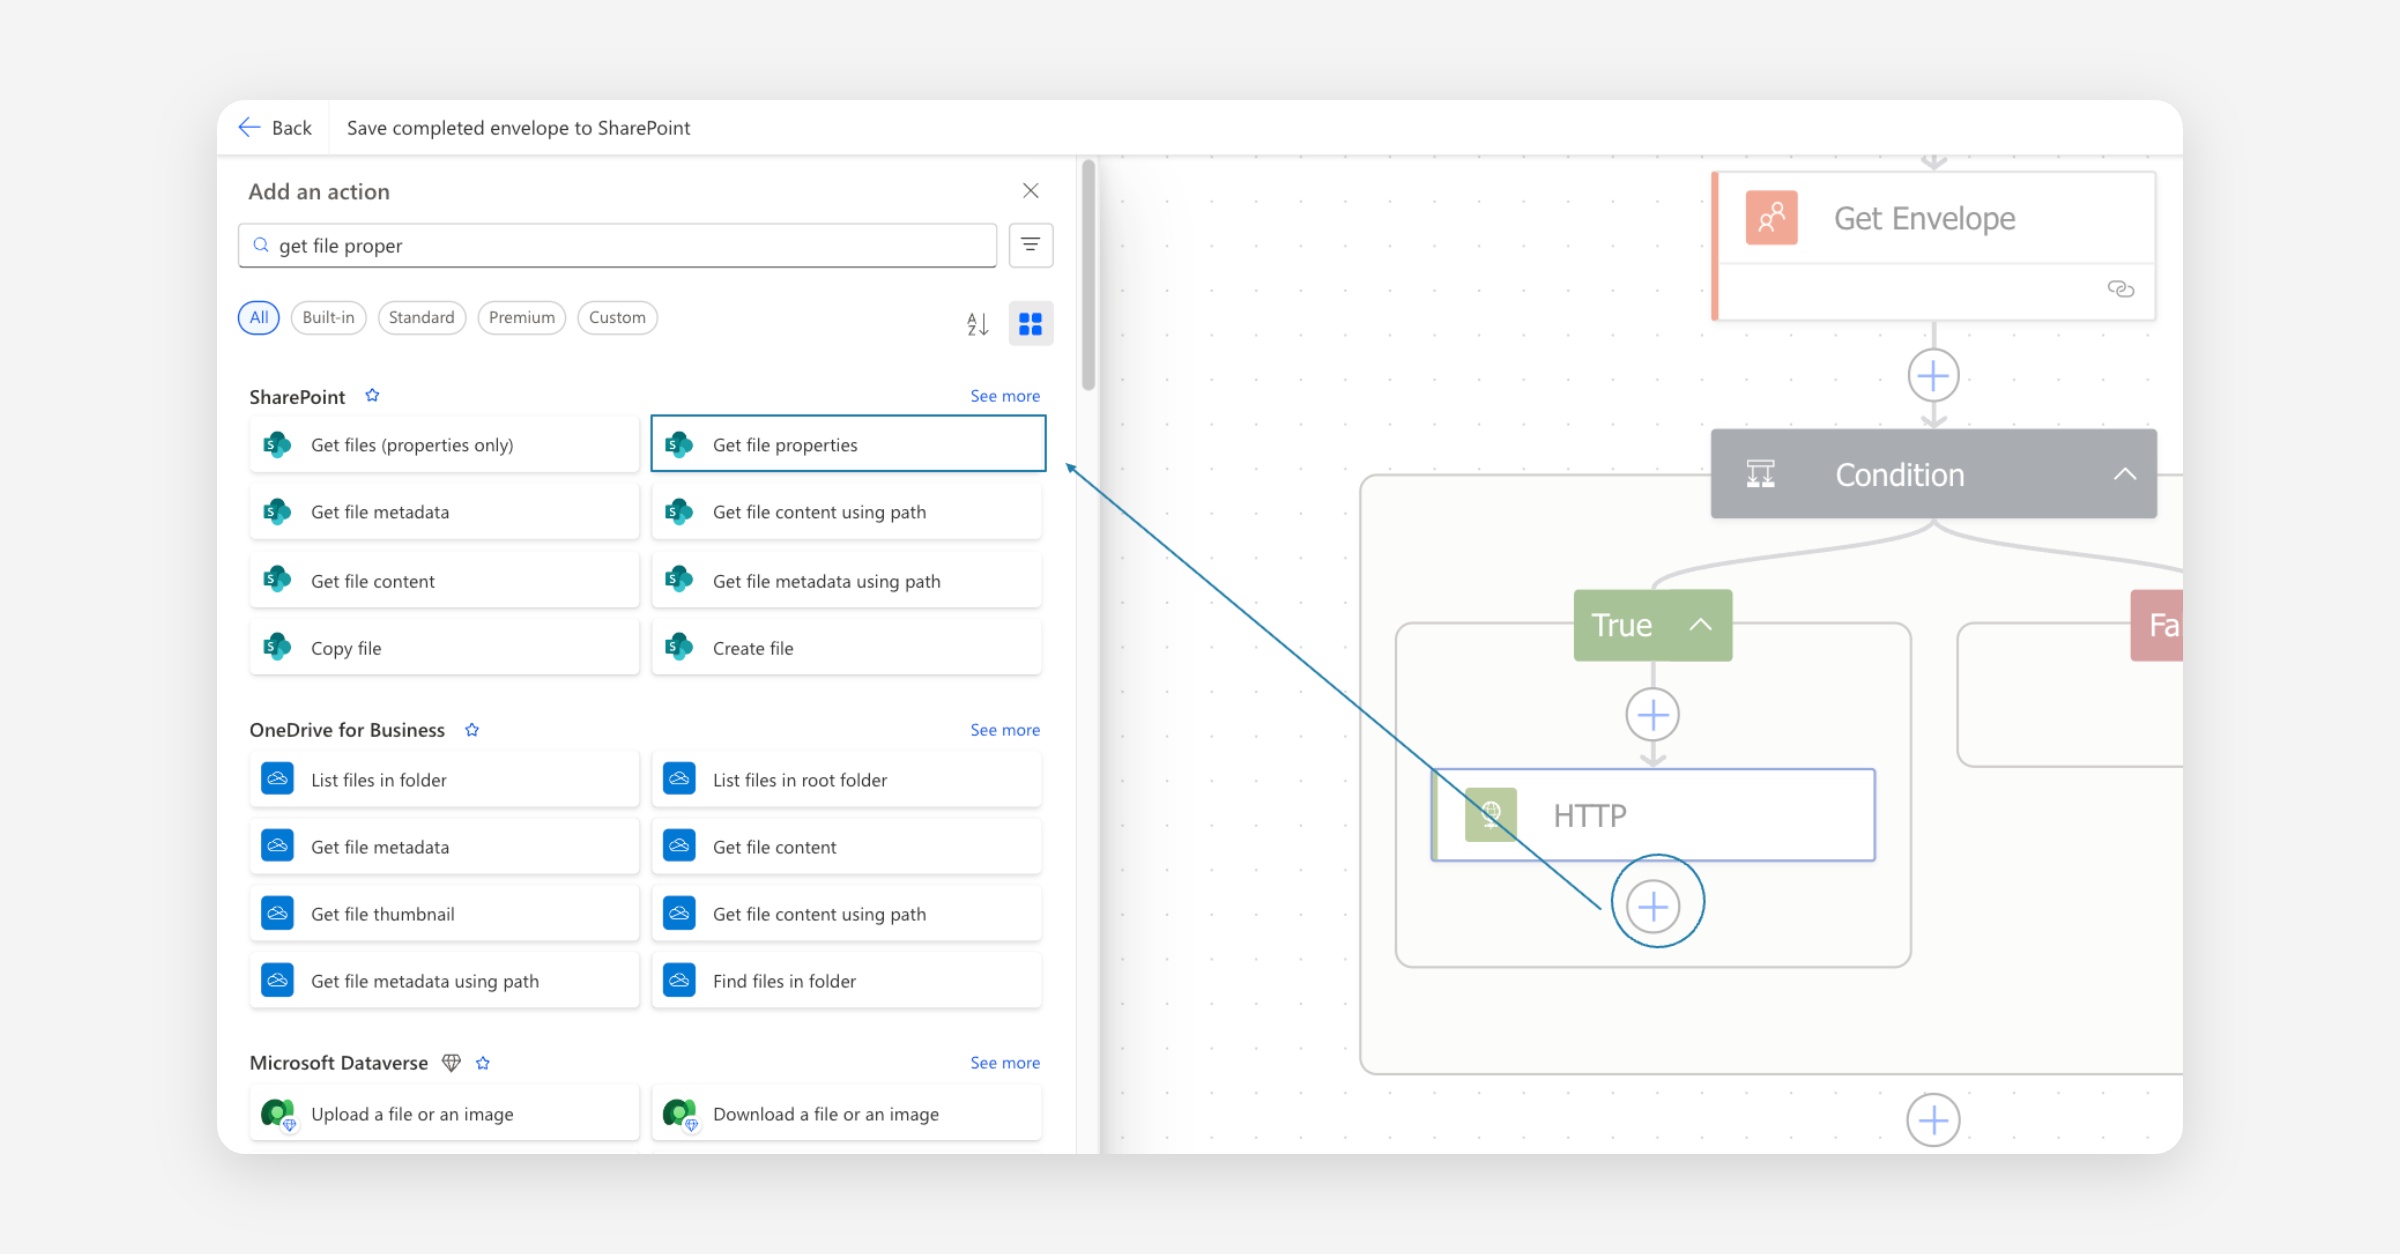
Configure the fields:
Site Address — the same SharePoint site as Flow 1.
Library Name — the same library as Flow 1 (typically Documents).
Id — click the fx icon and paste in:
body('Get_Envelope')?['metadata']?['sharepointFileId']
Once done, it should look something like this.
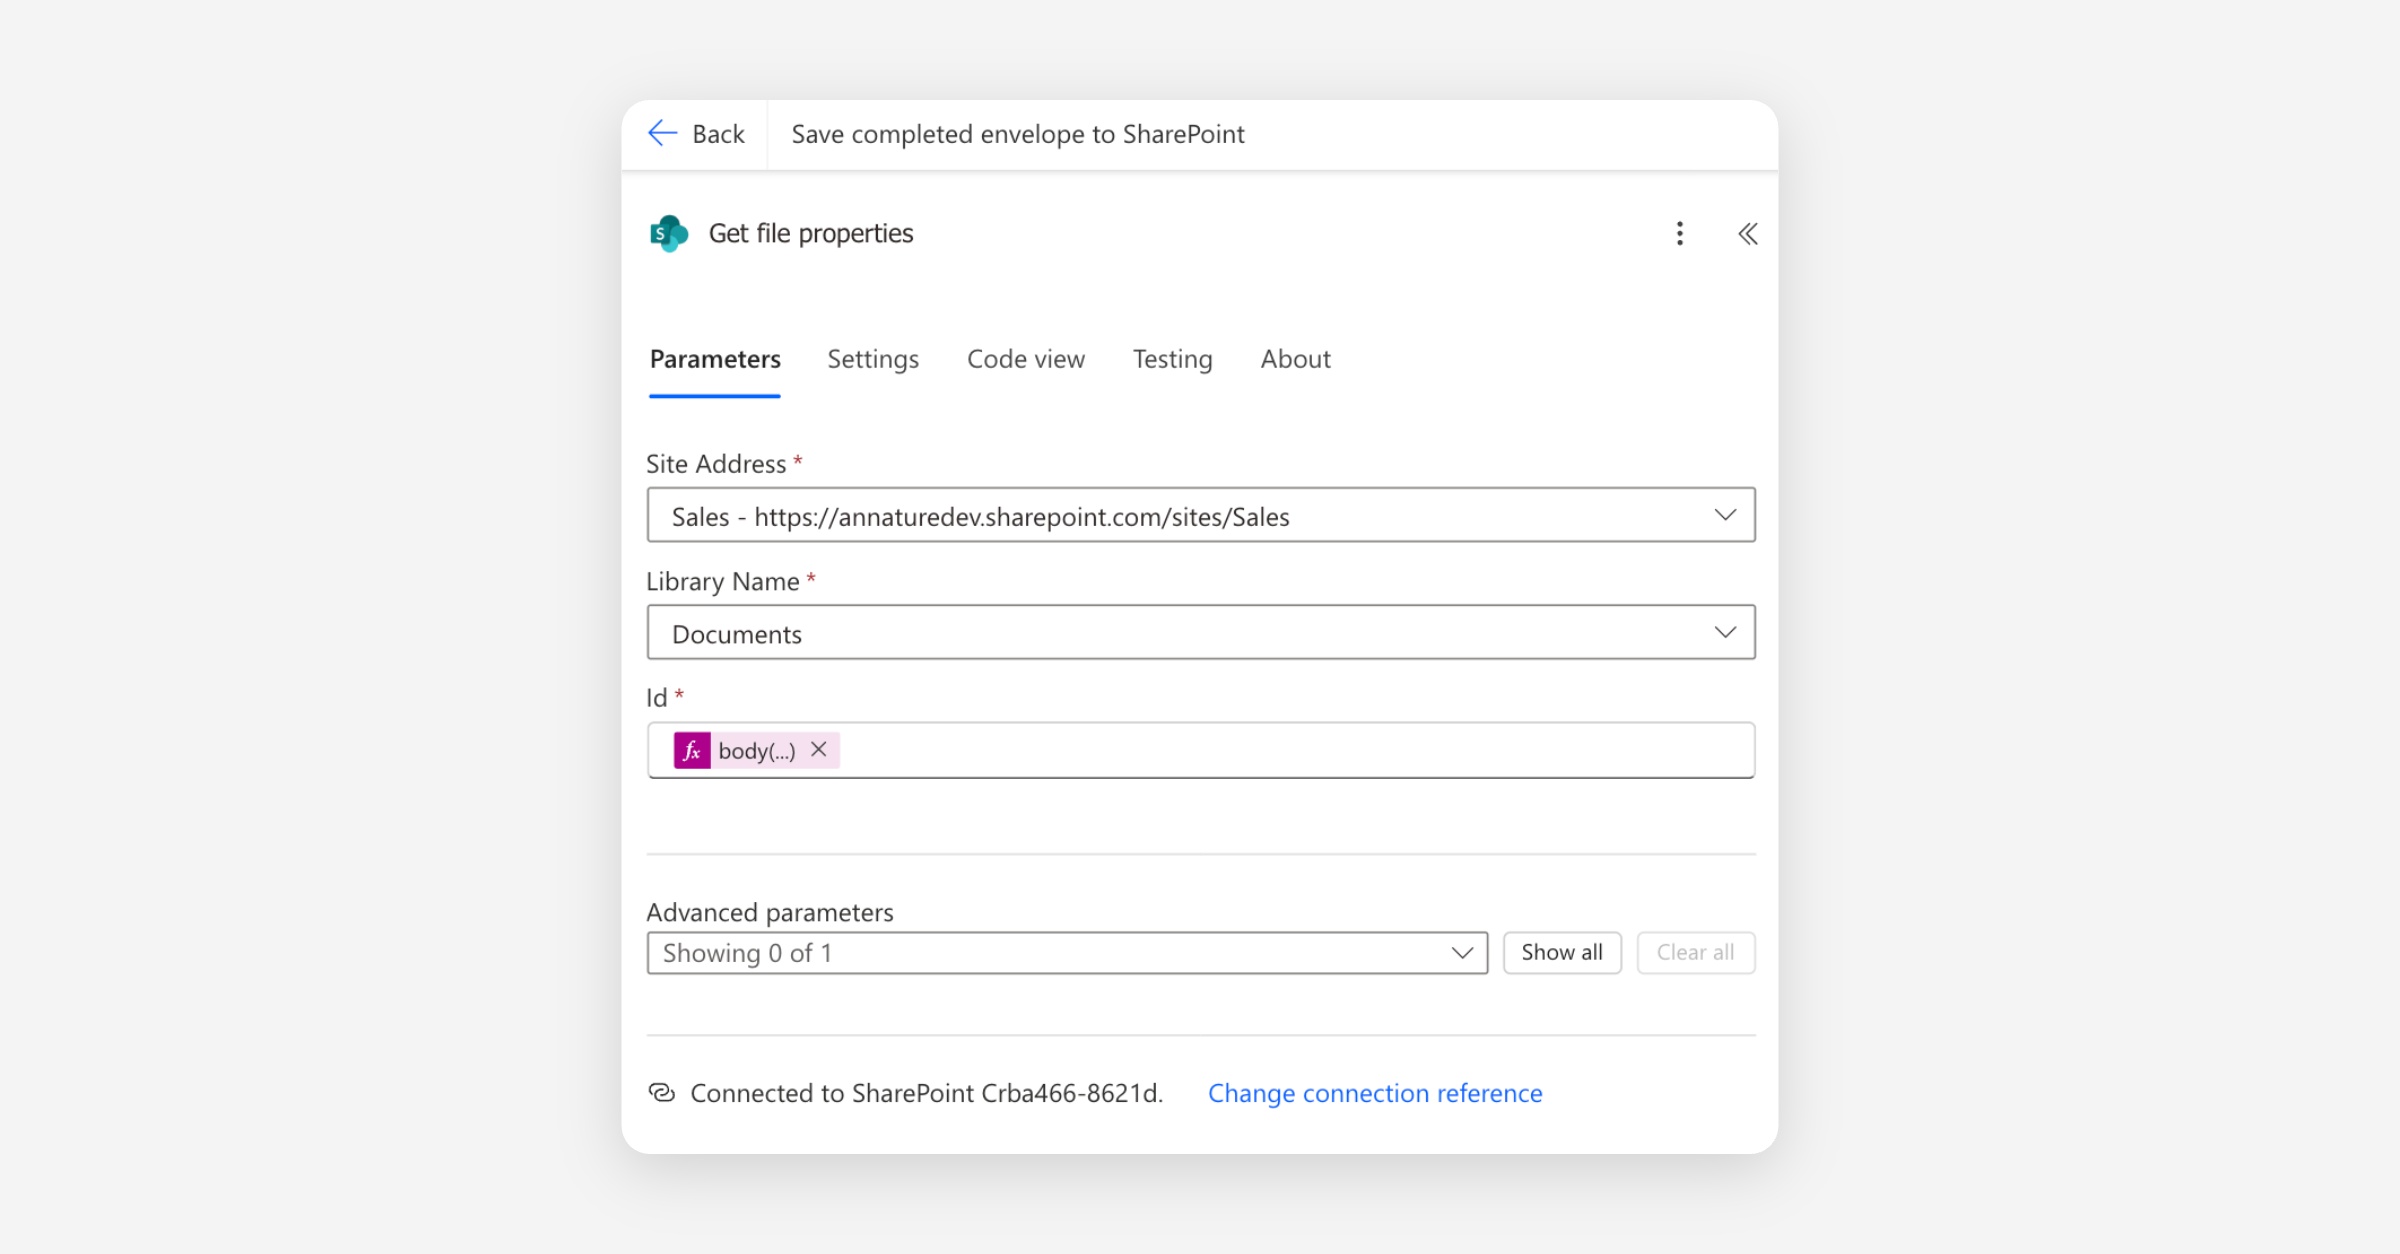
Get file properties returns the file's full metadata, including a clean Folder path value we can use directly in the next step. No URL parsing or string manipulation required.
Save the document to SharePoint
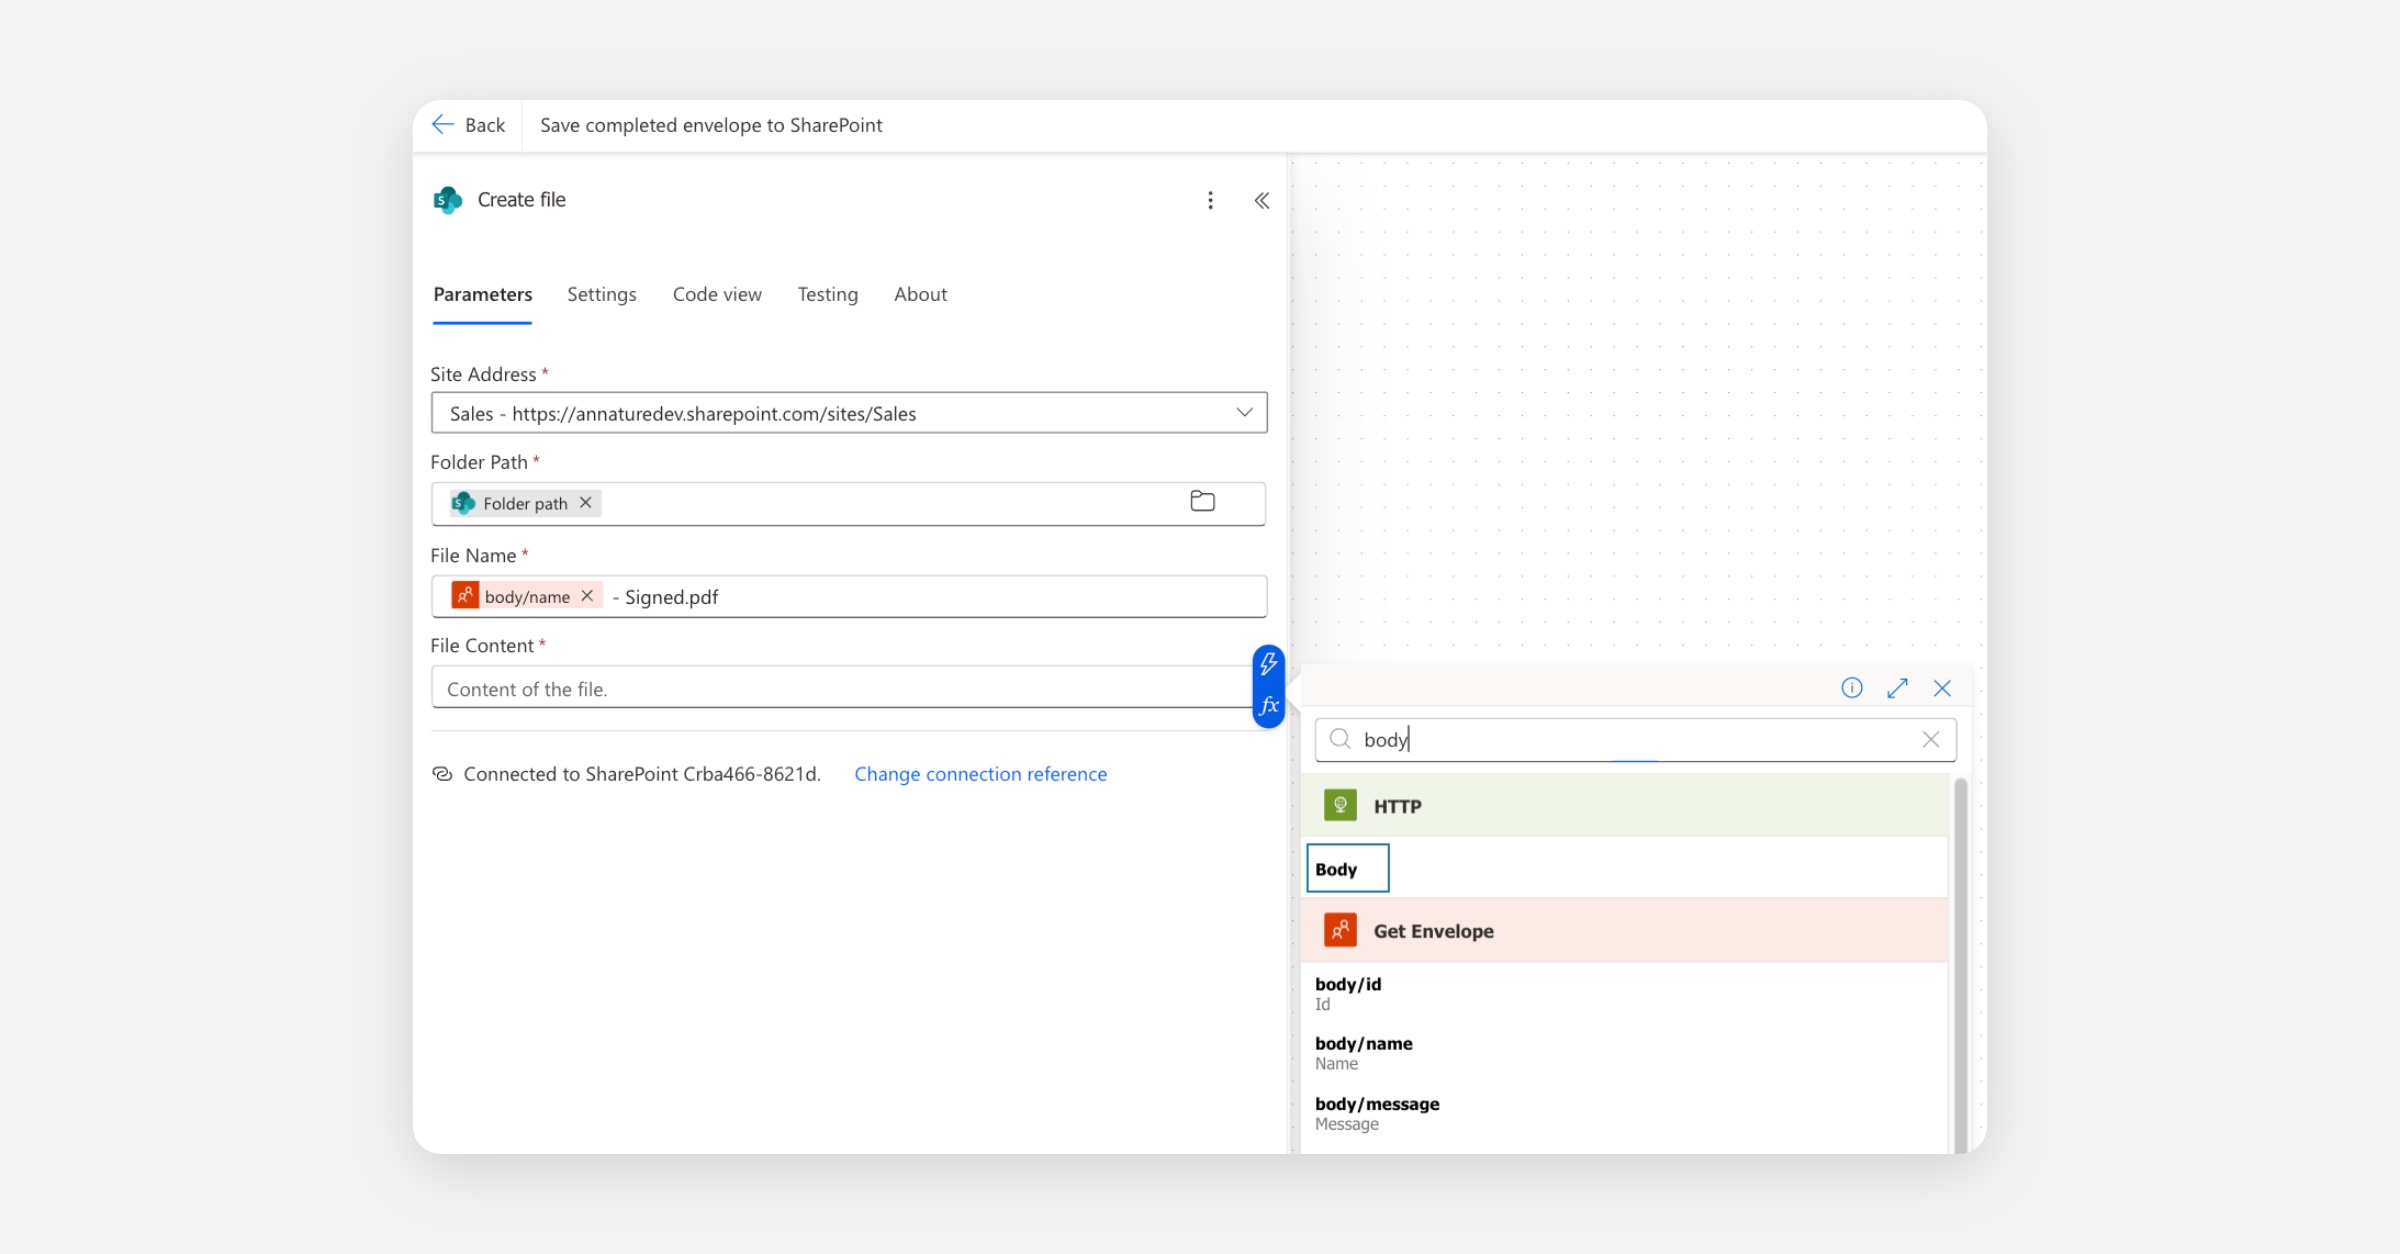
Below Get file properties, add a SharePoint Create file action.
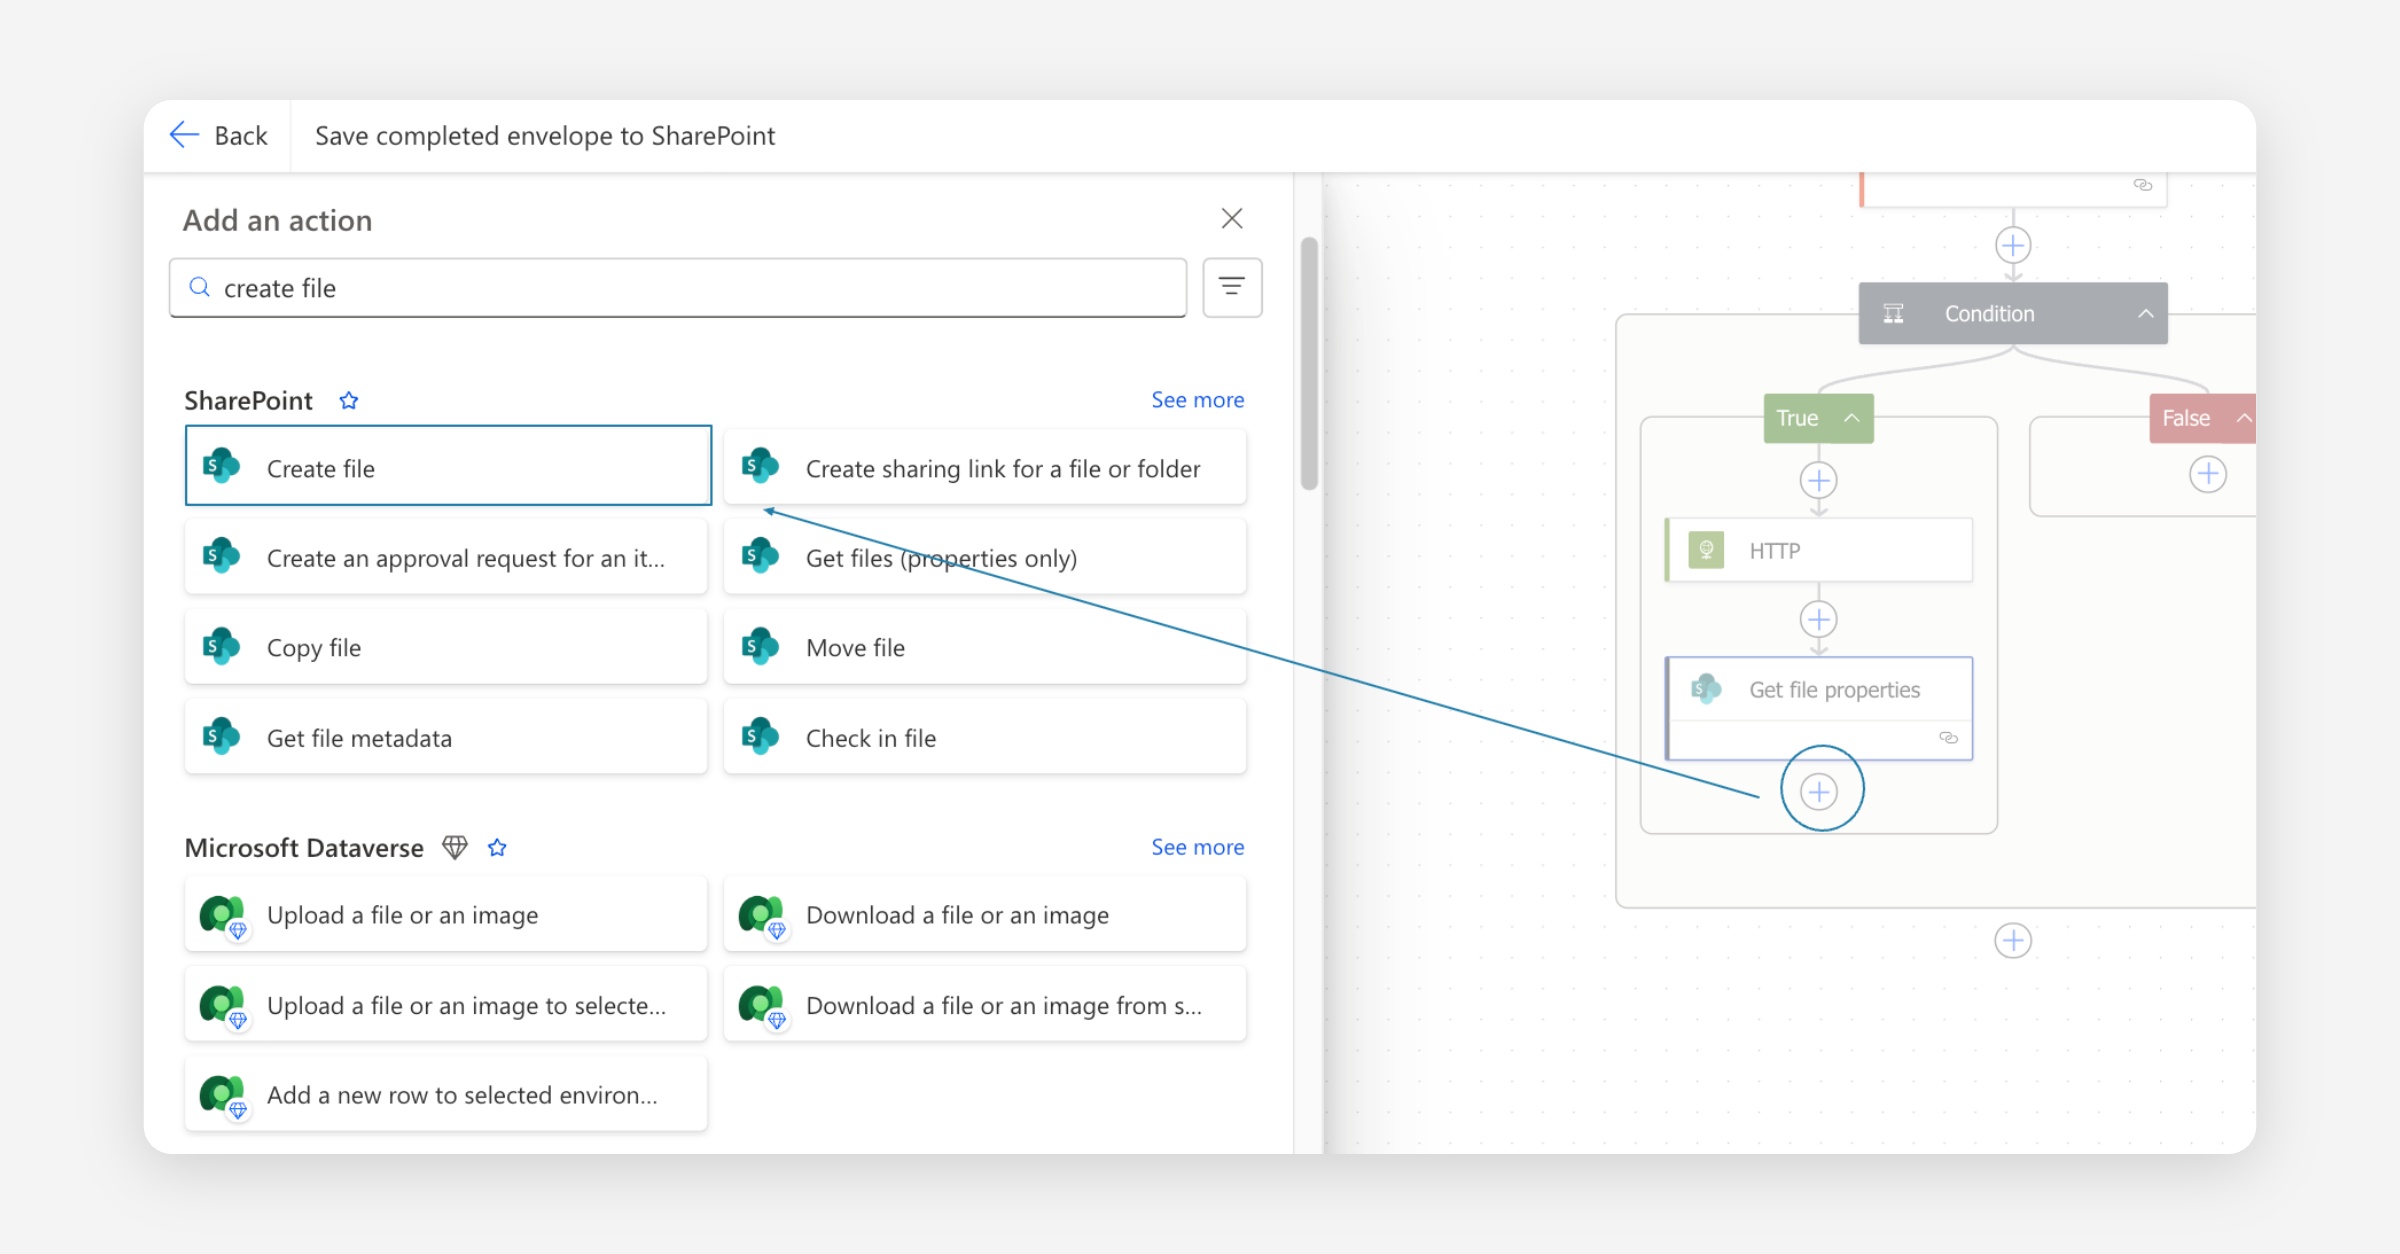
Configure the fields:
Site Address — the same SharePoint site as Flow 1.
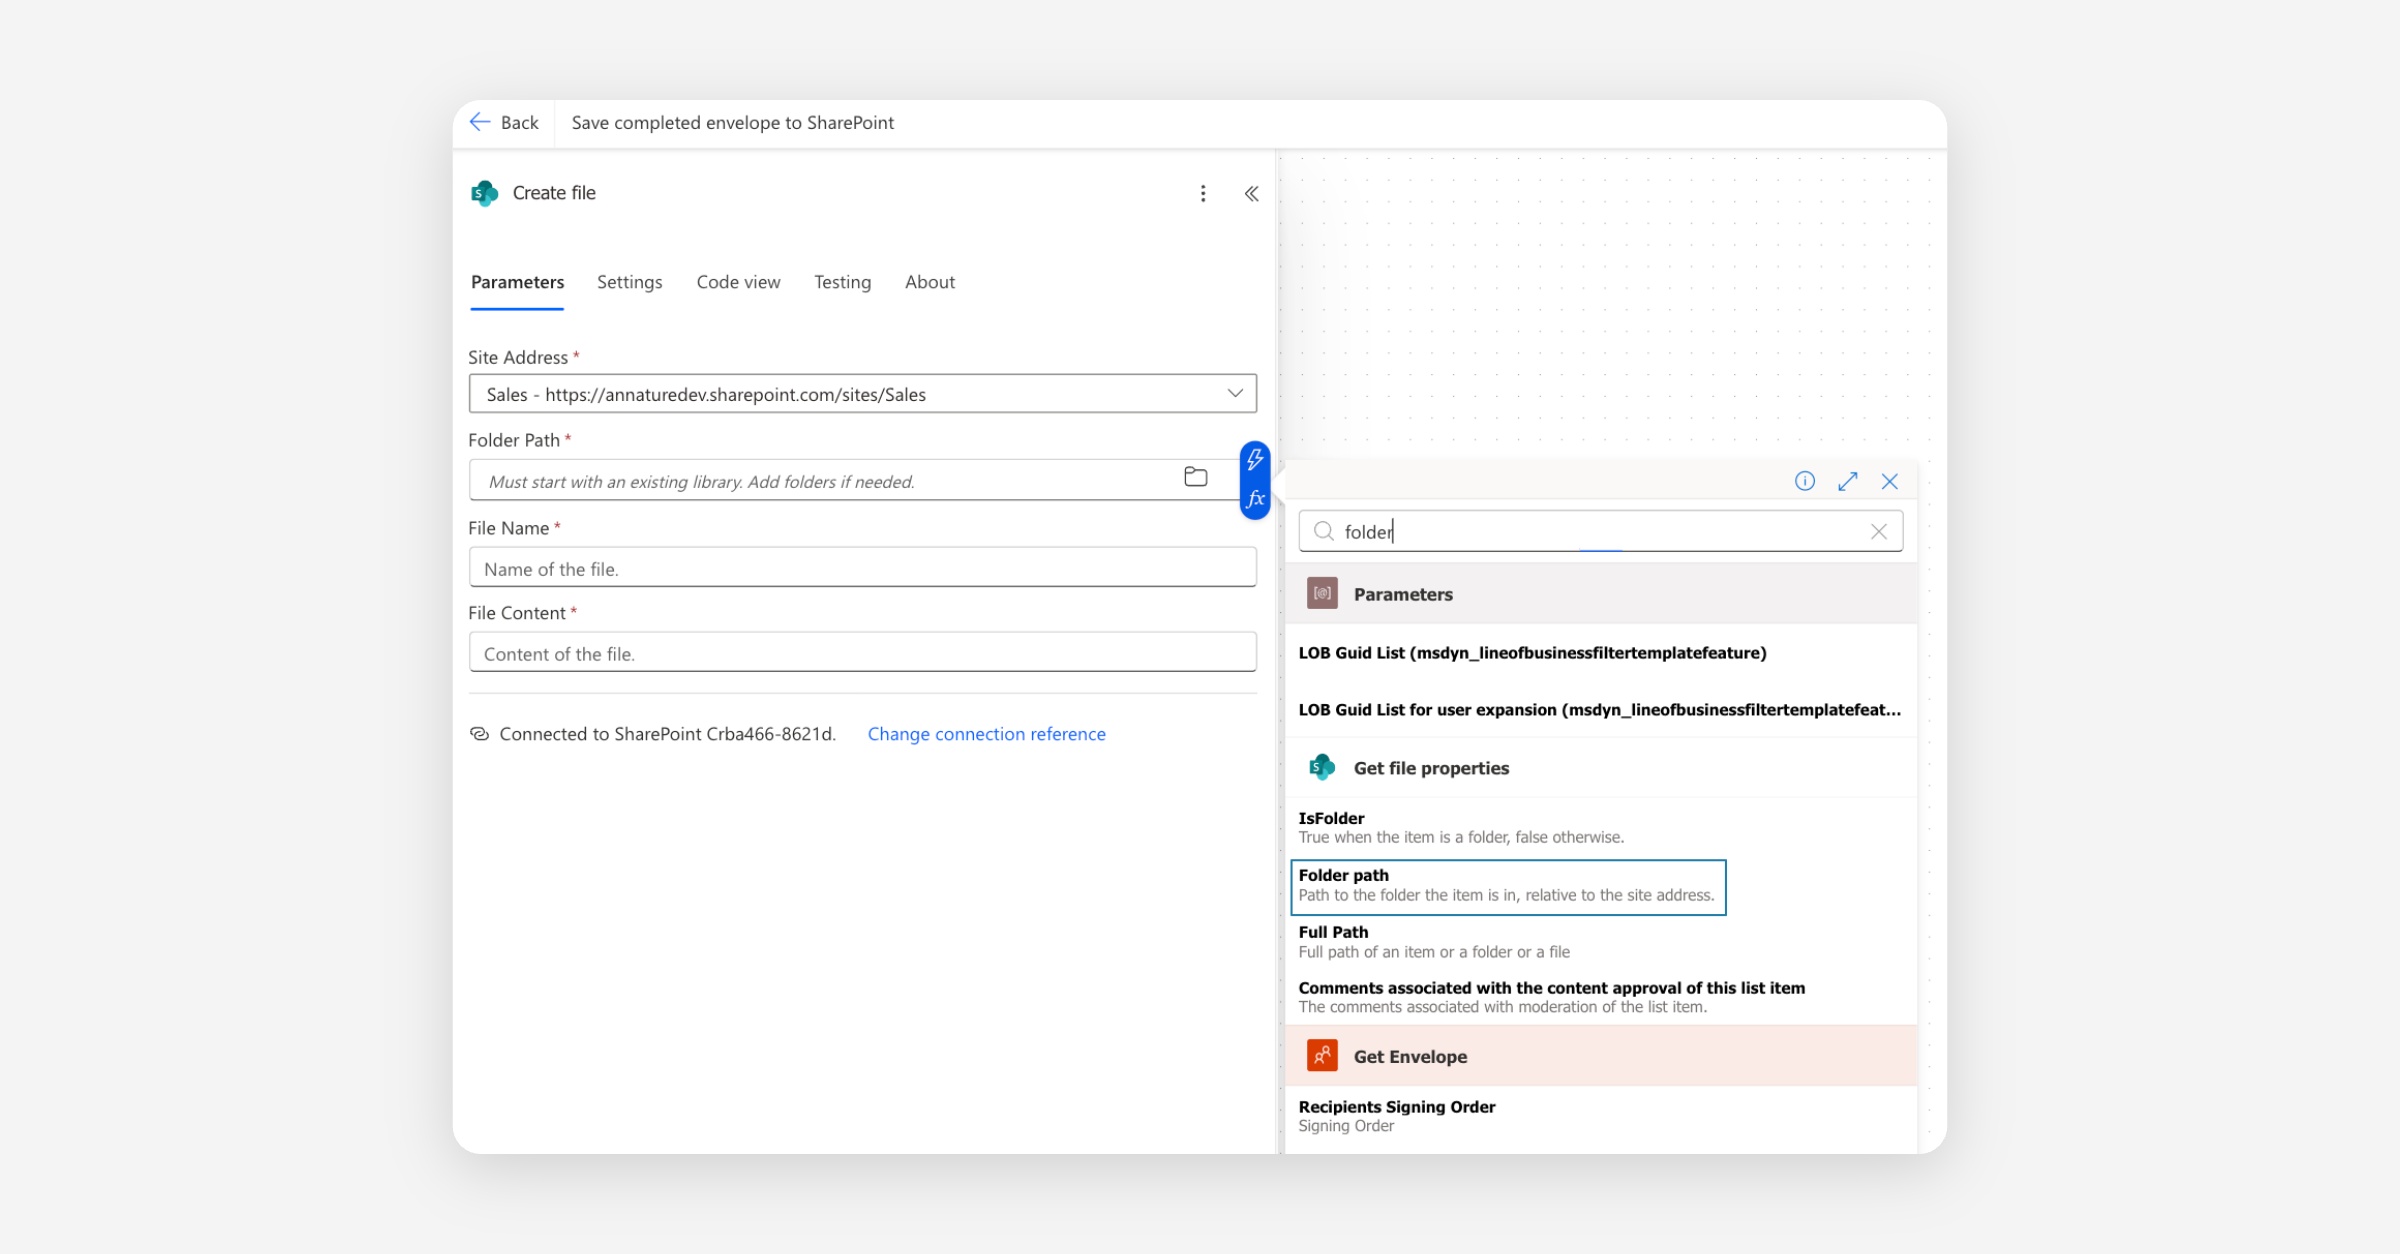
Folder Path — click into the field and use the dynamic content picker (lightning bolt) to select Folder path from the Get file properties step. This routes the signed PDF straight back to the same folder the original document lives in.
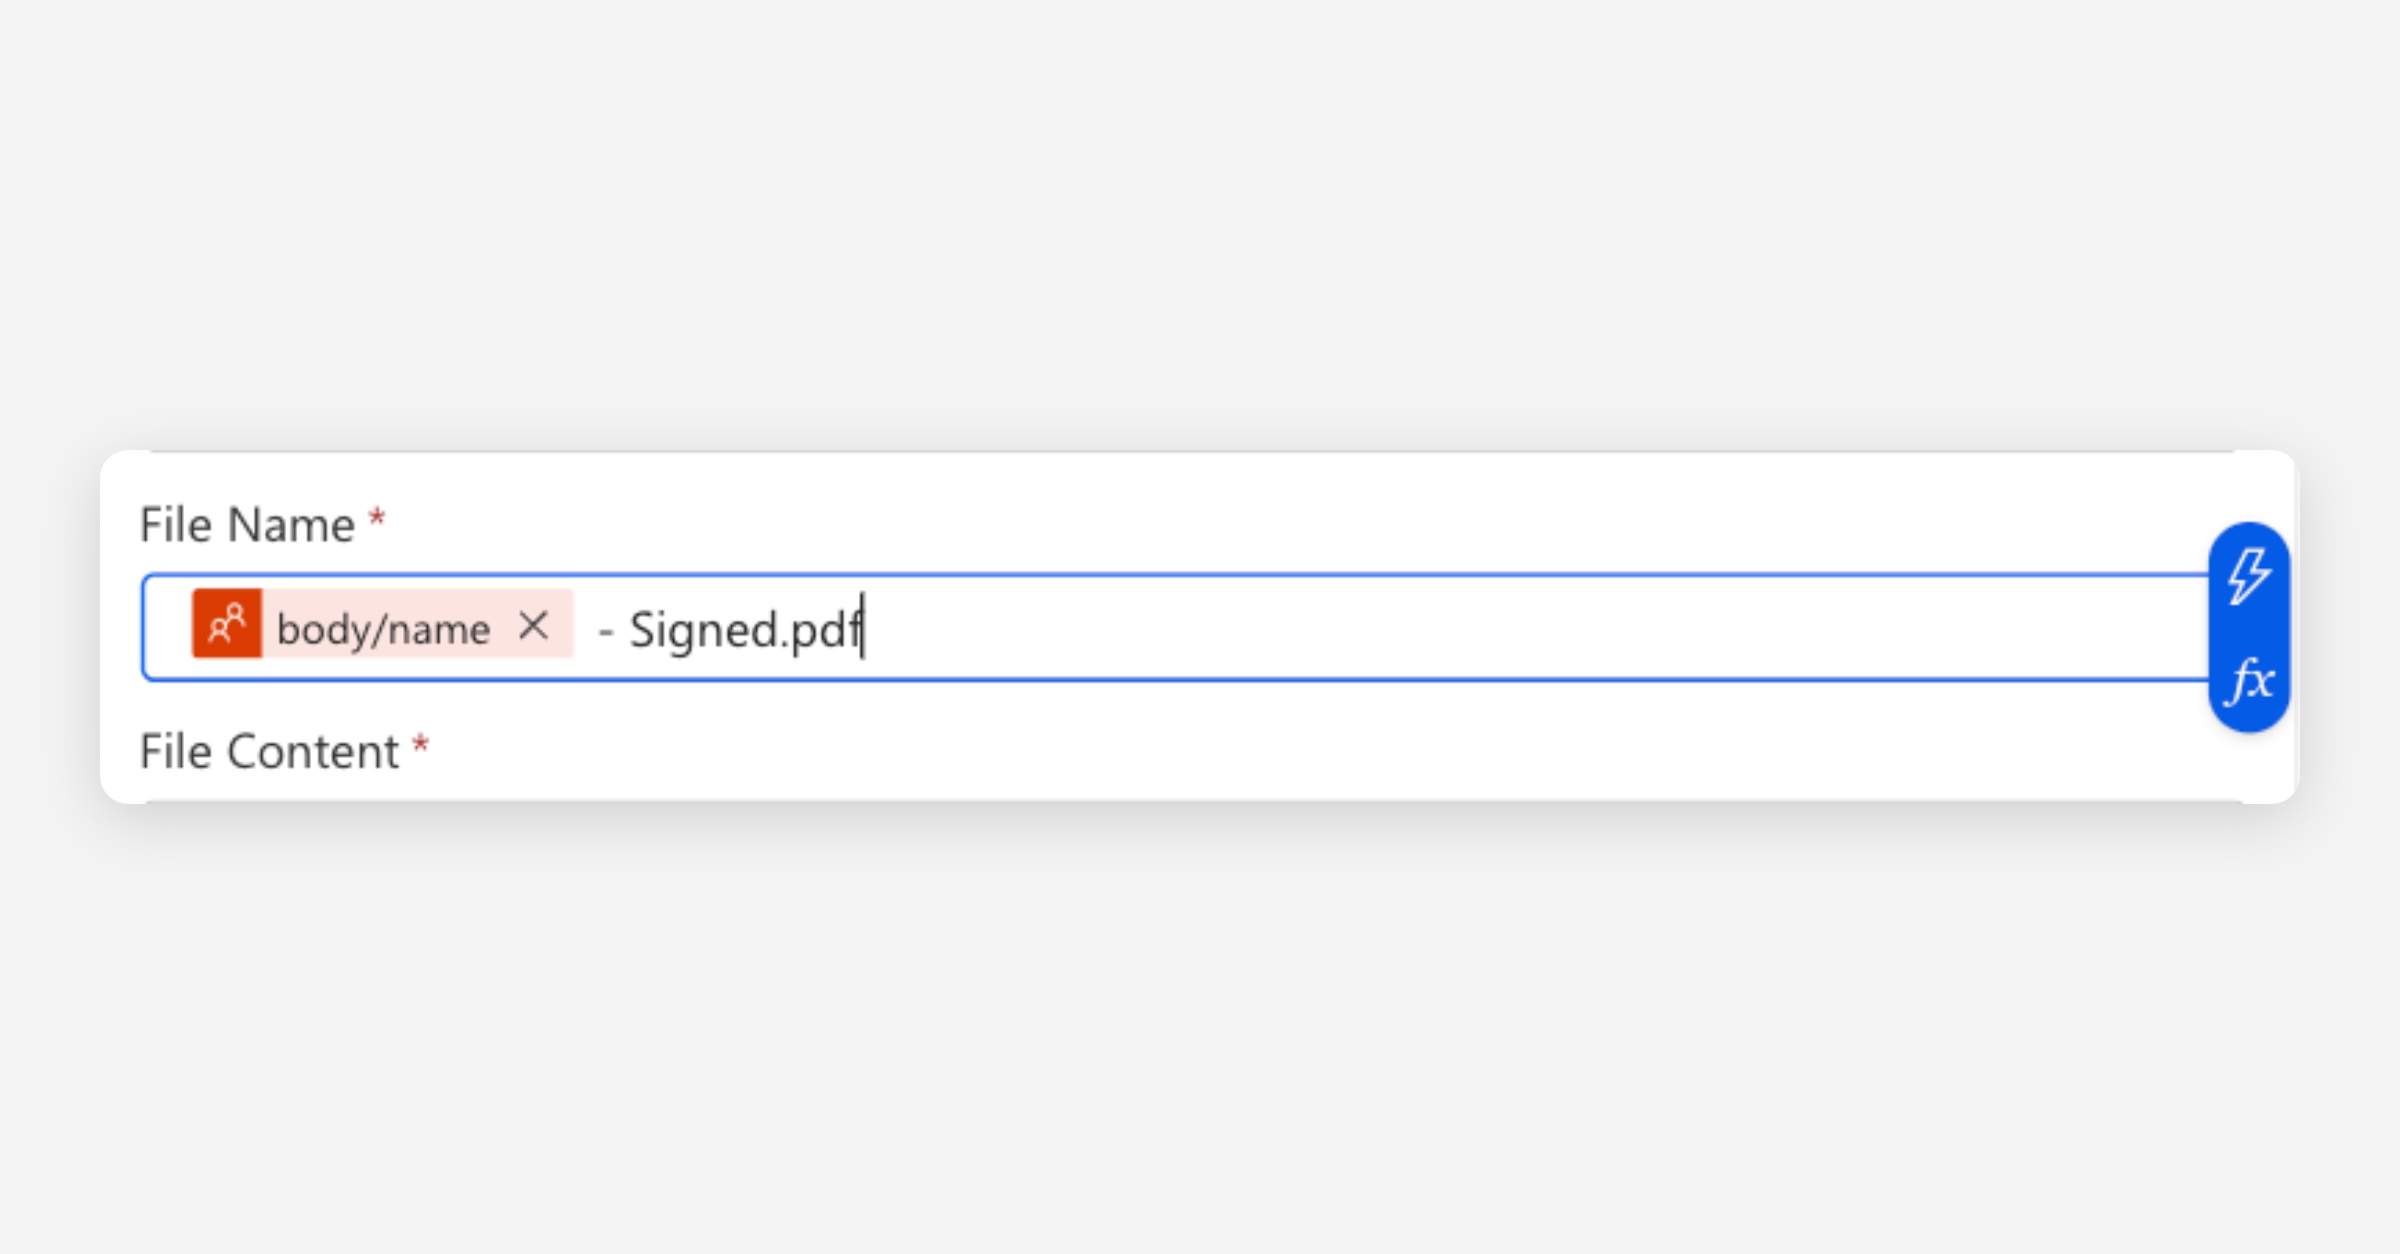
File Name — click into the field, use the dynamic content picker (lightning bolt) to insert Name from the Get Envelope step, then type
- Signed.pdfafter the pill. The field should read:[Name] - Signed.pdf. The signed copy will land alongside the original without overwriting it.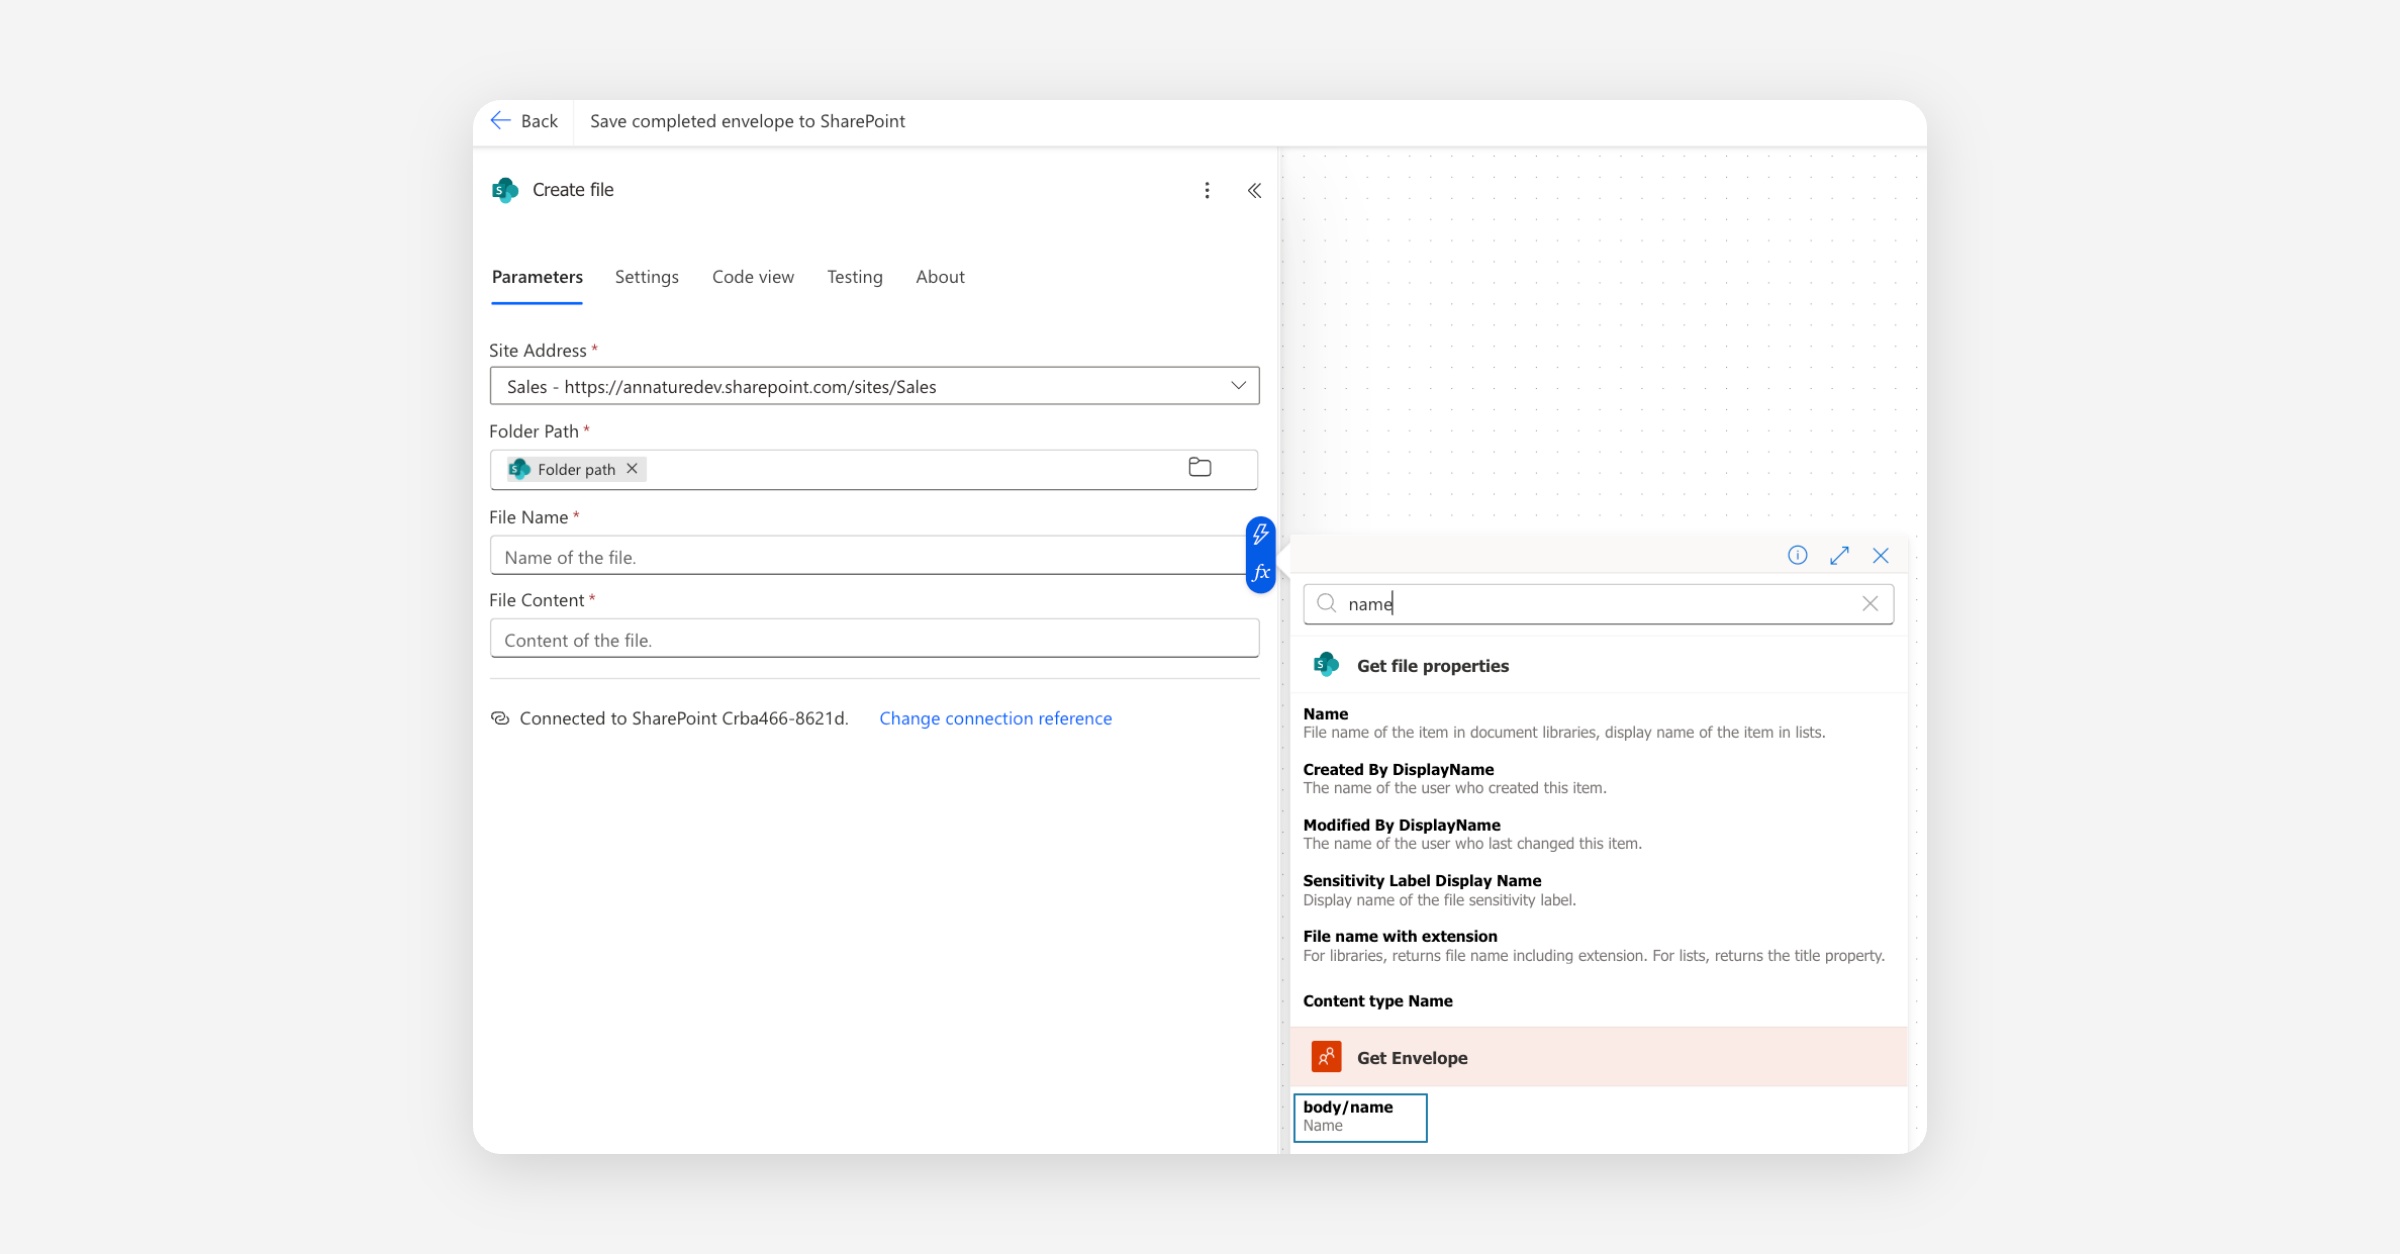
File Content — use the Body dynamic content (lightning bold) from the HTTP step.
Click Save.
Both flows are now live. Selecting a file in SharePoint and running Flow 1 creates a draft envelope. Once the envelope is completed in Annature, Flow 2 fires automatically and saves the signed PDF back into SharePoint, alongside the original document.
Adapting it to your use case
The pattern shown here — trigger, file conversion, Annature action — can be reused for almost any workflow. A few examples:
OneDrive instead of SharePoint — swap the SharePoint trigger and Create file action for the equivalent OneDrive actions.
Teams notifications on completion — replace the SharePoint Create file step in Flow 2 with a Microsoft Teams Post message action.
Trigger from an Outlook email — use the Outlook When a new email arrives trigger to start a flow when a specific email lands in your inbox.
Log envelope activity to Excel — add an Excel Add a row into a table action to keep a running log of completed envelopes.
If you want to build something specific for your business but aren't sure where to start, our team is happy to help. Reach out to [email protected] and we'll point you in the right direction.
Related articles
Was this helpful?